4 Simple Steps For The perfect Golf Drive
Step 1: Setup and Stance for a Powerful Tee Shot
the foundation of a great golf drive starts before you swing.A solid setup ensures that your body naturally supports a wide, efficient arc with the driver. When the setup is correct,you’ll feel connected to the target without fighting the club on the way back and through the ball.
- Place the ball just inside your left heel (for right-handed golfers). This promotes an upward angle of attack with the driver, helping you launch the ball higher with less fear of digging ground.
- Position your feet shoulders‑width apart. A stable base is essential to prevent swaying and to encourage steady rotation through the shot.
- Maintain a slight tilt from the hips rather than rounding the upper back.Keep your spine angle constant through address and into the swing, so your center of gravity stays over the ball.
- Favor a touch more weight on your lead foot (about 55-60% left). This helps you deliver the energy into the ball with an upward strike rather than dipping into the ground.
- Your shoulders, hips, and feet should be parallel to your target line.Use alignment sticks or clubs on the ground during practice to verify your lines.
Warming up with a few easy half-swings and light stretches can improve your mobility and reduce the chance of early-extension or over-swinging. The setup is your first-step trigger; if it’s not solid, the rest of the drive becomes a guessing game.
Drills to Reinforce Step 1
- Alignment drill: Place two alignment sticks-one along your toes and another just outside your lead shoulder. Practice addressing while keeping both sticks aligned to your target.
- Mirror check: use a full-length mirror to confirm ball position and spine tilt before each swing.
- Static posture holds: Pause at address for 2-3 seconds to feel the correct weight split and spine angle.
Common Mistakes to Avoid in Setup
- Ball too far forward or too far back, which disrupts attack angle.
- Overextending the spine or collapsing the upper body, causing loss of balance at impact.
- Feet too wide or too narrow, leading to instability or restricted hip rotation.
Step 2: Grip and Posture to Unlock Consistency
A repeatable golf drive starts with how you hold the club and how you position your body for the swing. The grip should enable a natural release and a stable face control through impact, while posture supports the correct spine angle and swing plane.
- Grip choice: For most players, a neutral grip (interlock or overlap) with light to moderate grip pressure is ideal. Avoid squeezing the club tightly; a relaxed grip helps you feel the clubhead without tension in the forearms.
- Hand placement: Place the hands on the club so that the V shapes formed by the thumbs and forefingers point toward your right shoulder (for right-handers).This promotes a square face through impact.
- Posture: Maintain a tall upper body with a slight knee flex.Your weight should stay around the middle of your feet, ensuring you can rotate your hips freely without collapsing.
- Head position: Keep your head relatively still during the backswing and transition. Small lateral movements are normal, but excessive head movement kills consistency.
Grip and posture influence how long you can maintain the lag between the hands and the body,which is crucial for maximizing clubhead speed without losing control of the face angle.
Grip and Posture Drills
- Neutral grip drill: Stand relaxed, grip the club as you would for a comfortable shot, and gently rock the clubhead away from you to ensure you can feel the face square at address.
- Posture hold: Create your address posture and hold for a count of 5-7 seconds while checking alignment in a mirror or window reflection.
Common Posture Mistakes to Watch
- Rounding the shoulders or standing too upright, reducing coil potential.
- Gripping too tightly, causing tension that restricts the swing path.
- Chin lift or a pronounced head lift at impact, leading to top or heel hits.
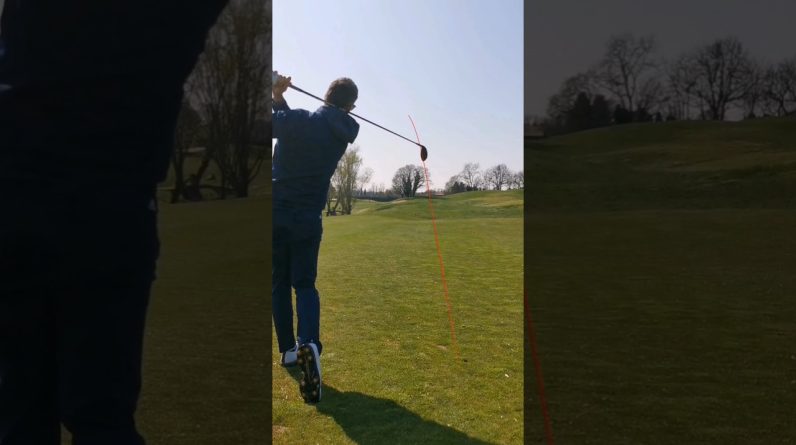
step 3: Swing Path, Tempo, and Rhythm
The swing path and tempo are the engine of the perfect golf drive. A smooth tempo with an efficient, slightly upward attack produces longer carries and tighter dispersion than raw power alone.
- Takeaway and sequence: Start the club on a low, inside path with your shoulders leading the turn. The hips should initiate the motion while the arms and hands follow, creating a one-piece takeaway.
- Plan the tempo: aim for a smooth tempo with a deliberate but relaxed rhythm. A common mental cue is “three to one”: three smooth backswing counts to one follow-through, which helps prevent trying to “hit” the ball.
- Attack angle: For drivers, a shallow to moderate upward angle of attack (2-4 degrees) encourages a higher launch with lower spin, maximizing carry distance.
- Hip and shoulder synchronization: Maintain a stable lower body while the upper body rotates through impact. Avoid excessive lower-body sway or over-rotation that can push the ball offline.
Tempo is the differentiator between a good drive and a great drive. A mis-timed transition often results in blocks to the right (for right-handed players) or pulls to the left. Training with stops and starts, or with impact bags, can help you feel the correct sequence without over-swinging.
Tempo and Path Drills
- Count drill: Use a 1-2-3 rhythm (backswing to top, downswing, contact) and practice maintaining the count even as speed builds.
- Net takeaway: Place a light alignment stick on the ground along your target line and practice bringing the club back on that line without hitting it,to reinforce an inside path.
Common Swing Path Issues
- Over-the-top path producing push draws or slices.
- Excessive hip slide causing loss of postural stability at impact.
- Steep angle of attack leading to heavy contact and lower launch.
Step 4: Impact and follow-Through for Maximum Distance
Impact quality determines how cleanly you transfer energy from the club to the ball. A accomplished impact position, combined with a full, balanced follow-through, yields greater accuracy and consistent distance with the golf drive.
- Impact position: Hands ahead of the clubface at impact ensures the sole of the club catches the ball and compresses it properly. A slight forward shaft lean helps-bearing contact and channelize speed into the ball.
- Weight transfer: As you strike the ball,shift your weight toward the lead foot. This forward pressure helps you maintain balance and keeps the driver from skying or tugging.
- Face control: Keep your face square to the target through impact. A rotating face is natural, but avoid excessive closing or opening that produces nasty hooks or slices.
- Follow-through: finish high and smooth, with a balanced chest facing the target and a respectable extension through the ball. A complete finish often correlates with solid contact and accurate direction.
Remember, the driver is a game of precision and control. The ideal follow-through is a natural byproduct of a clean impact, comfortable tempo, and a stable base. Practice this sequence slowly at first, then gradually increase pace as feel solidifies.
Impact and Follow-Through Drills
- impact bag drill: Place a pad or cushion behind the ball to feel the contact without fear of mis-hit. focus on padding through impact with a forward shaft lean.
- Balanced finish: Practice with no ball, and pause after impact to hold your finish for 2-3 seconds, ensuring you are turning fully through the shot.
Common Impact Mistakes
- Hands behind the ball at impact, causing low face contact or top shots.
- Early extension or loss of spine angle, resulting in inconsistent trajectories.
- Inconsistent weight transfer, leading to thin or heavy shots.
Benefits of a Consistent 4-Step Golf Drive
- Longer carries with improved ball speed thanks to efficient energy transfer.
- Stronger accuracy with a repeatable swing path and solid contact.
- lower penalty shots due to better face control and fewer mishits.
- Increased confidence on the tee, translating to better course strategy and decision-making.
practical Tips to Keep Your drive on Track
- Schedule a regular practice routine focusing on one step per session-gradually integrate all four steps.
- Use a launch monitor when possible to track launch angle, ball speed, and spin rate to quantify progress.
- Keep a simple drills journal. Note which drills produce more consistent shots and which cues help your tempo and swing path.
- Work with a coach or use video analysis to spot subtle faults in alignment,grip,or posture that may hinder your drive.
First-Hand Experience: Real Players’ Insights
Many players improve their golf drive when they internalize the four-step approach as a repeatable routine.Here are a few real-world insights gathered from amateur and recreational players who focused on the setup, grip, tempo, and impact sequence:
“Switching to a neutral grip and maintaining a stable spine angle eliminated my early extension. My tee shots started launching higher and carrying farther without extra effort.” - Emily, 34
“I used to swing too hard at the ball. After I adopted a smooth tempo and an inside-to-out path, I began hitting straighter drives with only moderate effort.” – Marcus,42
Case Studies: Swift Comparisons
| Player Type | Common Fault | Fix Implemented |
|---|---|---|
| weekend Warrior | ball teed too low,inconsistent contact | Adjusted ball position,added a slight spine tilt,practiced tempo drills |
| Improving Amateur | Over-rotation and sliced drives | neutral grip,inside-out path drills,balanced finish |
| Senior Player | Loss of distance due to weak attack angle | Increased shoulder tilt and chair-height tee,improved timing through tempo work |
Real-World Takeaways
Consistency on the golf drive is less about raw power and more about a repeatable setup,stable grip,controlled tempo,and clean impact.The four-step framework helps you diagnose faults quickly and implement targeted drills that produce measurable improvements in distance and accuracy.By addressing each component-setup, grip, tempo, and impact-you’ll be able to create a reliable tee shot that you can trust under pressure on the course.
Mini-Checklist for Your Next Tee Shot
- Ball position: just inside the left heel
- Stance: shoulder-width, aligned to target
- Grip: neutral, relaxed; V’s point to right shoulder
- Tempo: smooth 3-2-1 rhythm; avoid rushing
- Attack angle: upward with the driver (2-4 degrees)
- Impact: hands ahead, weight forward, balanced finish
Simple Practice Plan: 4 Weeks to a More Consistent Drive
- Week 1: Setup and stance focus; use alignment sticks; work on ball position and shoulder parallelism.
- Week 2: Grip and posture; test both interlock and overlap to see which feels most natural; monitor grip pressure with a soft touch.
- Week 3: Tempo and swing path; practice the 3-2-1 rhythm; add inside-out path drills and mini pauses at the top.
- Week 4: Impact and follow-through; implement impact bag drills and a balanced finish hold.
With patience and consistent practice, the four-step approach can transform your golf drive from a guesswork shot into a repeatable, confident tee shot that sets up better scoring opportunities for the rest of your game.
Related Resources
- Understanding Launch Angle and Spin for Beginners
- Choosing the Right Driver for Your swing speed
- On-Course Drills to Build Confidence on Tee Shots