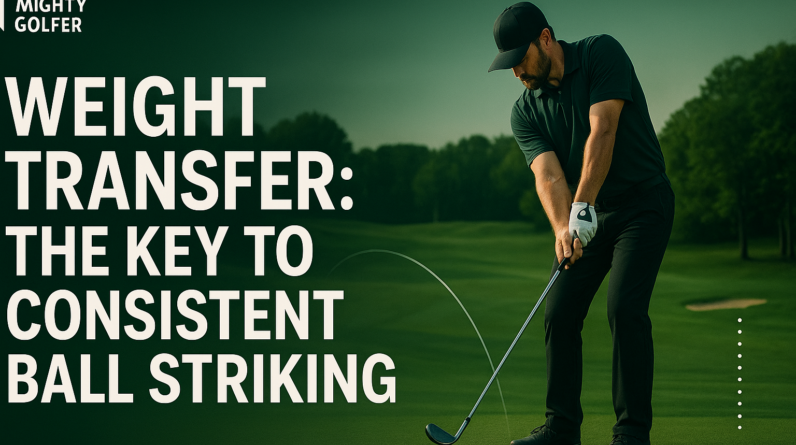

Weight Transfer for Consistent Ball Striking: A Focused Golf Lesson
In this post we zoom in on one critical aspect of the golf swing that often trips beginners and some intermediates: weight transfer. Mastering how your weight moves from the back foot to the lead foot during the downswing and impact can dramatically improve contact, accuracy, and power. This is a focused guide on that single concept—not the entire swing.
What the concept is
Weight transfer is the deliberate shift of your body’s center of gravity from the trail (back) foot toward the lead (front) foot as you swing and strike the ball. The goal is to start with balanced footing, then rotate your hips and torso to move your weight toward the target, finishing with the majority of your weight on the lead foot and your chest facing the target.
Why it matters to the golf swing
- Solid contact: Proper transfer helps you compress the ball cleanly instead of hitting behind or under the ball.
- Consistent trajectory: When weight shifts correctly, your swing path and face alignment stay more in control, leading to straighter shots.
- Power with control: Efficient weight forward at impact allows you to transfer energy from your body into the clubhead without flipping your hands late in the downswing.
What the golfer should feel when doing it correctly
- During the downswing: A smooth sense of weight moving from the back foot toward the lead foot.
- Hip rotation first: Hips turn toward the target, followed by the torso and arms—without sliding your torso excessively sideways.
- Finishing position: Most of your weight sits on the lead foot at impact and you finish tall and balanced, facing the target.
2–3 common mistakes and fixes
Mistake 1: Weight stays on the back foot too long (hanging back)
Why it hurts your swing: You often hit behind the ball, thin shots, or lose distance and consistency.
Fix: Begin the downswing with a deliberate shift forward. Imagine your right knee relaxing toward the left leg as you rotate your hips. Keep your spine angle intact and finish with your weight on the lead foot. A simple cue: “feel the left foot press into the ground as you release into the hit.”
Mistake 2: Weight slides laterally without real rotation
Why it hurts your swing: You may swing your hips side-to-side instead of turning, which can cause pulls or pushes and a loss of power.
Fix: Emphasize hip rotation over linear slide. Practice with a tee under your trail arm to remind your torso to rotate rather than slide. Think “turn first, glide second.”
Mistake 3: Finishing with most weight on the trail foot
Why it hurts your swing: Loss of balance and inconsistent impact and clubface control.
Fix: Finish with a tall, balanced pose and most weight on the lead foot. Visualize your chest pointing at the target and your trailing foot lightly off the ground as you hold the finish for a moment.
One easy practice drill you can do at home or on the range
Feet-Together Weight-Shift Drill
- Stand with your feet touching (heels and toes together) and lightly bend your knees. This stable setup reduces excessive lateral movement.
- Take a half-swing and, at impact, focus on shifting weight toward the lead foot while keeping your balance. Stop after each strike and reset.
- Do 6–10 repetitions, then gradually progress to a full swing while maintaining the same feeling of transferring weight forward and finishing balanced on the lead foot.
- Tip: If you wobble, shorten the swing and concentrate on hip rotation first, then allow the arms to follow.
This drill trains your body to move weight forward with controlled rotation, helping you feel the intended transfer without worrying about other swing details.
Remember, this post stays focused on weight transfer. As you practice, you’ll notice more solid contact and steadier results even when your overall swing is still a work in progress. If you’d like, tell me your current setup (hand position, ball position, and balance feel), and I’ll tailor cues to your body type and swing style.
Weight Transfer for Consistent Ball Striking: A Focused Golf Lesson
Core Principles of Weight Transfer
In golf, consistent ball striking hinges on an efficient weight transfer from ground to clubhead through the swing. The goal is a smooth, sequential shift of mass from the trail side toward the lead side, timed with the swing’s acceleration and deceleration. When executed correctly, weight transfer enhances control, clubhead speed, and contact quality, reducing mishits and fat shots.
- Ground reaction forces: your feet push into the ground and the ground pushes back. The goal is to harness this reaction to drive the body toward the target while keeping the balance quiet.
- Kinematic sequencing: A proper order of operations-hips rotating, torso unwinding, then arms delivering the club-ensures efficient energy transfer.
- Center of gravity and balance: A steady, adaptable center of gravity helps you stay over the ball while shifting weight, preventing excessive sway or lateral slide.
- Posture and spine angle: Maintaining posture through transition minimizes early extension or loss of spine angle, aiding on-plane strikes.
The Science Behind Weight Transfer
Weight transfer is not just a feel; it’s a biomechanical process rooted in simple physics and athletic movement. Understanding it helps you train more effectively and diagnose subtle swing flaws that interrupt consistency.
Center of Gravity and Ground Reaction Forces
The golfer’s center of gravity shifts during the swing. At setup, the weight is usually balanced between the feet. As you take the club back and begin the downswing, your trailing-side leg (right leg for right-handed players) loads, storing elastic energy in the hips and legs. At impact, the weight moves toward the lead foot, using ground reaction forces to accelerate the lower body into the shot. A controlled transfer reduces excessive lateral movement and increases solid contact.
Kinematic Sequencing and Hip-Arm Connection
Think of the swing as a wave: hips start the motion, the torso unwinds, and the arms follow with the club. This order helps prevent flying limbs and late timing. A well-timed weight shift supports clubhead lag through impact, leading to crisper contact and more consistent compression on the ball.
The Basics: Feet, Posture, and Balance
foundational elements set the stage for effective weight transfer. Small adjustments in setup can dramatically improve weight movement during the swing.
: A cozy stance with a slight feel of pressure toward the lead foot at address often helps you initiate the transfer smoothly. - Knee flex and hip tilt: Maintain soft knees and a slight knee flex, allowing the pelvis to rotate without collapsing the spine.
: Keep a stable spine angle from takeaway to follow-through to preserve a consistent platform for the club to strike the ball. : Visualize a line from your sternum through the ball to help monitor any unintended lateral sway.
Practical Drills for Weight Transfer
Use these drills to feel and rehearse the weight transfer without worrying about power or distance. Start slow, then progressively add speed and tempo as you sense a cleaner sequence.
Drill 1: Slow Motion Weight Shift
Purpose: Develop a mindful,repeatable transfer from the trail foot to the lead foot. Focus on keeping the spine angle and balance as you transfer weight through impact.
- Address with a light, athletic stance.
- Take the club back halfway,then pause at the top for a breath.
- In slow motion, shift weight from the trail foot toward the lead foot as you drop into impact position without lifting the head or swaying.
- return to balance and repeat for 8-10 repetitions.
Drill 2: Step-Through Weight Feel
Purpose: Build the feel of a progressive weight transfer into the lead side during the swing.
- Set up with a slightly taller posture, feet shoulder-width apart.
- Make a small step toward the target with the lead foot during the downswing, allowing your weight to move naturally to the lead side.
- Finish with weight strongly on the lead foot and a balanced finish between the feet.
Drill 3: Pivot and Rotary Drills
Purpose: Emphasize hip rotation and its relation to weight transfer.
- Place a club across your shoulders to limit arm motion and emphasize lower-body action.
- Rotate hips toward the target on the downswing while maintaining a stable spine angle.
- Feel the trailing leg loading and the lead leg accepting weight as you reach impact, then finish tall and balanced.
Drill 4: Ground contact Feedback
Purpose: Use a simple balance cue to visualize weight distribution during impact.
- Stand on two alignment sticks or narrow tape lines to create a visual boundary.
- Hit glide shots with a smooth, centered strike where weight shifts primarily inside the boundary toward the lead foot.
- Track where most pressure lands-aim for a balanced distribution at impact, with clear lead-side dominance after impact.
Tip: For more advanced players, a portable pressure mat or wearable sensor can help quantify weight distribution and shift timing. Use feedback to refine your feel for weight transfer without compromising rhythm.
Table: Weight Transfer Cues for Iron vs. Driver
| Aspect | Iron Shot | Driver Shot |
|---|---|---|
| Primary Weight Shift Timing | Progressive shift through impact; mid-transition emphasis | Delayed but pronounced shift due to longer arc |
| Posture Stability | maintain spine angle; steadier lower body | More rotation; keep balance to avoid over-the-top or early extension |
| Foot pressure Cues | Shift pressure toward lead foot as you strike | Load into trail leg slightly longer to generate drive, then unload to lead foot |
On-Course Application: Translating Weight Transfer to Scores
Learning weight transfer in practice is one thing; applying it on the course requires control, feel, and decision-making. The following tips help you translate the focused drills into lower scores and more consistent ball striking in real rounds.
- Pre-shot routine: Include a quick weight-transfer cue as part of your routine-“feel the trail foot loading, then deliver into the lead side.”
- Shot shaping and clubs: For shorter irons, the emphasis may be on precise weight shift to hold a compact, centered strike. for longer clubs or drivers,build progressive weight shift with controlled acceleration.
- Wind and terrain: In windy or uneven lies, maintain the same sequencing but adjust lower body torque to keep balance and strike quality.
- Practice grouping: Practice time for weight transfer should include both stationary drills and on-course simulation with target practice.
Case Studies and First-Hand Experience
Case Study 1: From Inconsistency to Reproducible Contact
A recreational golfer with a history of fat and thin shots found that his weight transfer was reactive rather than proactive. After four weeks of targeted drills-Slow Motion Weight Shift, Pivot Drills, and Ground Contact Feedback-he reported:
- Average contact improved from inconsistent to solid, with more centered strikes on the clubface in 85% of shots.
- Ball speed increased by an average of 4-6 mph on mid-irons,contributing to better distance control.
- On-course confidence rose, particularly under pressure, because the weight transfer felt repeatable and predictable.
Case Study 2: Windy Conditions and Stability
A mid- handicapped player struggled with drift caused by body sway in gusty wind. Implementing a steadier weight transfer approach-trimmed hip rotation, consistent lead-side loading, and a balanced finish-led to:
- Sharper ball flight with less dispersion in crosswinds.
- Reduced flight variability across different wind directions.
- Improved green-side proximity, thanks to more reliable contact and distance control.
Benefits and Practical Tips
Working on weight transfer yields a multi-faceted benefit to your golf game beyond just better contact.
Benefits
- More consistent ball striking and improved distance control.
- Better collision with the sweet spot, reducing mis-hits and spin variability.
- Enhanced balance under pressure, benefiting short game and mid-range approaches.
- Injury prevention through stable posture and controlled pivot, especially in the lower back and hips.
Practical Tips
- Start with slow motion drills to build a reliable weight transfer pattern before adding speed.
- Keep your head steady and eyes on the ball to avoid compensating with excess lateral movement.
- Use a cue you can feel comfortably, such as “load the trail leg, then unload into the lead foot.”
- Record your practice with a mirror or smartphone to verify posture and transfer rhythm.
Frequently Asked Questions
How do I know if I’m weight shifting correctly?
Indicators include a balanced finish with most weight on the lead foot, a clean, centered contact, and a consistent ball flight with predictable distance. If you’re consistently sliding or turning off the ball, you might potentially be early extending or initiating weight transfer too soon or too late.
Is weight transfer the same for all clubs?
Principles remain consistent, but the amount and timing can vary. Short irons usually require tighter control and quicker stabilization, while longer clubs benefit from a more pronounced and later transfer due to the longer swing arc. Always align your weight transfer with your swing speed and shot type.
How can I support weight transfer with conditioning?
Strength and versatility work for the hips, core, and ankles help maintain balance and rotate efficiently. Consider hip mobility exercises, single-leg balance drills, and dynamic warm-ups that prepare your body for the rotational demands of golf. A stable base supports better weight transfer and reduces the risk of swing faults.