Weight Transfer: The Key to Consistent Ball Striking
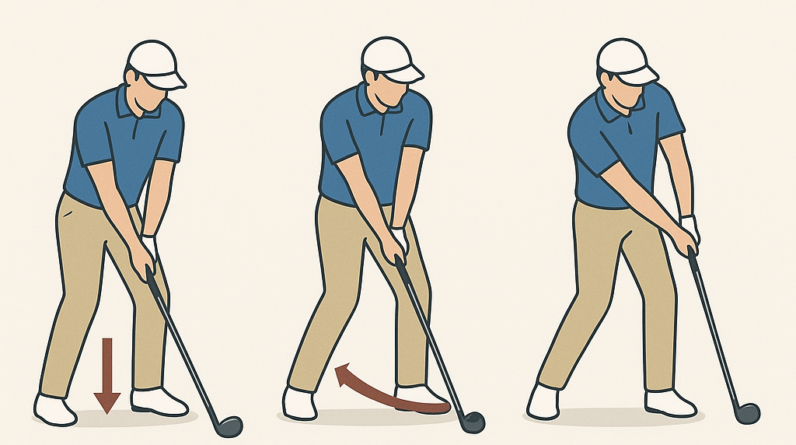
In golf, great ball striking starts with a simple, repeatable pattern: moving your weight smoothly from the trail foot to the lead foot during the downswing and through impact. This is weight transfer. It isn’t flashy, but it’s essential for consistent contact, solid compression, and balanced finishes.
What the concept is
- Weight transfer means shifting your center of gravity from the back (trail) foot toward the front (lead) foot as you swing down and through the ball.
- It happens in a smooth sequence: reserve energy in the backswing, then release it toward the target in the downswing and at impact.
- Think of your legs and hips as the engine. The hips rotate and the legs drive the weight forward, not the arms alone.
Why it matters to the golf swing
- Improves contact quality by keeping a steady spine angle and preventing excessive sway or slide.
- Increases ball speed and compression by delivering forward shaft lean and solid contact at impact.
- Promotes balance through the finish, making it easier to repeat the swing under pressure.
What you should feel when doing it correctly
- A gradual shift of weight from the trail foot to the lead foot as you descend toward the ball.
- Pressure building under the lead foot at impact, with the trail leg becoming more vertical as you rotate through.
- Maintaining spine angle and a stable head position, finishing with most of your weight on the lead foot and a balanced, athletic finish.
2–3 common mistakes and quick fixes
- Mistake 1: Staying stuck on the trail foot during impact.
- Fix: Feel a slow, deliberate press into the lead foot as you swing through. Imagine your front heel is “sticking” to the ground while your behind foot relaxes.
- Mistake 2: Weight shifts too early or too abruptly, causing loss of width and balance.
- Fix: Maintain a stable trail-side posture in the backswing, then initiate the transfer with a controlled hip rotation as you start down. Don’t rush to the lead foot—let the sequencing unfold.
- Mistake 3: Over-rotating the hips without transferring enough weight, producing thin/heavy strikes.
- Fix: Use your legs to drive the weight forward, not just the hips. A soft knee bend and a small step toward the target can help you complete the transfer smoothly.
One easy practice drill you can do at home or on the range
- Name: Step-Through Weight Transfer Drill
- Setup: Take a normal stance with a club or just your body. Stand with feet shoulder-width apart, a light knee bend, and relaxed shoulders.
- How to do it:
- Take a pretend backswing while keeping most of your weight on the trail foot.
- At the start of the downswing, rotate your hips and slowly transfer weight to the lead foot as you “step” the lead foot forward onto the line toward the target.
- Finish with your weight solidly on the lead foot, chest facing the target, and a comfortable, balanced finish.
- Tips: Do 8–12 slow reps, focusing on a smooth transfer rather than speed. If space is limited, perform the drill without a ball and just feel the sequence in sneakers on carpet or turf.
Mastering weight transfer won’t fix everything by itself, but it creates a stable platform for consistent ball striking. Practice this pattern, stay patient with the feel, and you’ll notice cleaner contact and more reliable distance control over time.
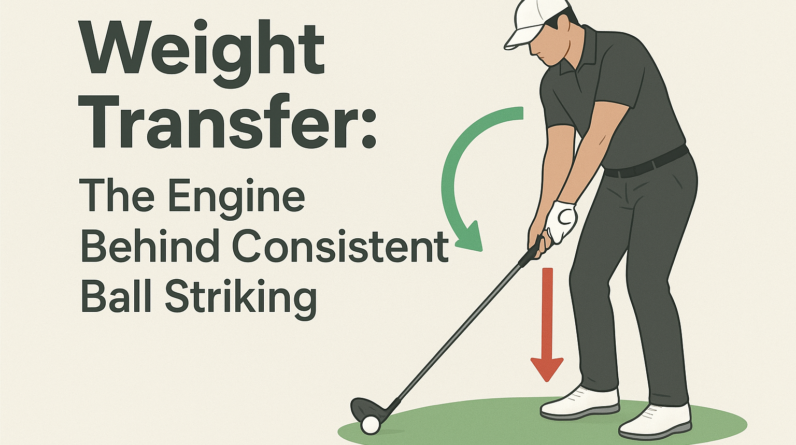
Weight Transfer: The Key to Consistent Ball Striking
Why weight transfer matters for every ball-striking sport
Whether you’re swinging a golf club, a baseball bat, or a cricket bat, the way your body shifts weight from one side to the other during the swing is a foundational element of contact quality. Proper weight transfer helps you:
- Increase clubhead or bat speed without sacrificing control
- Maintain balance through the swing, reducing mis-hits
- Improve ball striking consistency across a range of shots
- Generate power from the ground up, not by “dumping” energy into the ball
- allow cleaner, more centered contact, resulting in better ball flight and dispersion
In short, weight transfer is the bridge between technique and outcome. If you can reliably move your weight in the right sequence, you’ll see faster, straighter, and more repeatable results. The challenge is not just “moving weight” but doing so in harmony with tempo, leverage, and the position of the club or bat at impact.
The biomechanics of weight transfer: how it effectively works in the swing
Weight transfer is a timed sequence that starts from your stance and flows into the swing. While the exact motions vary by sport and style, most proficient ball strikers share a common blueprint: load, rotate, and release power through the ground into the object you’re striking.
Key phases of the weight-transfer cycle
Feet shoulder-width apart, knees slightly flexed, core engaged. The weight is evenly distributed,or slightly toward the back foot depending on your style. As you initiate the backswing or backswing-like motion, your weight shifts toward the back foot. this creates stored elastic energy in the legs and hips and sets up a strong transition to the forward swing. The hips begin to clear toward the target while the weight starts to move toward the front foot. Shoulders, arms, and the torso rotate in a coordinated manner to guide the club or bat through the strike zone. The majority of weight arrives on the front foot. On contact, energy is directed upward and forward, maximizing acceleration of the clubhead or bat while maintaining balance.
In practice, you’re not simply “shifting weight” randomly. You’re sequencing your load and unload so that your body acts like a springboard—storing energy during the load, then releasing it through a stable, well-timed impact. The most repeatable hitters—golfers, baseball players, and cricketers alike—master this timing and maintain control even under pressure.
Common weight-transfer patterns and how to optimize them
understanding typical patterns helps you diagnose issues on the range, field, or court. Here are the patterns you’ll encounter, along with practical adjustments.
Pattern A: Early forward weight shift
Symptom: The front foot plants hard too soon,causing early release and pulled or pushed shots. The swing can feel rushed,and balance is compromised.
Fixes:
- Pause briefly at the top of the backswing to synchronize the transition with the first move toward the ball.
- Practice with slower tempo drills to feel the load and transfer before accelerating through impact.
- Keep the head steady and let the hips led the transition rather than the arms.
Pattern B: Late weight transfer or flat-footed impact
Symptom: The weight remains on the back foot or the trail foot drags,resulting in thin contact or topped shots.
Fixes:
- Work on a more aggressive forward-press in the downswing so the front foot springs into readiness for impact.
- Use a tee-height drill in golf or a soft-ball drill in baseball to encourage contact with weight over the front leg.
- Improve hip rotation timing to ensure the hips clear and the weight shifts naturally forward through impact.
Pattern C: Uneven weight shift causing dispersion
Symptom: Ball flights show inconsistent direction due to mis-timed weight transfer.
Fixes:
- Establish a consistent setup that places a touch more weight on the centre or slightly on the back foot to allow a smooth transition.
- in drills, focus on maintaining a quiet head and stable pelvis while the hips initiate the turn.
- Incorporate balance work (single-leg drills) to improve stability during the shift.
Practical drills to train repeatable weight transfer
Below are progressive,sport-agnostic drills you can try to ingrain the feeling of proper weight transfer. Each drill focuses on timing,balance,and the connection between leg drive and upper-body rotation.
1) Foot-plant tempo drill
Goal: Synchronize load, turn, and release with a clear tempo cue.
- Take your normal stance. Place your hands on your hips and practice the backswing half-height.
- Begin a three-beat tempo: step back with the trail foot, rotate the hips, then plant the front foot and drive through impact.
- Repeat 20–30 reps, focusing on a smooth tempo rather than power. The objective is timing over speed.
2) Hip-rotation mirrors drill
Goal: Feel the hips initiating the transfer, not the arms.
- Use a mirror or video your swing from the side. Stand with feet shoulder-width apart.
- Perform dry swings where you exaggerate hip turn during the transition while keeping the upper body passive.
- Gradually reduce exaggeration while maintaining the hip-driven transition.
3) Front-foot pressure plate drill
Goal: Train front-foot loading and balanced finish.
- Place a small cushion or pressure pad under the lead foot.During the swing, notice how weight shifts onto that foot near impact.
- Focus on keeping pressure through impact without collapsing the knee or leaning excessively forward.
- perform 2–3 sets of 10 swings with a light club or bat.
4) Split-stance swing for control
Goal: Improve balance and transfer control by introducing a stable baseline.
- Begin with a slightly wider stance, then perform a slow swing focusing on transferring weight to the lead foot at impact.
- Progress by reducing stance width and increasing swing speed as control improves.
5) medicine ball toss with stance discipline
goal: Coordinate lower-body drive with upper-body reach and contact timing.
- Stand in your normal golf, baseball, or cricket stance with a light medicine ball in both hands.
- Rotate hips and torso to throw the ball forward, emphasizing a strong forward weight transfer and stable landing.
- Repeat 12–15 throws, emphasizing consistent contact with the target location.
Setup and posture: creating the environment for proper weight transfer
Your body’s posture and grounding are the foundation of prosperous weight transfer. Good setup makes the transfer more reliable and repeatable.
- Keep a slight knee flex and a tall spine, ready to absorb and transmit force.
- Distribute weight evenly or slightly toward the back foot at setup,then allow a natural shift toward the front foot through impact.
- Maintain a stable head position and a relaxed grip to prevent tension from blocking the transfer.
- Ensure the ground contact is deliberate: feel the force move from the heels/toes in the sequence that supports your swing path.
Weight transfer across sports: comparing golf, baseball, and cricket
While the goal is the same—maximize efficient transfer of energy from the ground to the ball—the mechanics vary slightly across sports due to grip, stance, and swing path.
Golf vs. Baseball: similarities and differences
- similarities: Both rely on a lag and release mechanism where the hips drive the turn and the weight shifts forward through impact.
- differences: Baseball often involves more dynamic upper-body involvement and a shorter swing arc, while golf emphasizes a longer arc and subtle weight distribution differences between clubs.
Cricket batting: weight transfer in a lateral game
- Cricket requires a broader base and often a more pronounced weight transfer toward the front foot with a strong front-side drive at release.
- Balance and timing are crucial in handling different pitch speeds and shot selections.
Across all three sports, learning to read the ball, sense the load, and execute a precise transfer of weight will improve shot quality and reduce inconsistency.
Case studies and first-hand experiences
Case study: Amateur golfer reduces dispersion by refining weight transfer
A mid-handicap golfer reported a noticeable improvement after focusing on the transition phase. By coupling a deliberate hip-rotate cue with a weighted-sole focus on the front foot at impact, thay achieved a tighter shot pattern and increased carry by approximately 8–12 yards on avg across a single range session.
First-hand experience: a coach’s perspective
During a coaching session, a player who consistently topped the ball learned to pause briefly at the top of the backswing, allowing the hips to initiate the transfer rather than rushing with the arms. The player described a “smoother spring” into impact and a marked reduction in mishits as a direct result of improved weight transfer timing.
These anecdotes highlight a core truth: even small refinements in how weight moves from back foot to front foot can translate into meaningful gains in contact quality and consistency.
Weight-transfer cues and speedy-reference checklist
Use these cues to self-d assess and cue your practice sessions. They are designed to be quick reminders you can internalize during a round or a drill block.
- Load with the hips,not the arms.
- Feel the weight shift toward the lead foot just before contact.
- Maintain a quiet head and stable spine through transition.
- Drive from the ground up—ankles, knees, hips—before guiding the upper body.
- Finish with balanced, centered posture and a chest facing the target.
Quick cue table
Use this as a practical reference when you practice or play. The cues are aligned to the four major phases of the swing.
| Phase | Cue | Focus | Common Thought |
|---|---|---|---|
| setup | Light toe pressure, grounded | Balance and posture | Where is my weight today? |
| Load | Hip hinge and back foot loading | Energy storage | Load the spring |
| Transition | Hips clear, torso rotates | Timing and sequencing | Turn and tilt, not rush |
| Impact | Front-foot pressure, strong extension | Contact quality | hit the ball, not the air |
| Finish | Balanced finish | Recovery and control | Stay centered on target |