
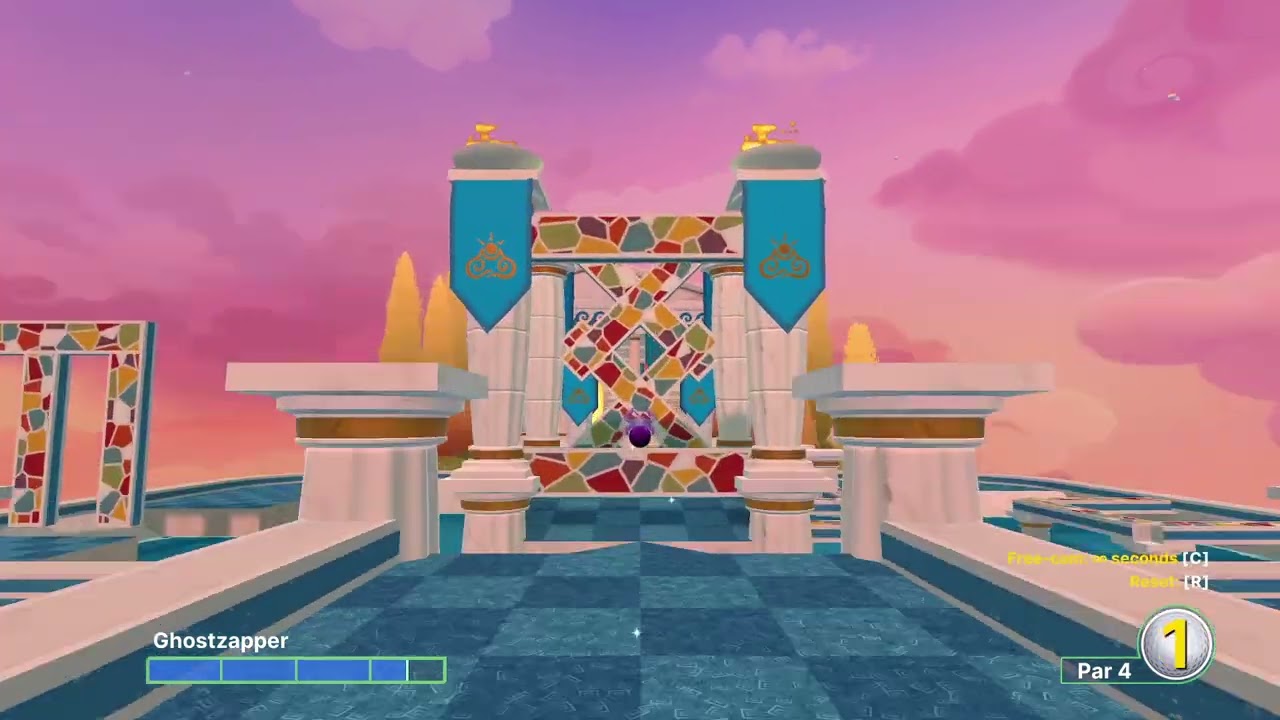
Golf With Your Friends Olympus Odyssey Classic Guide! (18 Holes In One!)
Overview of Olympus Odyssey Classic
Olympus Odyssey Classic is a dream-ride through mythic terrain, where lush cloud-topped platforms meet ancient ruins and glowing runes. This 18-hole minigolf challenge in Golf With Your Friends tests your precision, timing, and shot selection as you navigate a world inspired by legendary architecture and celestial vistas.Teh objective is simple in concept—hole out with the fewest strokes—but the reality is a test of control,risk assessment,and creative trick shots. In this comprehensive guide, you’ll find actionable tips, hole-by-hole walkthroughs, and practical strategies designed to help you achieve multiple holes-in-one and outplay friends in multiplayer mayhem.
Key mechanics You Should Master
- Shot Power and Spin: The power of your stroke and the spin you apply drastically changes ball behavior on slopes and ramps. A slight adjustment can be the difference between a gentle roll into the cup and a missed par.
- Bank Angles and Slope Reading: Olympus Odyssey uses a combination of grade changes, banked turns, and curved rails. Reading the slope from the approach angle is essential to set up a controlled second shot after a subtle first strike.
- Obstacles and Dynamic Elements: Expect moving platforms, rotating gates, teleport portals, wind effects, water hazards, and occasional lava-like pits. Each hole has a signature mechanic that rewards timing and positioning over brute force.
- Power Shots and Trick Tricks: Some holes reward longer, power-driven shots to reach elevated platforms or to carom off walls for a favorable rebound. Others demand finesse, such as backspin to stop near the hole or topspin to glide up a ramp.
- Multiplayer Etiquette: In co-op or competitive play,give space for each player’s line of sight and avoid blocking lanes. A calm, communicative approach makes complex shots easier to execute for everyone.
Hole-by-Hole Strategy: Olympus Odyssey Classic (18 Holes)
Hole 1 — Summit Approach
Starting on a gentle incline, you need to gauge the power to avoid overshooting the first platform. The ramp feeds to a narrow channel lined with decorative columns. A light, controlled shot aimed toward the left-center of the channel sets up a favorable roll toward the cup.
- Recommended shot: Medium power with slight left spin to hug the inner curve.
- common pitfalls: Overshooting the channel or clipping the column tops causes unpredictable rebounds.
Hole 2 — Ruin Gate
A towering stone gate blocks the straightforward path. A precise bank off the inner wall opens a diagonal route toward the cup. Timing matters as the gate can close briefly, altering your line.
- Recommended shot: Soft,accurate stroke to kiss the inner wall and deflect into the diagonal run.
- Tip: If the gate blocks, use a hairline backspin to keep the ball hugging the wall upon rebound.
Hole 3 — Celestial Bridge
This hole features a translucent bridge with a central pillar. the ball must roll to the edge of the bridge and fall onto a second platform for the final approach.
- Recommended shot: Aim for the far left wing to trigger a favorable rebound toward the main platform.
- Tip: Avoid the central pillar’s impact; it can deflect you off course and add strokes.
hole 4 — Oracle’s Spiral
A spiraling ramp winds upward with a rotating ring hazard. you’ll need enough momentum to clear the curve while not overshooting into the ring.
- Recommended shot: Medium power with slight hammer-to-backspin to control the exit trajectory.
- Note: The rotating ring can delay your cross to the next segment; wait for a favorable window if possible.
Hole 5 — Hall of Mirrors
Multiple reflective surfaces create ambiguous angles. The best approach is to send a straight, medium-power line that hits the central mirror square and bounces toward the cup.
- Recommended shot: Straight shot with minimal spin to minimize unpredictable bounces.
- Strategy: Line up your stroke using the glass edges as visual anchors.
Hole 6 — Thunder Steps
A staircase of stepping stones requires careful pacing. Jumping stones can be timed to bounce forward, but mis-timed hops cost strokes.
- Recommended shot: One precise strike to land on the first step, then adjust for the remaining steps in sequence.
- Tip: Avoid rushing; the stones respond best to deliberate, measured power.
Hole 7 — Windward Gorge
A gusty wind tunnel influences the ball’s horizontal movement. You’ll want to compensate for crosswind by aiming slightly into the wind direction.
- Recommended shot: Slightly stronger shot than you think, with a small offset to counter wind drift.
- Hint: A gentle curve toward the center of the fairway reduces edge risk.
Hole 8 — Amphitheater Rally
Set in a circular amphitheater, the eighth hole features a lip that can either cradle your ball for a gentle finish or fling it outward if misaligned.
- Recommended shot: A calm, centered stroke aimed toward the lip’s inner edge for a soft drop into the final chute.
- Strategy: if you’re unsure, take a conservative approach and settle for a par to preserve momentum.
Hole 9 — Golden Arch Landing
A grand archway marks the cusp between the lower and upper sections. The ball must pass under the arch, then roll onto a balcony platform for the final cup.
- Recommended shot: Light power to pass underneath cleanly, followed by a precise second shot from the balcony.
- Tip: The balcony edge is slippery; keep your aim centered on the cup’s vicinity.
Hole 10 — Pegasus Plains
Wide-open plains with a distant peak. Long-range shots can set you up for a direct approach, but accuracy matters more than raw distance.
- Recommended shot: Medium-length drive aimed toward the left arc of the plateau for a clean drop toward the cup.
- Note: Read the plateau’s tilt—short side shots can hit a wall and bounce away.
Hole 11 — Oracle’s Lantern
A hanging lantern acts as a beacon for a long approach. The lantern’s glow helps you align to a narrow corridor that leads to the hole.
- Recommended shot: A controlled stroke that lands in the corridor’s center,minimizing wall interactions.
- Tip: If you miss, the lantern’s shadow can help you aim on successive attempts.
Hole 12 — River run
A winding water feature challenges you to avoid the banks while steering toward the cup. The current can subtly pull the ball off course.
- Recommended shot: A gentle, curved shot hugging the inner water edge to stay clear of the bank.
- Trick: Use the bank’s curvature to your advantage by allowing the ball to bounce toward the cup.
Hole 13 — Dragon’s pass
A dragon statue spouts a misty arc that interacts with the ball’s travel. Timing and line choice determine whether you save strokes or squander them.
- Recommended shot: Aim for the mist arc’s edge so the ball glides into a favorable channel on the other side.
- Hint: Don’t chase a perfect center—sometimes the edge yields a cleaner path forward.
hole 14 — Moon Gate
A moon-shaped gate opens to a cliffside path. The gate’s movement creates a variable lane; pick a lane early and commit.
- Recommended shot: A precise, medium-power stroke to reach a stable lane.
- Note: If the gate closes unexpectedly,the other lane might offer a safer fallback late in the round.
Hole 15 — Athena’s Corridor
A narrow corridor lined with statues demands tight accuracy. The ball’s path is a straight shot with minimal deviation.
- Recommended shot: Very controlled stroke to thread through the statue gaps toward the cup.
- Strategy: Visual anchors on the corridor walls help maintain your aim as you proceed.
Hole 16 — Halflight Rift
A rift with alternating ledges rewards players who time their shots to utilize stepping stones. The final slope intensifies as you approach the cup.
- Recommended shot: One measured strike to land on the first ledge, then follow through with careful progression.
- Tip: If you misjudge timing, reset and pick a safer block to minimize risk.
Hole 17 — Titan’s Spiral
A spiral ramp that twists around a central pillar. The optimal move is to approach from an angle that sets up a clean drop to the final segment.
- Recommended shot: Use a diagonal approach to control spin and exit angle for the final approach.
- Note: The central pillar can alter your exit trajectory; aim for a clearance path slightly off-center.
Hole 18 — Olympus Crown
The closing hole crowns the Odyssey by combining elevation, a final bend, and a direct cup tap. This last obstacle tests your consistency and nerve under pressure.
- Recommended shot: A deliberate drive that lands on the crowned platform’s outer edge, followed by a precise finish stroke.
- Clutch tip: If you’re chasing an ace, a controlled hack with a gentle curve can yield a satisfying finish without risking a wild miscue.
Strategies for Consistent Holes-In-One
- Practice and Pattern Recognition: Spend time in practice mode to learn each hole’s unique geometry and how different spins behave on the Olympus Odyssey surfaces.
- Shot Rehearsal: visualize a prosperous path before your stroke. Imagine the ball’s contact with walls, rails, and ramps to reduce hesitation in real play.
- spin Mastery: Master backspin for soft landings on elevated platforms and sidespin to compensate for curves and wind effects.
- Elevation and Lec-Reading: Focus on how elevation changes influence your final resting spot. Use the slope to guide the ball toward the cup rather than against gravity.
- Risk Management: On tougher holes, aim for an exact par rather than gambling for an ace. Momentum matters in team games, and reliable scoring keeps you competitive.
Case Studies: Real-World Experience on Olympus Odyssey Classic
Case Study A — A Double-Hole-In-One Run
A four-player session turned into a memorable night when two players hit back-to-back holes-in-one on Hole 5 and Hole 9 during a casual tournament. The secret was consistent practice with medium-power lines and relying on backspin to settle the ball behind the cups. Debrief: they focused on tempo, avoided over-rotation on the ramps, and communicated early to avoid collision or lane blocking in tight segments.
Case Study B — From Par to Ace Momentum
One dedicated gamer documented a 3-hole-in-one streak across holes 6, 12, and 18 by prioritizing controlled shots with gentle curves and minimal spin variance. The key was to read the lane curvature and adjust power by a hair’s breadth, then hold the line on the final approach. Result: big momentum swing that carried the team through the final round with confidence.
Benefits and Practical Tips
- Olympus Odyssey Classic is perfect for group play, encouraging communication and shared strategy, while still allowing individual skill to shine.
- the map requires strategic thought rather than brute force, making it accessible for beginners yet challenging for seasoned players.
- The combination of artistic visuals and varied hole mechanics ensures each round provides fresh opportunities for strategy and creative shotmaking.
- The layout provides multiple lines of attack on many holes, wich helps accommodate different skill levels and preferences for risk versus reward.
Equipment, Settings, and Online Play Tips
- Controller vs. Keyboard/mouse: Many players prefer a controller for fine-tuned power control; others enjoy the precision of mouse movement for micro-adjustments.
- Camera Angles: Use an over-the-shoulder or top-down view to read slopes effectively. Personal comfort dictates which view gives you the best read.
- Game Settings: In a custom Olympus Odyssey lobby, set match type to “Stroke Play” or “Skins” for variety.Private rooms help minimize distractions in competitive rounds.
- Communication: Clear signal phrases (e.g., “two-stroke plan,” “line reads left,” “play safe”) keep everyone aligned during busy shots.
First-Hand experience: Lessons Learned on Olympus Odyssey
In my own sessions, I’ve found that the moast valuable lessons come from slow, deliberate practice rather than fast, risky plays. Spending 15–20 minutes on a single hole to dial in the exact power and spin you need yields long-term dividends across the 18-hole course.The map’s aesthetic is inspiring, but the key to unlocking holes-in-one is disciplined line reading and tempering ambition with patience. When you approach the final holes with consistent form, the odds of catching a surprise ace rise dramatically.
Rapid Reference: Hole Overview Table
Use the table below as a concise reference for rough par expectations and suggested shot types. It’s designed for quick scans during practice or before a match to refresh your plan.
| Hole | Par | Key Challenge | Suggested Shot Type |
|---|---|---|---|
| 1 | Par 3 | Incline, channel banking | Medium power, slight left spin |
| 2 | Par 3 | Gate timing | Soft bank to diagonal run |
| 3 | Par 3 | Bridge navigation | Far-left approach for rebound |
| 4 | Par 4 | Spiral ramp + ring | Medium power, backspin |
| 5 | Par 3 | Mirror/reflective surfaces | Straight stroke, center hit |
| 6 | Par 4 | Stepping stones | precise first step, measured follow-up |
| 7 | Par 3 | Wind/drag effects | Slight into-wind offset |
| 8 | Par 3 | Ampitheater lip | Centered gentle finish |
| 9 | Par 4 | Arch gate to balcony | Calm drive, precise second shot |
| 10 | Par 4 | Long-range approach | Left arc setup |
| 11 | Par 3 | Lantern alignment | Centered corridor shot |
| 12 | Par 4 | River run, banks | Hug inner edge, controlled curve |
| 13 | Par 3 | Dragon mist arc | Edge trigger for favorable path |
| 14 | Par 3 | Moon gate timing | Conservative center line |
| 15 | Par 4 | Temple corridor | Thread through gaps, minimal spin |
| 16 | Par 3 | Halflight rift steps | Measured progression across ledges |
| 17 | Par 4 | Spiral around pillar | Diagonal exit to control angle |
| 18 | Par 4 | Final crown challenge | Deliberate drive, precise finish stroke |
SEO and Content Best Practices for Golf With Your Friends Guides
- Incorporate primary keywords in headings and naturally throughout the article: Olympus Odyssey Classic, Golf With Your Friends, 18 holes, holes-in-one, minigolf guide, shot power, spin control, multiplayer tips.
- Use descriptive subheadings (H2, H3) to improve readability and crawl-ability for search engines.
- Provide practical, actionable content: hole-by-hole guides, tips, and case studies that readers can apply in their next session.
- Include tables with clean markup to improve information density and user engagement; use wordpress class names like wp-block-table to maintain styling consistency.
- Offer diverse content sections—tips, strategies, case studies, and quick references—to capture long-tail search queries (e.g., “Olympus Odyssey hole by hole guide”, “Golf With Your Friends 18 holes strategy”).
Frequently Asked Questions (FAQs)
- What is olympus Odyssey Classic in Golf With Your Friends?
- A custom/minigolf map featuring 18 creative holes with myth-inspired design and unique obstacles; designed for multiplayer fun and skill testing.
- how can I improve my chances of getting holes-in-one on Olympus Odyssey?
- Focus on consistent line reads,practice power control for each hole,master spin usage,and learn each hole’s signature obstacle to anticipate the ball’s path.
- Is there a recommended order to practice the holes?
- Start with the easier holes to build confidence (e.g., 1–4), then gradually tackle the more complex sections (7–12), and finally refine the high-stakes holes (15–18) to maximize late-round performance.
Closing Thoughts: A Player’s Roadmap to Mastery
While the Olympus Odyssey Classic is visually stunning and thematically immersive, the true thrill comes from mastering the shot discipline that turns potential into performance.Use this guide as your blueprint: study each hole’s mechanics, practice your preferred lines, and maintain a calm, confident rhythm during multiplayer rounds. The more you practice, the more holes-in-one becomes a realistic milestone rather than a lucky break. Enjoy the journey through the mythic courses, and may your putts glide true across Olympus’ celestial greens.