
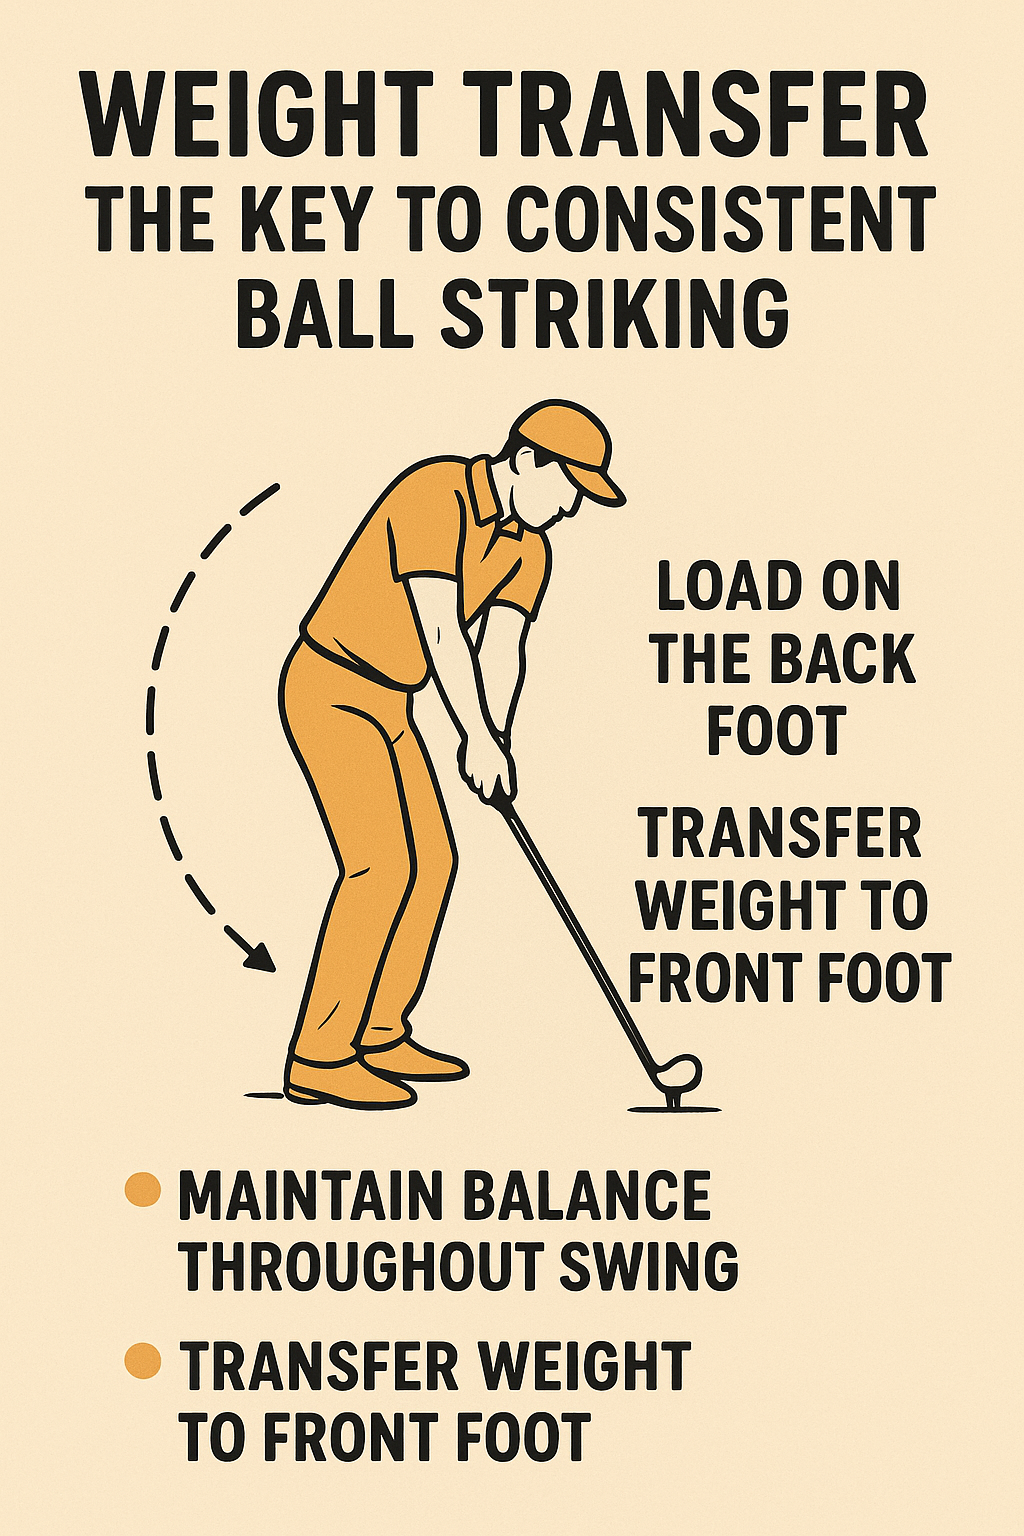
Weight Transfer: The Key to Consistent Ball Striking
Today we’ll focus on one essential idea that makes a big difference in how solid your contact is: weight transfer. This means moving your body’s weight from the trail (back) foot toward the lead (front) foot as you swing through impact. When you do this well, you’ll feel grounded, and your strikes tend to stay more solid, better understood by your clubface and path.
What the concept is
- Start with your weight balanced over both feet at setup.
- During the downswing and through impact, shift your weight toward the lead foot—usually a noticeable move of the hips and spine toward the target.
- Finish with most of your weight on the lead foot and your chest facing the target.
This isn’t about “jumping forward” or forcing the body to move too fast. It’s a smooth, coordinated transfer that allows your hands to release naturally and your hands-to-clubface relationship to stay stable.
Why it matters to the golf swing
- Promotes solid contact. When weight shifts forward at impact, you’re less likely to thin or fat shots and more likely to compress the ball.
- Improves consistency. A steady transfer helps your path and clubface to stay on a repeatable plane, which translates to more consistent distances and trajectories.
- Aids balance. A balanced move through impact reduces swings “dumping” or “stalling” at the ball, helping you recover to a good finish.
What you should feel when it’s right
- You feel the bulk of your weight moving from the back foot toward the front foot as you strike the ball.
- Your hips rotate toward the target and your chest stays square to the target longer into the swing.
- At impact, your lead knee has a little flex, your head remains relatively still, and your weight is mostly on the lead foot.
2–3 common mistakes and fixes
- Mistake: Hanging back on the trail leg and not transferring forward.
Fix: Try a gentle bump of the trail knee toward the target as you start the downswing, then feel the chest turn toward the target. A simple cue is “stay tall and move your hips toward the target.” - Mistake: Sliding the hips laterally instead of rotating.
Fix: Practice with a wall-tuck drill: stand with your back against a wall, feet shoulder-width apart. Rotate your hips so your belt line points to the target without your hips sliding up or down the wall. This helps you learn rotation instead of slide. - Mistake: Early forward weight shift before contact causes heel lift or a jumpy finish.
Fix: Slow it down. Pause at the top for a breath, then gently initiate the downswing with a modest weight shift toward the lead foot. Use a half-swing to feel the sequence, then step up to a full swing once control is consistent.
Simple, actionable drill you can do at home or on the range
The Step-Through Progression (no heavy equipment needed):
- Stand with your feet close together, weight evenly distributed.
- Take a half-swing and as you reach impact, step your lead foot forward about a foot and finish with your weight on the lead foot. The idea is to feel the weight transferring forward as you strike.
- Repeat 8–12 reps, keeping your balance solid and your head steady.
Tip: do this first with a shorter club or without a club, focusing on the feeling of forward weight transfer rather than power.
Short home-range routine
Practice 5–10 minutes, 3–4 days this week:
- 2 sets of 8 Step-Through reps (as described).
- 2 sets of 6 slow-motion half-swings, emphasizing weight shift to the lead foot at impact.
- Finish each rep with a quiet, balanced pose for 2 seconds.
Want this tailored to your swing or a specific club? Tell me your current setup and the kind of ball flight you’re getting, and I’ll adjust cues and drills to fit you best.
Weight Transfer: The Key to Consistent Ball Striking
weight Transfer: The Key to consistent Ball Striking
In any sport that involves striking a ball, achieving consistent contact is the gold standard. While many players focus on swing plane, grip, or racket face, the true engine behind reliable, repeatable shots is weight transfer. Properly timed and controlled weight transfer—moving your center of mass from back to front through the kinetic chain—transforms energy into power, pace, and precision.This article breaks down the science behind weight transfer, offers practical drills, and provides actionable tips to help you build a repeatable, confident strike in golf, tennis, baseball, and other ball sports.
What is Weight Transfer in Ball Striking?
Weight transfer refers to the purposeful shift of your body’s weight from one area to another during the swing or stroke. In moast ball-striking contexts,the pattern is a loading phase on the trail (back) leg,a rotation and transfer through the hips and torso,and a release phase onto the lead (front) leg. The goal is to move the center of mass efficiently over the base of support at the moment of impact, maximizing ground reaction forces and aligning energy with the ball.
- Core principle: The legs and hips act as a spring that stores energy during load and releases it during impact.
- Key factor: Timing. If weight shifts too early or too late, power is wasted, and accuracy suffers.
- Result: A more consistent strike, better ball speed, and improved control over trajectory.
Why Weight Transfer Matters for Consistency
Consistency in ball striking comes from repeatable mechanics, and weight transfer is at the heart of those mechanics. Here are the main reasons why this concept matters across sports:
- Power generation: Proper transfer converts horizontal momentum into vertical and forward momentum at impact, increasing force without reliance on brute strength.
- Contact quality: A centered strike is more likely when the body weight is aligned with the contact point, reducing mishits.
- Control and timing: Weight transfer provides a natural tempo cue—load, shift, and release—that helps maintain consistent timing.
- Injury prevention: A well-timed transfer reduces excessive stress on the back and wrists by distributing load through the kinetic chain.
- Versatility: The same core mechanics apply to golf, baseball, and tennis, enabling improved performance across stroke types.
Weight Transfer Across Sports: A Shared Framework
Golf
In golf, the backswing loads the trail foot and hip, then the downswing releases energy as weight shifts toward the lead foot.The moment of impact is when the weight is predominantly on the front foot, with hips rotated through, pelvis over the front leg, and a stable spine angle.This sequence helps deliver a pure strike and consistent ball flight.
Tennis
Tennis players typically drive weight forward through the front foot on forehands and backhands. A well-timed weight transfer enables shoulder and racket speed to translate into pace while maintaining balance during rapid direction changes and off-center contact situations.
Baseball/Softball
Baseball hitters load onto the back leg, rotate the hips, and then transfer weight to the front leg during the swing. Efficient weight transfer helps maximize bat speed at contact and improves pitch recognition and timing,especially when facing varied pitch speeds.
The Mechanics of Proper Weight Transfer: A step-by-step Guide
Step 1: Setup and balance
Begin with a stable base. Feet hip-width apart, knees slightly flexed, spine tall but relaxed, and shoulders aligned with the target. Your weight should be roughly evenly distributed between the feet, with a subtle nod toward the balls of the feet—ready to load onto the trail leg without collapsing the arch.
Step 2: Load and Ground Interaction
As you initiate the backswing or backswing-like motion, shift a portion of your weight onto the trail foot. This loading phase engages the ankles, knees, and hips and primes the axial skeleton for efficient transfer. Maintain balanced posture and avoid excessive lateral sway. The load should feel like a compressed spring ready to release, not a rigid lock.
Step 3: Transition and rotation
initiate the transition by rotating the hips toward the target while maintaining posture. The trunk should lead the movement, followed by the arms and hands. The goal is to store energy through hip rotation and partial trunk rotation, keeping the spine angle stable while the hips open toward the target.
Step 4: Release and Front Foot Pressure
As you approach impact, the weight travels forward to the lead foot. The front knee should show a controlled flexion, with the ankle, knee, and hip aligned to transmit energy into the ball. The chest and shoulders should align with the target, and the rear shoulder should stay square enough to avoid blocking the body’s path.
Step 5: Finish and Recovery
After contact, allow the weight to flow naturally onto the front foot and into a balanced finish position.A proper finish involves a stable base, a tall spine, and a relaxed, contented finish with the chest facing the target. Finishing on the lead side reduces the chance of energy loss and reinforces consistent timing in future attempts.
Practical Tips and Drills to Master Weight transfer
- Slow-motion tempo practise: Practice the full sequence in slow motion, focusing on feeling the load, transition, and release. Gradually increase speed while maintaining form.
- Foot-pressure awareness: use a simple pressure mat or barefoot practice to sense the shift from back foot to front foot. Aim for a progressive increase in front-foot pressure through impact.
- Balance challenges: Perform single-leg drills on both sides to build stability. A stable base supports efficient weight transfer during quick transitions.
- Hip-first cue: Imagine your hips leading the movement. This helps prevent early arm-centric motion that disrupts timing.
- Wall contact drill: Stand close to a wall with your lead shoulder toward it. As you swing, keep your weight within the base, ensuring you don’t over-extend toward the wall. This teaches compact transfer without losing balance.
- Ground reaction force awareness: Place a light plate or mat under your front foot and monitor how quickly pressure rises at impact. A smooth, progressive rise indicates good transfer.
- Video analysis: Record swings or strokes at home. Slow down the footage to verify the sequence: load on back leg, forward weight transfer, and the moment of impact with the front foot grounded.
Common Mistakes and How to Fix Them
- Staying on the back foot too long: Fix by pausing the backswing earlier and feeling the weight shift forward as you pivot. A subtle forward hinge helps maintain balance without rushing the move.
- Over-rotation without transfer: Avoid turning the torso without moving the hips. Emphasize a coordinated hip rotation that drives weight onto the lead leg.
- Early lateral tilt: Keep the spine neutral. Excess lateral movement disrupts timing and can result in off-center contact.
- Weight over the wrong foot at impact: Practice with a drill that forces weight on the lead foot only at impact, such as a small-step progression from back-foot load to front-foot finish.
- Rushing the transition: Work on tempo and rhythm. A deliberate, audible cue (e.g., a “settle” breath) can help synchronize load, transition, and release.
Case Studies and First-Hand Experiences
Case Study 1: A Golfer’s Path to Consistency
A recreational golfer noticed inconsistent ball strikings and a tendency to pull left. After focusing on weight transfer, the golfer implemented a two-week plan: daily 15-minute weight-transfers drills and slow-motion practice. The result was a more even tempo, less leftward dispersion, and a noticeable increase in tolerance to different clubs and swing thoughts. The key turning point was aligning weight transfer with the moment of impact, ensuring the front foot carried most of the load at contact.
Case Study 2: A Tennis Player’s Forehand Consistency
A competitive tennis player struggled with inconsistency on forehands, especially under pressure. By treating weight transfer as a core mechanic rather than a peripheral element,the player introduced a deliberate load-rotate-release sequence. Foot pressures were monitored with a simple app, and video analysis confirmed a cleaner transfer to the front foot during contact. Over several weeks, the player reported steadier groundstrokes, improved pace control, and reduced arm fatigue on long rallies.
Metrics and Measurement: How to Gauge Weight Transfer Progress
Measuring weight transfer can be as simple or as advanced as you need.Here are practical options for different budgets and settings:
- Video analysis: Record from the side to observe the sequence of load, transfer, and release. Watch for hips leading the move and weight shifting toward the front foot at impact.
- Foot pressure and balance: Use a mobile app with a balance or pressure-tracking feature, or a basic pressure mat to visualize how weight shifts during the stroke.
- Feel-based cues: Rely on kinesthetic feedback—how it feels to load onto the trail leg and then drive forward through impact. Consistent cues help with habit formation.
- Biomechanics feedback (optional): In clinics or with trainers, use simple wearable sensors or motion capture to quantify hip rotation, spine angle, and center of mass movement.
Drills and Quick Reference Table
Below is a concise, wordpress-pleasant drill table to quickly reference during practice sessions. The table uses common WordPress table classes for styling (wp-block-table and widefat).
| drill | Purpose | How to Do |
|---|---|---|
| Step-Back Drill | Feel weight shift to the back foot | Stand with a ball; take a small step back and gently load onto the back foot,then step forward while maintaining balance and feeling energy build in the front leg at impact. |
| Hip-Lead Drill | Promote hip-driven transfer | from a squared stance, initiate movement with the hips first, then allow the torso and arms to follow toward the target. |
| Medicine Ball Toss | Transmits core energy through the kinetic chain | hold a light medicine ball, rotate hips and torso, and release toward a target while transferring weight to the lead foot. |
| Single-Leg Balance to Swing | Build stability for transfer | Balance on the trail leg for 20 seconds, then perform a controlled swing, focusing on keeping weight in the right place at impact. |
| Slow-Mo to Full Speed | Establish timing and rhythm | Practice the sequence in slow motion first, then gradually increase speed while preserving form and transfer mechanics. |
Putting It All Together: A Simple Practice Plan
- Set a baseline by recording a few swings or strokes to observe your current weight transfer pattern.
- Pick 2-3 drills from the table and perform 10–15 minutes of focused practice, 4–5 days a week.
- Incorporate a tempo cue (e.g., inhale before swing, exhale during impact) to synchronize load, transfer, and release.
- track progress weekly with video or a simple note about ball flight consistency and distance stability.
Common Questions About Weight Transfer
- Is weight transfer the same as weight shift?
- Yes, weight transfer is a dynamic, purposeful version of weight shift, specifically tuned to the moment of impact to maximize efficiency and consistency.
- Do I need to shift all my weight to the front foot?
- No. the goal is a fluid transfer where enough weight moves forward to support impact while maintaining balance and control. Over-shifting can cause loss of control or mis-hit.
- Can overweighting the front foot cause injuries?
- Improper, abrupt, or unbalanced transfer can strain the lower back, knees, or ankles. Build transfer gradually with proper warm-up, alignment, and progressive drills.
- How long does it take to master weight transfer?
- timing and consistency improve with deliberate practice. most athletes notice meaningful improvements in 3–8 weeks of consistent, focused drills.
Final Thoughts on Weight Transfer: A Balanced Approach
Weight transfer is the connective tissue that links preparation, power, and precision in ball striking. By understanding the loading, transition, and release phases, you can develop a repeatable, confident swing or stroke. The most effective athletes treat weight transfer not as an afterthought, but as a core skill: a measurable, coachable element that can be improved with structured practice, feedback, and commitment.
Related Concepts to Explore
- Center of mass management and balance control
- Kinetic chain efficiency and energy transfer
- Ground reaction forces and lower-body sequencing
- Tempo, rhythm, and mental cues for better transfer
As you work on weight transfer, remember that small, consistent improvements compound into bigger gains in distance, accuracy, and control.Keep your focus on clean mechanics, honest feedback, and progressive drills, and you’ll build the repeatable ball-striking ability that separates good players from great ones.