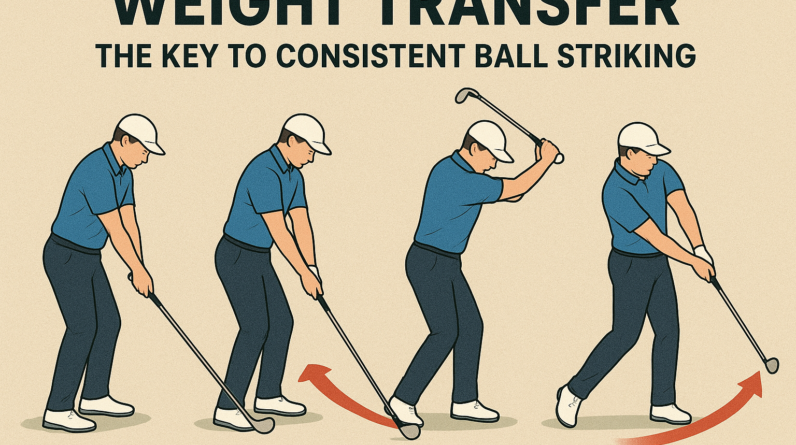

Weight Transfer: The Key to Consistent Ball Striking
A focused guide for beginner to intermediate golfers.
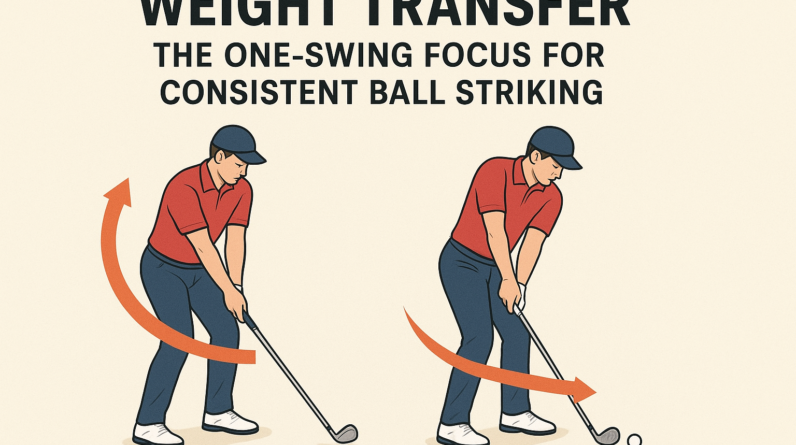
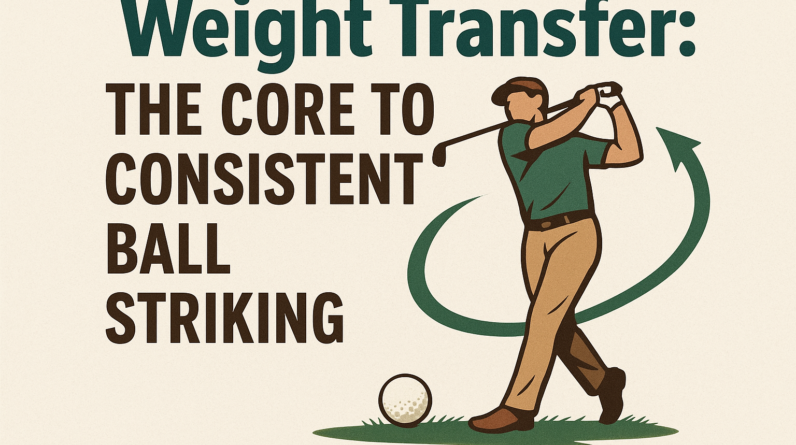
Weight transfer is the deliberate move of your body’s weight from the trail foot to the lead foot
as you swing. When done with control, it helps you strike the ball more consistently and keeps
your momentum toward the target.
What the concept is
- Start with most of your weight over the right foot (for right-handed players) in your setup.
- As you swing down and through the ball, your weight shifts toward the left foot and then into a full finish on the lead side.
- Movement should be gradual, not a big lurch. The goal is a smooth, balanced transfer that aligns with a solid strike.
Why it matters to the golf swing
- Improved contact. A well-timed transfer helps you strike the ball first, then let the body finish, reducing thin or fat shots.
- Better consistency. When your weight moves predictably, your clubface stays square longer and your path stays more on plane.
- More distance control. Proper transfer creates solid compression and helps you control dispersion and flight.
What you should feel when doing it correctly
- At the top of your backswing, you sense load on the trail foot (the right foot for a right-handed player).
- During the downswing, you feel the pressure shift toward the lead foot just as you approach impact.
- You finish with most of your weight on the lead foot, a tall spine, and a stable, balanced posture.
2–3 common mistakes
- Mistake 1: Staying back or “hanging back” on the trail foot into impact, leading to thin or fat shots and loss of power.
- Mistake 2: Excessive lateral sway. The hips slide sideways instead of rotating, so the weight moves but the body stays off its platform.
- Mistake 3: Rushing the transfer. The move to the lead foot happens too early or too abruptly, throwing your swing timing off.
Simple, actionable fixes for each mistake
- Fix for Mistake 1: Build a slow, deliberate transfer. From setup, feel your weight begin to move toward the lead side as you start the downswing, but keep your head centered and your spine angle intact. Practice with no ball to emphasize balance.
- Fix for Mistake 2: Stop swaying. Think “rotate, don’t slide.” Put a small-foam roller or rolled towel under your trail foot’s arch to remind you not to push the foot out and away. Focus on turning the hips toward the target instead of moving the hips sideways.
- Fix for Mistake 3: Pace the transfer like a 1-2-3 rhythm: load on the trail foot (1), begin downswing with a smooth transfer (2), complete weight shift and finish on the lead side (3). Use a metronome or count aloud to keep tempo steady.
One easy practice drill
Step-Through Weight Transfer Drill
- Stand with feet hip-width apart and the club resting lightly across your shoulders (hands behind your neck, elbows down).
- Take a small backswing, feel the load on your trail foot (right foot for a right-hander).
- Slowly swing down and, as you transition into the downswing, step forward with your lead foot into impact position. Your weight should move from the trail foot to the lead foot as you make a gentle contact without rushing.
- Finish tall with most of your weight on the lead foot. Repeat 8–12 times, connecting the feeling of rotation with the weight shift.
Remember, this post focuses on weight transfer as a single, repeatable element of your swing. Keep
the drill smooth and controlled, and you’ll notice more solid contact and better consistency over time.
Weight Transfer: The Key to Consistent Ball Striking (Beginner–Intermediate Guide)
Weight transfer is more than shifting your weight from one foot to another. In golf and other ball-striking sports, it’s the dynamic sequencing of center of gravity, ground reaction forces, and body rotation that determines how cleanly you contact the ball. This beginner–intermediate guide breaks down the concepts, offers practical drills, and shares real-world case insights to help you develop repeatable contact, improved power, and better balance throughout your swing.
Why Weight Transfer Matters
Consistent ball striking relies on a smooth and well-timed transfer of weight from the trail side (right foot for right-handed players) to the lead side (left foot for right-handed players) through impact. Key benefits include:
- Improved contact — clean strikes with less fat or thin shots.
- Increased power — efficient energy transfer from ground up through the kinetic chain.
- Better accuracy — steadier balance reduces wild ball flight.
- Enhanced consistency — repeatable patterns across swings and practice sessions.
- Injury prevention — safer loading and unloading of the hips and spine when weight shifts correctly.
Although “weight transfer” is a simple concept, translating it into a repeatable swing requires understanding timing, posture, and ground reaction forces. The following sections unpack the physics in plain terms and then translate them into actionable steps for beginners and intermediate players.
The Physics of Weight Transfer
Center of gravity and ground reaction forces
During a controlled swing,your body’s center of gravity (CoG) moves from the back foot toward the front foot.This shift drives the ground reaction force (GRF) upward through your legs and hips, helping you generate leverage at impact. A well-timed CoG move aligns your hips, torso, and arms so the clubface meets the ball in a stable, balanced position.
Timing and sequencing
Weight transfer is not a single action but a sequence:
- Set up solidly with even pressure across both feet.
- Feel a light coil into the trail leg during the backswing.
- Transition weight to the lead leg as you rotate toward impact.
- Release weight through impact and into the through-swing,ending with balanced finish.
Inadequate transfer often shows up as early extension, a loss of posture, or over-rotation without forward momentum. The goal is to move weight efficiently while maintaining posture and spine angle.
the Weight Transfer Sequence (beginner–Intermediate)
1) Setup and balanced posture
Begin with a solid athletic stance. Distribute your weight evenly or slightly toward the midfoot. Maintain a slight knee flex and tall spine. This foundation makes the early stage of weight transfer deliberate rather than reactive.
2) Load and coil into the trail leg
During the backswing, feel a gentle loading into the trail foot. The knee on the trail side should point toward the target while the hips rotate modestly. The goal is to create a stored energy that will be released in the downswing, not to slam through the shot.
3) Transition and forward weight shift
As you start the downswing, shift weight from the trail foot to the lead foot.Think of the weight moving from the right heel (for right-handers) toward the left forefoot as you rotate hips toward the ball. This transfer aligns the hips with the target and stabilizes the strike path.
4) Contact and impact
At impact, aim for a momentary balanced moment were the body is stacked over the lead leg. The trail leg should be actively suppressing excessive collapse, while the lead leg accepts the majority of the weight. The result is a solid, centered strike with clean contact.
5) Through-swing and finish
Continue weight transfer through the ball and into the finish. A full, balanced finish with the chest facing the target generally indicates successful weight transfer and timing.
Tip: Use a cadence that suits your tempo. Faster swings demand more precise timing; slower swings reward deliberate weight transfer and stable posture.
Common Mistakes and How to Fix Them
- Mistake: Hanging back on the trail foot after impact.
Fix: Initiate the forward shift earlier in the downswing and feel the trail-to-lead weight transfer begin just after the top of the backswing.
- Mistake: over-rotation without power – twisting upper body without transferring weight.
- Mistake: Rushing the downswing and losing balance.
- Mistake: Lifting the head or drooping the posture during impact.
Fix: synchronize hip rotation with weight shift and keep the lower body connected to the ground through the lead foot.
Fix: Practice tempo and a controlled downswing with a deliberate lead-foot push-off to encourage proper GRF direction.
Fix: Maintain spine angle and keep eyes on the ball; imagine keeping your chest “over the ball” through impact.
These fixes are especially helpful for beginners who tend to rely on arm strength rather than coordinated weight transfer and body rotation. The drills below are designed to reinforce correct sequencing with progressive difficulty.
Drills and Practice Progressions
Drill 1: Heel-Toe Weight Shift (All Levels)
Stand with normal stance. Step 1: Shift weight to the trail heel, then to the lead toe while keeping the hips quiet. Step 2: Add a small shoulder turn as weight transfers. Step 3: Perform half-swings focusing on a smooth transfer.
Drill 2: Step-Through Transfer (Beginner)
Place a chair or alignment stick outside of your trail foot. Take a backswing,then step toward the target with your lead foot while transferring weight forward. This teaches the sensation of moving weight into the lead leg while maintaining balance.
Drill 3: Impact Tape Feedback (All Levels)
Lightly tape the face or use impact stickers to visualize strike location. Focus on making contact slightly forward of center as you transfer weight. Review the impression after 10–15 shots to gauge progress in weight transfer timing.
Drill 4: Banded Ground Connection (Intermediate)
Attach a light resistance band around your hips and anchor the other end behind you.As you swing, let the band encourage a stable base and clear weight transfer to the lead foot through impact.
Drill 5: Turn-and-Shift Drill (Advanced Beginner–Intermediate)
From setup, rotate your hips into the trail side while keeping the weight on the balls of both feet.Then shift weight to the lead foot as you rotate through impact. This drill links hip turn with weight transfer for a more integrated move.
Practical Tips for Every Session
- Secure a stable setup: Start with a balanced stance, light knee flex, and even pressure across both feet.
- Feel vs. see: Use tactile cues like “feel the weight shift through the lead heel” rather than relying solely on visual alignment.
- Progress gradually: Add speed onyl after you can perform the weight transfer cleanly at a slower pace.
- Integrate breath: Inhale on setup, exhale during the transition to help maintain posture and timing.
- Use video analysis: Record slow-motion swings to inspect weight transfer cues,hip rotation,and balance.
- For long-term consistency: Build a warm-up routine that includes balance work and light drills focused on weight shift before you practice full swings.
Bonus cue: “Feel the floor push you forward.” This reminds you to use ground reaction forces rather than purely arm speed to drive the strike.
Case Studies
Case Study 1: Amelia’s Path to Consistency
Amelia started as a beginner with inconsistent contact and a tendency to stall her weight on the trail foot.By focusing on a light load into the trail leg, a deliberate transfer to the lead leg, and a balanced finish, she reported a notable drop in fat shots and improved carry distance within six weeks. The key changes were a steadier stack over the lead leg at impact and a smoother, audible transition cue during the downswing.
Case Study 2: Jordan’s Timed Transfer for Faster Swings
Jordan had moderate speed but suffered from timing issues that caused early knock-down shots. We incorporated a tempo-based drill sequence emphasizing a controlled weight shift timing. After two months, his impact window widened, and his ball-striking consistency improved, particularly on off-center hits. the lesson: timing weight transfer matters as much as the amount of weight moved.
First-Hand Experience: Coaching insights from the Front Line
In coaching beginners, I’ve found that the most reliable way to teach weight transfer is through a sequence of tangible cues and immediate feedback. Early on, players often try to hit the ball with their arms and upper body. When we introduce a ground-based cue—“feel the trail heel loading first, then the lead foot push”—the swing becomes more organized and repeatable.With repeated practice, players begin to anticipate impact and deduce the moment to shift weight without breaking posture. The reward is a smoother arc, better contact, and greater confidence on the range and course.
Metrics to Track During weight Transfer Drills
| drill / Phase | Primary Cue | What to Observe | Common Mistakes | Coachable Fix |
|---|---|---|---|---|
| Setup & Balance | “Balance across both feet” | Even weight distribution, stable spine angle | Early pressure shift, wobble | Re-establish stance, small checks with mirror |
| Trail-Load (Backswing) | “Load into the trail leg” | Gradual knee flex, hip turn | Over-rotation or stiff hips | Slow the backswing, recheck hip path |
| Downswing Transfer | “Shift weight to lead foot” | Lead-side pressure, hips square to target | Rushing or early extension | Pause just prior to impact, breathe, then move |
| Impact & Through | “Body stacked over the lead leg” | Solid contact, balanced finish | Head lift, loss of posture | Finish with chest facing target, hold finish |
| Tempo Integration | “Cadence over power” | Consistent swing speed, repeatable transfer | Speeding up before transfer completes | Practice slower; build to speed gradually |
Quick Reference Cheatsheet
- Start neutral: balanced weight, slight knee flex, and tall spine.
- Feel the trail heel load first, then shift to the lead foot.
- Keep hips rotating toward the target without over-rotating the upper body.
- Maintain a stable spine angle through impact.
- Finish tall and balanced to confirm proper weight transfer.
Remember: Weight transfer is a means to a clean strike, not an end goal by itself. Repetition with correct cues builds reliability over time.
Resources and Further Reading
Explore videos, golf swing analyses, and coaching articles focused on weight transfer, ground forces, and kinetic chain sequencing.Look for content that emphasizes the link between foot pressure, hip rotation, and clubface control to deepen your understanding of how weight transfer drives ball striking.
Recommended practice plan (4-week cycle)
- Week 1: Setup, balance, trail-load drills (no ball, focus on form).
- Week 2: add weight transfer to lead foot in short irons (gentle tempo).
- Week 3: Introduce impact feedback (impact tape) and tempo work.
- Week 4: Combine weight transfer with full-swing drills and on-course submission.