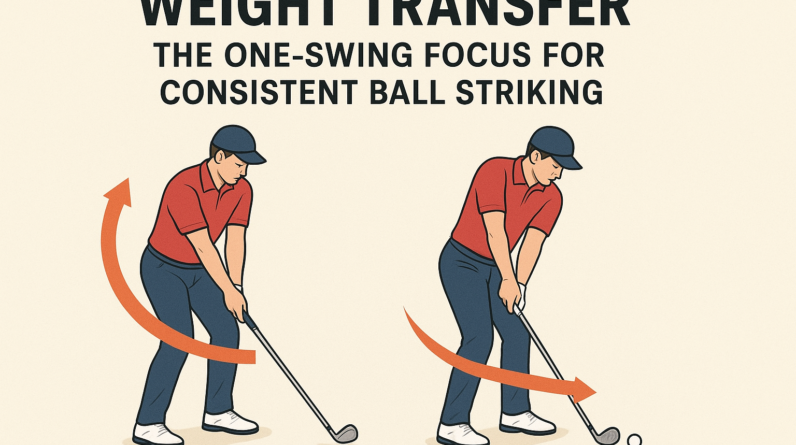
Weight Transfer: The Key to Consistent Ball Striking
As a PGA professional, I focus on one main idea to help beginners and intermediates hit more solid shots: weight transfer. It’s not about how hard you swing or how fancy your grip looks. It’s about moving your body mass smoothly from your trail side to your lead side so the clubhead can meet the ball in the right spot with the right path.
What the concept is
Weight transfer is the deliberate shift of your center of gravity from the back foot toward the front foot as you move through the swing. At setup most players load a bit into the trail foot; as you start the downswing, your weight travels toward the lead foot and into the ball. A good transfer helps the club reach the correct position at impact and encourages a consistent arc and contact.
Why it matters
- Better contact: When weight is on the lead foot at impact, the bottom of the swing arc stays consistent, helping you strike the ball and the ground in a repeatable way.
- More solid contact: Proper transfer reduces fat or thin shots by stabilizing your spine angle and posture.
- Consistent ball flight: A smooth transfer promotes steadier clubhead speed through the ball and a reliable path.
What you should feel when it’s working
- Backswing feel: A gentle loading into the trail foot, with the body rotating rather than sliding sideways.
- Transition feel: Your hips start to turn toward the target while your weight begins to move toward the lead foot.
- Impact feel: Most of your weight is already on the lead foot, with the chest and pelvis stacked over the front leg. You should feel balanced and in control, not leaning toward the ball or tipping forward.
2–3 common mistakes and fixes
- Mistake 1: Swaying or sliding the hips toward the target instead of turning.
Fix:- Rotate your hips around your spine, not your hips sliding sideways. Think of turning your belt buckle toward the target rather than “sliding your hips.”
- Practice a wall drill: stand with your back against a wall, feet shoulder-width apart, and rotate to about 45–60 degrees without your head losing contact with the wall. This reinforces turning over sliding.
- Mistake 2: Early or excessive weight shift to the lead foot during the backswing.
Fix:- Pause briefly at the top of the backswing to feel the weight stay roughly mid-plant, then smoothly move into the downswing.
- Use a 1–2 count during the transition: feel the weight shift first to the trail leg, then steadily to the lead leg as you strike the ball.
- Mistake 3: Finishing with the weight too far forward or losing balance after impact.
Fix:- Finish with a balanced, athletic pose: chest facing the target, weight predominantly on the lead foot, and a quiet trail knee.
- Keep your posture tall and proud through the finish—don’t crash forward. A quick mirror check or video can help you confirm you’re not collapsing onto the front foot.
A simple drill you can do at home or on the range
Drill: The Step-Through Weight Shift Drill
- Stand with feet shoulder-width apart, knees lightly bent, club resting across your shoulders (hands on the club ends).
- Take a small backswing and feel the weight stay primarily on the trail foot while you rotate your upper body. Do not let the head move forward.
- At the transition, smoothly shift your weight toward the lead foot and, as you swing down, take a small step with the lead foot toward the target. Your weight should move onto the lead foot as you strike the ball.
- Finish with a balanced pose, chest square to the target and weight on the lead foot.
Practice this with half-swings first, then progress to full swings as the feel becomes natural. The goal is a calm, controlled transfer rather than a big, aggressive move.
Note: For most right-handed players, think of transferring about 60–70% of your weight to the lead foot at impact. Use the drill to ingrain a smooth, athletic transfer that supports consistent contact and solid ball flight.
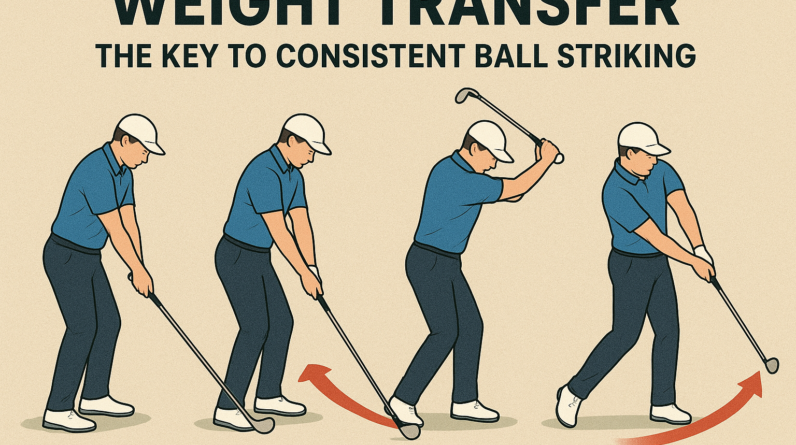
Weight Transfer in the Golf Swing: The Key to Consistent Ball Striking
Understanding Weight Transfer in the Golf Swing
Weight transfer, often described as a deliberate shift of load from the trail side to the lead side during the swing, is a basic engine behind consistent ball striking. It’s not just about “pushing off the back foot” or “hitting with the front foot.” Rather,it’s a coordinated sequencing of the entire body—hips,spine,chest,arms,hands,and even the feet—that allows you to compress the ball cleanly,maintain posture,and deliver the clubface to the ball with the right angle and speed.
At address, most golfers aim for a balanced, athletic setup—roughly equal weight between the feet and a stable spine angle. As the club moves into the backswing, the weight begins to load onto the trail foot (the foot away from the target). In the downswing, the hips initiate the shift back toward the lead side, the torso rotates through impact, and much of the load transfers to the lead foot. By the time you reach impact, a solid weight transfer helps you maintain a steady spine angle, control shaft lean, and deliver a crisp strike.
it’s meaningful to distinguish weight transfer from uncontrolled weight shifting or sliding. A compensated weight transfer is intentional, gradual, and well-timed; it creates a stable engine for the downswing. An excessive, uncontrolled shift or a late transfer can cause mishits, loss of control over trajectory, and inconsistent ball speed.
Why Weight Transfer Matters for Consistency
The way you shift your weight influences several critical aspects of ball striking:
- Solid contact: Proper transfer helps you strike the lower half of the ball consistently, controlling the bottom of the arc and reducing fat or thin shots.
- Distance control: Efficient energy transfer from the ground up translates into more consistent ball speed and yardage with each club.
- ball flight: Timely weight shift helps you maintain an optimal spine angle,reduces face closure or open-outcome mishits,and supports more predictable draw/fade patterns as intended.
- Swing direction and sequencing: A clear transfer sequence (back to front) minimizes lateral sway and promotes cleaner, more athletic rotations.
The phases of Weight transfer in the Golf Swing
understanding the phases helps you train the correct sensations:
Phase 1: Address and Setup
- stand in a balanced athletic posture with slight knee flex and relaxed shoulders.
- Distribute your weight roughly 50/50 between the feet, with the spine angled slightly forward from the hips.
- Keep the head steady, eyes on the ball, and the clubface square to your target line.
Phase 2: backswing Weight Loading
- Allow the weight to load onto the trailing foot (the back foot during a right-handed swing) as you rotate your lead shoulder under your armpit.
- Maintain a steady spine angle and avoid excessive lateral movement.
- Feel the left heel (for a right-handed swing) or right heel for a left-handed swing lightly anchored, but not flat-footed, to preserve balance.
Phase 3: transition and Downswing
- Initiate the downswing with a controlled hip rotation toward the target,sequencing from the ground up.
- As the hips rotate, the weight shifts toward the lead foot, and the chest and arms follow with proper lag and compression through the ball.
- Keep the head steady and the spine angle stable to maintain a solid strike plane.
Phase 4: Impact
- Maximum weight transfer should be felt on the lead side just as the clubface meets the ball.
- Promote a slightly forward shaft lean at impact to compress the ball into the turf and achieve solid contact.
- Release the hands through the ball while maintaining a stable lower body to avoid flipping or over-rotating.
Phase 5: Follow-Through
- Continue the rotation so that weight finishes on the lead foot with a balanced finish position.
- Hold the finish long enough to verify you’ve controlled the balance and recovered athletic posture.
Common Faults and How to Fix Them
Even small deviations in weight transfer can lead to inconsistent results. Here are frequent faults, their causes, and practical fixes.
Fault 1: Early weight transfer (excessive weight on the front foot before impact)
Fault 2: Excessive lateral sway without rotation
Fault 3: Reverse weight shift (too much weight on the lead foot early)
Fault 4: Floating head and loss of spine angle
Drills to Train Proper Weight Transfer
Drills are the fastest route to internalizing the correct feel of weight transfer. Start with slow-motion, focus on sequencing, then progressively add speed and resistance.
Drill 1: The Weighted-Shift Drill (with alignment sticks)
Set up two alignment sticks on the ground: one along your target line and another perpendicular to your stance near your toes. Start with a half-swing and focus on transferring weight from the trail foot to the lead foot during the downswing, keeping the trail foot light and the body rotating toward the target.
Drill 2: Step-Through Drill
After contact, take a small, deliberate step toward the target with your trail foot, then finish. This creates a tangible cue for transferring weight forward and through impact, reinforcing proper sequencing.
Drill 3: Medicine Ball Rotation
Stand with feet shoulder-width apart and hold a light medicine ball at chest height. rotate your torso as you woudl in a swing, then step into a small forward lunge and rotate through to reflect weight transfer. This drill improves core rotation and transfer mechanics without needing a full swing.
Drill 4: Wall-Drive Drill
Stand close to a wall with your leading hip just barely touching it. Perform swings while maintaining contact with the wall as you rotate. The wall acts as a guide to prevent excessive lateral sway and reinforces weight transfer through the core.
drill 5: squat-to-Impact Drill
Start in a light squat position with the club resting across your shoulders. Initiate the swing by turning your hips toward the target, then rise slightly to a balanced finish. This drill emphasizes maintaining posture while the weight shifts forward.
Drills at a Glance: Quick Reference
| Drill | What It Trains | How to perform |
|---|---|---|
| Weighted-Shift Drill | Lead leg loading, balance | Two sticks along lines; half-swings focusing on downswing weight shift |
| Step-Through Drill | sequential weight transfer | Hit and step toward target with lead foot |
| Medicine Ball Rotation | Core rotation, weight transfer | Rotate, then step forward with controlled transfer |
| Wall-Drive Drill | Posture, non-sway transfer | Swings with wall contact to limit lateral movement |
| Squat-to-Impact Drill | Posture, transfer through impact | Squat back; rotate hips and finish balanced |
Practical Tips for On-Course Application
- Feel the ground first: Before you swing, imagine pressing into the ground with your feet. A grounded start makes the weight transfer more controllable.
- Use cues you can trust: Phrases like “hips first,hands second” or “rotate through impact” help keep your sequencing on track.
- Keep the trail knee slightly flexed: This supports energy storage in the hips and helps prevent early forward weight shift.
- Balance before speed: Focus on a balanced finish position before trying to swing harder or faster.
- Video feedback: Record a few swings from down the line and face-on. Compare your weight transfer timing with the drills above and adjust gradually.
Case Studies and First-Hand Experience
Case Study 1: Amateur Golfer Rebuilds Contact with Proper Weight Transfer
An amateur golfer struggled with inconsistent ball striking, producing a mix of fat and thin shots. After integrating a structured weight-transfer routine—emphasizing hip initiation in the downswing and a deliberate transfer to the lead foot during impact—the golfer reported:
- Improved contact consistency across all clubs
- A more predictable ball flight with reduced dispersion
- Feedback from a teaching pro indicating improved sequencing and balance
Case Study 2: Mid-Handicap Player Reduces Slices Through Balanced Weight Transfer
A right-handed player with a slice relied on excessive forearm release and poor sequencing. By focusing on maintaining a stable spine angle while transferring weight from the trail foot to the lead foot, the player saw:
- A reduction in left-to-right dispersion
- More consistent draw/fade control, depending on club selection
- enhanced overall balance through impact and into the follow-through
FAQ: Weight Transfer and the Golf Swing
Q: Can you train weight transfer without a full swing?
A: Yes. Drills like the weighted-shift drill and wall-drive drill help cue the correct sequencing without requiring the full speed of a swing.
Q: Should my weight shift be the same for every club?
A: The general principle remains the same, but heavier clubs typically require more intentional weight transfer to generate solid contact and consistent impact. Adjustments come with practice and personal biomechanics.
Q: How long does it take to see improvements in weight transfer?
A: Many golfers notice improvements within a few practice sessions when drills are executed with mindful focus on sequencing and balance. Consistency comes with regular practice, video feedback, and often professional guidance.
Bottom-Line Cues to Remember
- Wind up with a balanced, athletic setup, then allow the weight to load onto the trail leg in the backswing.
- Initiate the downswing with hip rotation, not by forcing the arms or tossing the wrists.
- Shift weight toward the lead foot through impact while maintaining spine angle and steady head position.
- Finish in balance with the weight on the lead foot and a controlled, extended finish.
Pro tip: Treat weight transfer as the engine of your swing. When you improve transfer sequencing, you’re more likely to see improvements in contact, distance control, and ball flight consistency across the bag.