
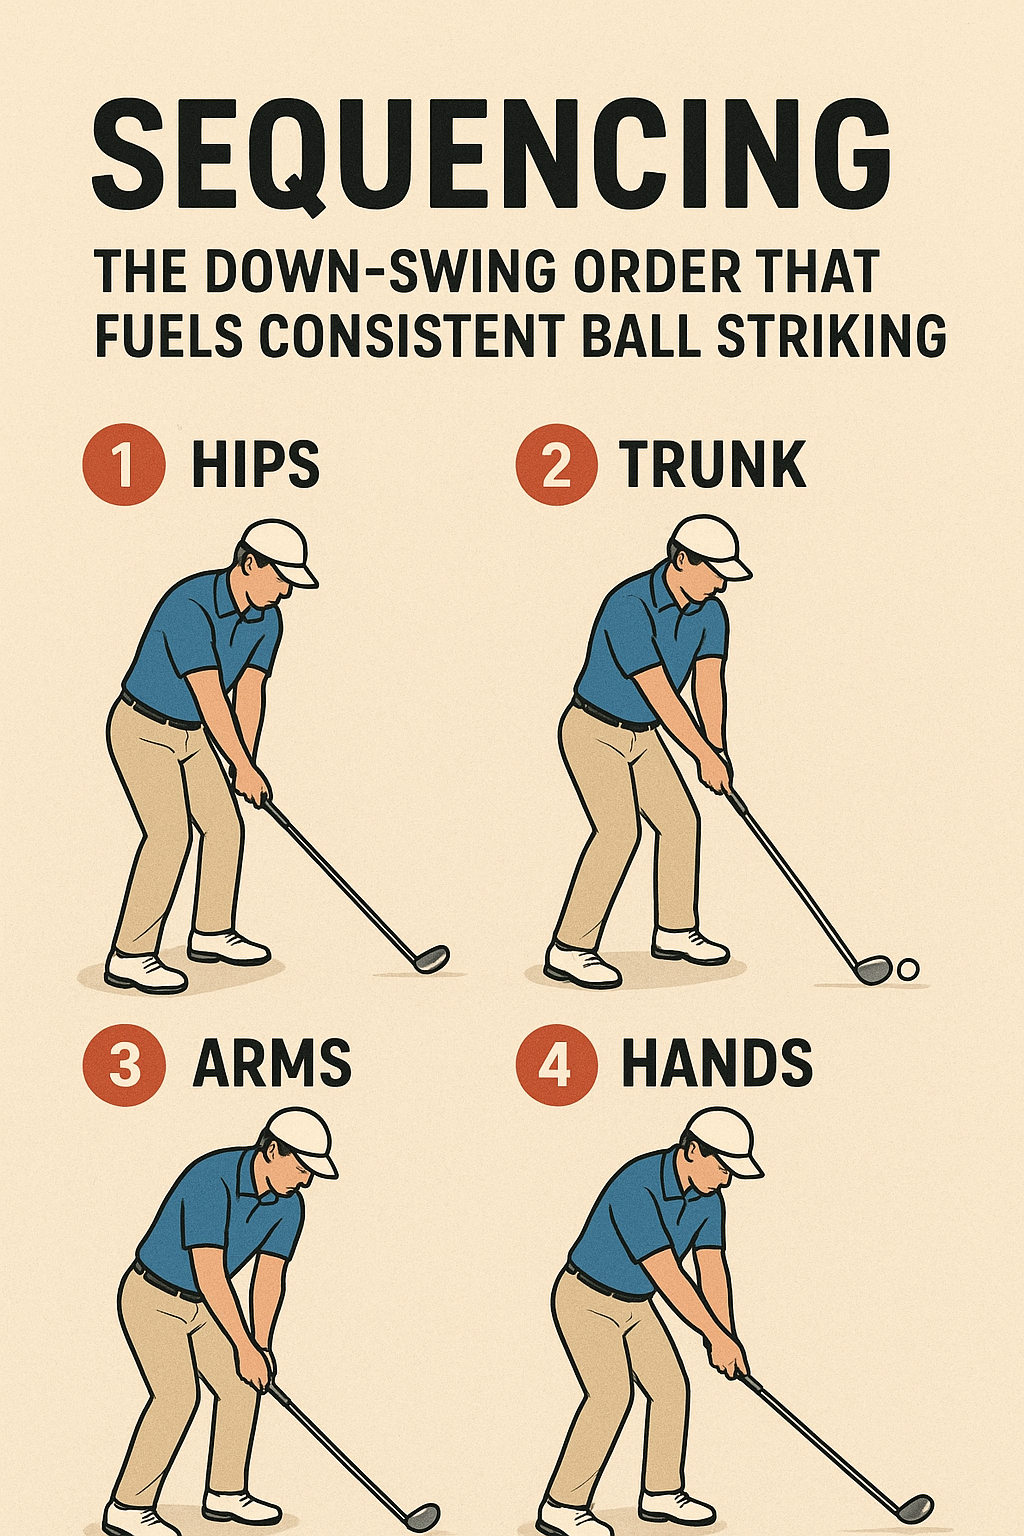
Sequencing: The Down-Swing Order That Fuels Consistent Ball Striking
In simple terms, sequencing is the order in which your body parts and the club move from the top of the backswing to impact. The goal is to start from the ground up: the hips initiate the downswing, the torso rotates, the arms and hands release last, and the clubface squares at the moment of contact. When this order stays intact, you’ll feel smoother timing and cleaner strikes.
What the concept is
Sequencing means a predictable rhythm: legs and hips move first, then the chest and shoulders, and finally the arms and hands catch up to release the club into the ball. This is not about forcing a big swing—it’s about letting energy transfer efficiently from ground to ball. Proper sequencing helps you compress the ball consistently, control direction, and maintain a steady swing arc.
Why it matters to the golf swing
- Creates solid contact by aligning the clubface with a stable body path at impact.
- Increases distance control through efficient energy transfer from the ground up.
- Reduces tension and timing errors, helping you hit more consistent shots with less guesswork.
What you should feel when doing it correctly
- Your weight shifts gently from the trail foot toward the lead foot as you start the downswing.
- Your hips rotate before your upper body, and your chest unwinds toward the target while your arms stay connected to your torso.
- Your hands lag slightly behind the shoulders, allowing the club to square up naturally as you approach impact.
2–3 common mistakes with fixes
Mistake 1: Arms outrun the body
Hips and torso don’t lead the downswing; the hands fire early and the club gets on-plane too late.
Fix:
- Focus on a hips-first start to the downswing. Cue yourself with “hips then hands.”
- Keep the chest quiet and let the arms follow the torso’s rotation. Think about your belt buckle aiming at the target first.
- Use a slow-motion drill (no ball) to reinforce the sequence, then add a ball as you tempo-match the feel.
Mistake 2: Weight stays on the back foot into impact
That reverse weight shift robs you of speed and solid contact, producing thin or fat shots.
Fix:
- Feel a progressive weight transfer to the lead foot as you rotate down. A good cue is “toes-to-lead, then into the ball.”
- Maintain a slight knee flex and keep your center of gravity over the lead leg through impact.
- Practice with a drill partner or mirror to verify you’re not hanging back or sliding excessively.
Mistake 3: Excess lateral sway or loss of spine angle
Backing away from the target or collapsing your spine disrupts the timing and path, making consistent contact hard.
Fix:
- Keep a stable spine angle by rotating the hips, not sliding the hips laterally. Think “rotate, don’t shift.”
- Use a wall drill: stand with your backside lightly touching a wall and swing. Your head should stay near the wall while your hips rotate and your arms work in sequence.
One easy practice drill you can do at home or on the range
Hip-First Slow-Motion Downswing Drill
- Stop at the top of your backswing (no ball). Take a two-count to feel the position and calm your tempo.
- Begin the downswing by rotating your hips toward the target first. Let your chest and shoulders follow in succession; keep your arms passive and connected to the torso.
- Feel the weight shift from the trail foot to the lead foot as you rotate, and maintain a quiet head position as you approach impact.
- Finish with a balanced pose, chest facing the target and hips fully rotated toward the target.
- Repeat slowly for 6–8 reps, then add a ball at half-speed and gradually build to full pace while maintaining the sequence.
Consistency starts with a clear, repeatable order. By letting the lower body lead, keeping the torso connected, and allowing the arms to follow in sequence, you’ll feel more control, better contact, and cleaner ball flights. If you’d like, I can tailor the drill to your current swing and help you track your progress with video feedback.
Sequencing: The Down-Swing Order That Fuels Consistent Ball Striking
In golf, consistency is built on the reliability of the sequence that moves your body toward impact. The down-swing order—frequently enough referred to as the downswing sequencing—determines how energy transfers from the ground through your body and into the club. When the sequence is clean and repeatable, ball contact becomes more solid, shots fly straighter, and distance control improves.This article breaks down the down-swing order, explains why hip-shoulder sequencing matters, highlights common faults, and offers practical drills to ingrain the proper pattern.
What is Downswing Sequencing?
Downswing sequencing is the dynamic order in which body segments activate to deliver the club into an optimal impact position. Think of it as a kinetic chain: ground reaction forces start from the feet, flow up through the hips and torso, then through the arms and hands, finally unleashing the clubface at the moment of impact. When sequencing is correct, each segment releases energy in a controlled sequence, maximizing clubhead speed at the precise angle of attack for consistent ball striking.
Key Principles of the Down-Swing Sequence
- Ground to target initiation: Energy begins with the ground. A stable, grounded setup allows the hips to rotate first without swaying, creating a solid foundation for the downswing.
- Hip rotation precedes shoulder turn: The hips initiate the sequence, creating centrifugal force that powers the torso and arms. If the hips are late or restricted, the upper body overcompensates and the path may become inconsistent.
- Pelvis and lower body led the club: Proper sequencing sends the club on an shallow, inside-to-out path, which promotes a square or slightly closed clubface at impact for most players with a mid-to-long iron or a mid- to high-ball flight in woods.
- Shoulder and arm connection follows: After the pelvis leads, the shoulders rotate, followed by the arms and hands. Delays or rushing can disrupt timing and lead to issues like slicing, hooking, or pushed balls.
- Wrist release and impact position: A stable release of the wrists just before impact ensures the clubface meets the ball squarely. Excessive hand manipulation can destroy the sequencing and produce inconsistent results.
- Maintained spine angle and posture: keeping posture through the downswing helps maintain a repeatable arc and reduces over-the-top movements that ruin contact.
Hip-Shoulder Sequencing
Hip-shoulder sequencing is a cornerstone of consistent ball striking. The ideal pattern typically looks like this: hips rotate first, followed by torso rotation, then arms. When this flow is smooth, the clubing action is generated by the body’s big muscles first, with the arms and wrists adding precision near impact. This reduces tension in the hands and forearms, helping the clubface reach square at impact more naturally.
Common Faults and How to Fix Them
- Over-rotating the hips too early: This can collapse the upper body and cause a steep downswing. Fix: Practice a slow, deliberate hip initiation with a towel under the arms to maintain connection and prevent early hip spin.
- Too much upper-body timing (hands racing the hips): Leads to an outside-to-in path. Fix: Use a downward-target drill with alignment sticks to feel the hips initiating before the arms.
- Reverse sequencing (arms leading): Results in inconsistent contact. Fix: Pause the downswing briefly at the top of the backswing, then feel the hips drive into the downswing.
- sway or loss of spine angle: Reduces sequencing efficiency.Fix: Practice with a mirror or camera to ensure your upper body stays behind the lower body until impact.
- Early forward shaft lean or casting the club: A symptom of late release. Fix: Implement a pause drill, then reintroduce a smooth release with controlled wrist hinge.
Benefits of a Proper downswing Order
- Increased consistency: A repeatable sequence minimizes compensations and improves contact consistency shot-to-shot.
- Improved power transfer: The kinetic chain generates more clubhead speed without sacrificing control.
- Better swing path: Proper sequencing helps keep the club on a more inside-to-out path for most golfers, reducing hooks and slices.
- Enhanced impact position: A stable sequence fosters a square, solid impact, resulting in better ball flight and distance control.
- Lower tension: When the body operates in logical order, players swing with less arm-only effort, reducing fatigue during rounds.
Practical Drills to Train the sequence
Drill 1: The 3-Point Pause
Purpose: Teaches the feel of hip-led initiation before the arms engage. How to do:
- Take your usual address position with a mid-iron.
- slowly take the club back to the top, pause for 1–2 seconds, then start the downswing by turning the hips toward the target.
- Continue the swing smoothly,focusing on feeling the hips drive the motion before the shoulders.
- Repeat in sets of 8–12 to ingrain the sequencing without rushing.
Drill 2: Towel Under Arm Connection
Purpose: Maintains connection and prevents early upper-body movement. How to do:
- Place a folded towel under both armpits to keep a connected arc.
- From address, practice slow-motion swings, emphasizing hip initiation and a connected downswing.
- Gradually increase speed while maintaining connection and proper sequencing.
Drill 3: Inside-Out Path Drill with Alignment Rods
Purpose: Promotes an inside-to-out path that aligns with ideal sequencing. How to do:
- Place two alignment rods on the ground: one along your target line and another offset to guide the swing path.
- hit half-swings focusing on keeping the club on the inside path during the downswing, with the hips initiating first.
- Progress to full swings as the pattern becomes more automatic.
Drill 4: Slow-Motion Release with Impact bag
Purpose: Encourages a proper wrist release and solid impact position. How to do:
- Set an impact bag or towel in front of your stance. Take a slow backswing,pause,and then execute a controlled release into the bag.
- Feel the wrists releasing near impact while the hips and torso remain in sequence.
- Repeat with a light to moderate swing tempo to build consistent timing.
Case Studies: Sequencing in Action
Case Study A: Mid-Handicap Golfer Gains Predictable Contact
A 14-handicap player reported inconsistent ball striking with a tendency to push shots. After focusing on hip-led sequencing and implementing the pause drill, thier impact consistently improved, resulting in a more centered ball and fewer mis-hits. over eight weeks, their fairways hit rate increased by 12% and their greens-in-regulation percentage improved as a byproduct of improved strike consistency.
Case Study B: Transition from Over-Handling to Body-Driven Swing
A player who relied on arm speed found their shots fluttering and inconsistently slicing. By emphasizing hip initiation and the 3-Point Pause, they learned to trust the lower body to start the downswing. Within a few practice sessions,their path shifted to a more square impact and their dispersion narrowed noticeably.
First-Hand experience: What Real Golfers Say
“Learning to let my hips start the downswing felt awkward at first, but once I did, my timing felt more natural. The ball started to fly more consistently and I wasn’t fighting the club through impact.”
“The towel drill helped me stay connected. I realized my upper body was getting ahead of my hips, which caused a lot of sweeps. Reestablishing the sequence changed my contact for the better.”
“Drills that emphasize the sequence are not about forcing a perfect swing; they’re about building a dependable pattern. When I stick to the sequence,I see real improvement on the course.”
Visual Guide: Understanding the Down-Swing Sequence
To help you visualize the sequence, here’s a succinct guide you can carry to the range. Focus on the order and timing, not just speed.
- Phase 1: Setup — Stable posture, feet shoulder-width apart, weight centered.
- Phase 2: Backswing — Arms and club load while hips rotate away from the target.
- Phase 3: Transition — Hip initiation begins the downswing; torso begins to unwind in response.
- Phase 4: Downswing — Hips drive, torso follows, arms and hands deliver the club on the correct path.
- Phase 5: Impact — Clubface square, minimal compensations, maintain spine angle.
- Phase 6: Release — Controlled wrist release, followed by a balanced finish.
Table: Downswing Sequencing Checklist
| Phase | Key Move | Common Fault | Drill to Reinforce |
|---|---|---|---|
| Phase 1: Setup | Stable posture, grounded feet | —Neutral stance drill | |
| Phase 2: Backswing | Arms load while hips rotate away | Sways or spins | 3-Point Pause |
| Phase 3: Transition | Hips initiate downswing | Arms rush first | Towel Under Arm |
| Phase 4: Downswing | Hips -> Torso -> Arms | Outside-in path | Inside-Out path Drill |
| Phase 5: Impact | Square clubface, solid contact | Early release or hands ahead | Impact Bag release |
| Phase 6: Finish | Balanced finish | Loss of posture | Posture hold |
Common Questions About Downswing Sequencing
Is sequencing the same for all clubs?
Core principles—hip-led initiation, then torso, then arms—are generally global, but the exact timing and path can vary with club type and individual biomechanics. Longer clubs might emphasize a slightly later release, while shorter irons often benefit from a crisper sequence to control height and spin.
Can you fix sequencing without a coach?
Yes. Start with self-assessment using slow-motion drills and a mirror, then implement targeted drills like the 3-Point Pause and towel-under-arm technique.Video feedback or a session with a coach can accelerate progress,but consistent practice with the right drills can yield solid improvement over time.
How long dose it take to see results?
Most golfers notice a change in contact and dispersion within a few practice sessions, especially after integrating a structured drills routine. For some, it may take 4–8 weeks to feel habitual and see meaningful on-course gains.
putting It All Together: A Simple Practice Plan
- Warm up with light movement to activate the hips and core.
- Work on the 3-Point Pause for 15 minutes, focusing on hip initiation before the shoulders.
- Incorporate the towel-under-arm drill to maintain connection for 10 minutes.
- Practice the Inside-Out Path Drill with alignment rods for 15 minutes, gradually increasing tempo as the path remains consistent.
- Finish with the impact bag release drill to reinforce the correct impact position for 10 minutes.
What to Remember About Sequencing and Consistency
- Consistency comes from repeatable patterns. The downswing order should feel natural, not forced.
- Energy transfer begins at the ground. If the foundation is unstable, the entire sequence can crumble.
- Small, focused drills beat long, unfocused practice.Work on one or two sequencing cues at a time.
- Martial-arts-like timing isn’t the goal; fluid, coordinated motion is.Let the body’s big muscles do the heavy lifting and the hands provide precision.