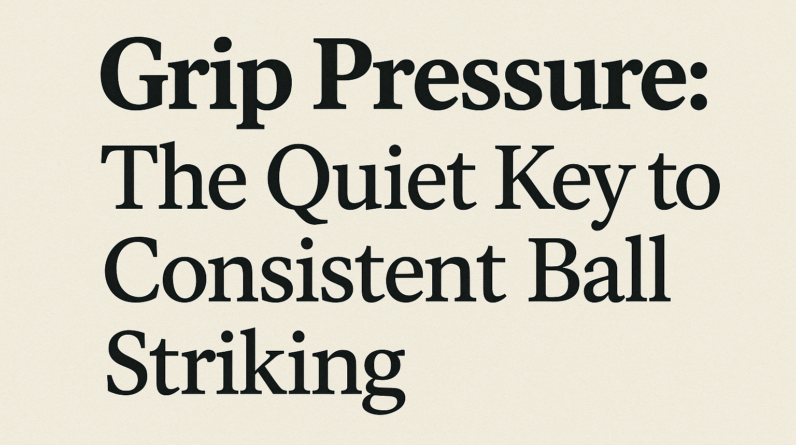
Weight Transfer: The Engine Behind Consistent Ball Striking
As a PGA professional, I see this one idea unlock a lot of consistency: the way you move your weight from the trail foot to the lead foot through impact. Weight transfer is not a dramatic move; it’s a smooth, connected sequence that helps you compress the ball and keep the clubface on the correct path.
What the concept is
Weight transfer is the deliberate shift of your balance from the back (trail) leg toward the front (lead) leg as you swing. At address you start with a comfortable, balanced setup. During the backswing your weight stays relatively centered. As you start the downswing, you progressively load onto the lead foot, peaking at impact, and finish with most of your weight on the lead foot. For right-handed players, think of moving your weight from the right side toward the left, finishing with your chest facing the target and your weight mostly on the lead foot.
Why it matters to the golf swing
- Improved contact: a forward-shifted center of gravity helps the clubhead strike the ball before the ground, reducing fat or thin shots.
- Better compression: transferring weight into the lead leg at impact helps you square the clubface to the ball and compress it against the clubface.
- More consistent ball flight: proper sequencing of weight transfer helps your path stay stable, which supports predictable draws or fades rather than wild twists in the swing.
What you should feel when doing it correctly
- In the transition from backswing to downswing, you feel a gentle “load” into the lead foot—your right heel lightens and your left foot begins to press more into the ground.
- Hip rotation leads the way: your hips rotate toward the target as your weight moves forward.
- At impact, most of your weight sits on the lead foot, with a balanced, athletic finish where your chest faces the target and your back foot is light or just coming off the ground.
2–3 common mistakes and how to fix them
- Mistake 1: Staying back on the trail leg too long
What it looks like: The head seems to move away from the target and you “hit uphill” into the ball, often producing fat or thin shots.
Fix: Feel a steady, controlled shift toward the lead foot starting just as you reach transition. Practice with a softer knee bend on the trail leg and a deliberate, but not forced, push into the lead foot through impact. - Mistake 2: Swaying instead of turning
What it looks like: Your hips slide laterally, and your weight traces a straight line to the left instead of rotating.
Fix: Drive the lower body with a good hip turn. Keep your left knee slightly flexed and your head still over the middle of your stance as you rotate toward the target. A mirror or video can help you see if you’re sliding rather than turning. - Mistake 3: Rushing the transfer or transferring too early
What it looks like: The club gets steep or you lose lag; you “fall” onto the front foot before the club head reaches the ball.
Fix: Tempo your transition. Practice slow, deliberate weight shift in slow-motion half-swings, then add speed only after you can reproduce the feeling of transferring weight smoothly to the lead foot at impact.
One easy drill you can do at home or on the range
The Step-Through Weight-Shift Drill
- Stand tall with feet together and a light grip pressure, ball position as you normally use for your club.
- Take a small backswing, then begin the downswing and step forward with your lead foot (left foot for right-handed players) into a normal stance as you strike the imaginary ball.
- Finish with your chest facing the target and most of your weight on the lead foot. Do 8–12 reps, focusing on a smooth transfer rather than big moves.
- Gradually add a real ball and perform at a comfortable tempo. If you don’t have a net, use a foam ball or practice on the carpet to keep the tempo controlled.
Tip: keep the drill lightweight. The goal is a natural, repeatable weight shift, not a dramatic lunge. Use a mirror or quick video check to ensure you’re rotating and transferring weight rather than leaning or swaying.
By focusing on how your weight shifts through impact, you’ll develop more solid contact and a more reliable ball flight. Start with small, controlled movements, and let the transfer become a steady part of your everyday practice.
Weight Transfer: The Engine Behind Consistent Ball Striking
Weight Transfer: The Engine Behind Consistent Ball Striking
Why weight transfer matters for ball striking
In any ball-striking sport, from golf to baseball to tennis, the way your body shifts weight during the swing is the engine that drives power, precision, and consistency. proper weight transfer helps generate clubhead speed or bat speed, maintains balance through contact, and minimizes off-center hits. When the center of gravity moves smoothly from the ground up through the kinetic chain, you deliver clean, repeatable impact cues that translate into more consistent ball flight.
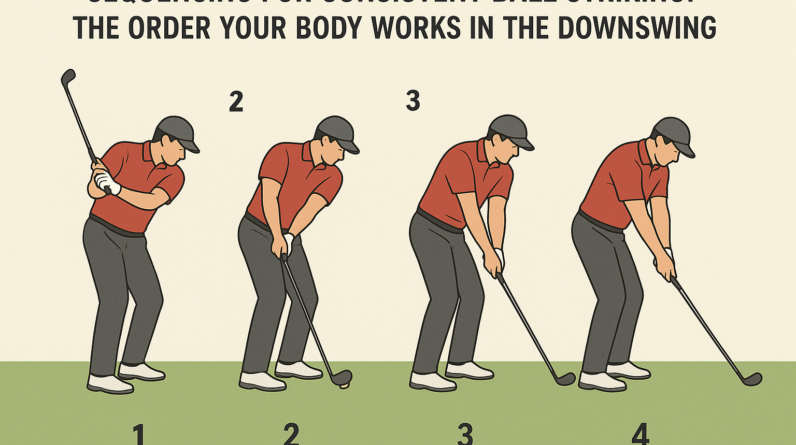
The kinetic chain: from feet to fingertips
Weight transfer is not a single action but a coordinated sequence. The most effective transfers begin with the feet and ankles, progress through the hips, engage the core, and culminate in the arms delivering the club or bat to the target. A well-timed transfer stores energy in the legs and torso and releases it through a stable axis into the ball.
Ground reaction forces drive the initial shift. A slight forward pressure into the midfoot during the backswing sets up a smooth transition into the downswing. - Kinetic sequencing: The hips begin the turn, followed by the torso and shoulders, then the arms and hands. This chain creates dynamic acceleration and improves contact quality.
A solid core maintains trunk control and prevents early release or wobble at impact. - Upper body connection: Efficient weight transfer keeps the arms connected to the torso, reducing deceleration and mis-hits.
Benefits and practical tips for consistent weight transfer
- Increased contact quality: When weight is properly transferred, the sweet spot is more often struck, resulting in straighter shots and better distance control.
- Improved balance under pressure: A well-timed weight shift helps you stay balanced through varying lies and speeds of incoming balls.
- Power without overuse: Efficient transfer yields speed without sacrificing control, reducing the risk of over-rotation or early extension.
- Consistency across shots: Reproducible pressure patterns enable more predictable ball flight and scoring opportunities.
Practical cues to reinforce healthy weight transfer include feeling the trail foot pushing into the ground, maintaining a slight knee flex in the front leg, and keeping the chest centered over the midline of your stance as you rotate through impact.
How to train weight transfer: drills and cues
Below are progressive drills that help players feel and reproduce effective weight transfer. Start with the simplest drill and advance as your awareness and control improve.
| Drill | primary Focus | Cue | How to Practice |
|---|---|---|---|
| Foot-Wedge Drill | Ground reaction forces | Push into the ground with the trail foot | Place a small wedge under the trail foot. From address, swing normally and feel the trail foot pushing into the wedge to initiate weight transfer. |
| Step-Through Drill | sequential leg-to-arm transfer | Step and rotate | Make a half-swing and step through toward the target, finishing with weight over the lead foot. Repeat slowly, then increase tempo. |
| Impact Alignment Drill | Centering weight at impact | Midfoot contact | Use a mirror or video; practice hitting into a centroid line while keeping weight centered over the midfoot at impact. |
| Clock Drill | rotation sequencing | Use a clock-face setup | From feet to hips to shoulders to hands, rotate through a series of positions (12 o’clock, 3 o’clock, 6 o’clock) while maintaining balance. |
Pro tip: perform drills with a slow tempo first, then gradually increase speed as you maintain form. Recording video can help you verify that weight shifts occur in the intended order and that the head stays relatively still through impact.
Common faults and fixes
- Early excessive forward lean: Fix by maintaining a stacked spine angle and rotating hips first rather than over-bending at the waist.
- back knee collapse on the trail side: Strengthen a stable trail-side leg with posterior chain exercises; cue: “push into the ground, hips stay level.”
- Heel lift or toe-heavy weight shift: Practice with a soft-knee stance and purposeful weight transfer to the midfoot-to-heel region during the downswing.
- Loss of balance after contact: Build core stability and balance drills (single-leg support) to keep the center of gravity steady during follow-through.
Sports-specific considerations
While weight transfer concepts are universal, the exact timing and emphasis vary by sport.
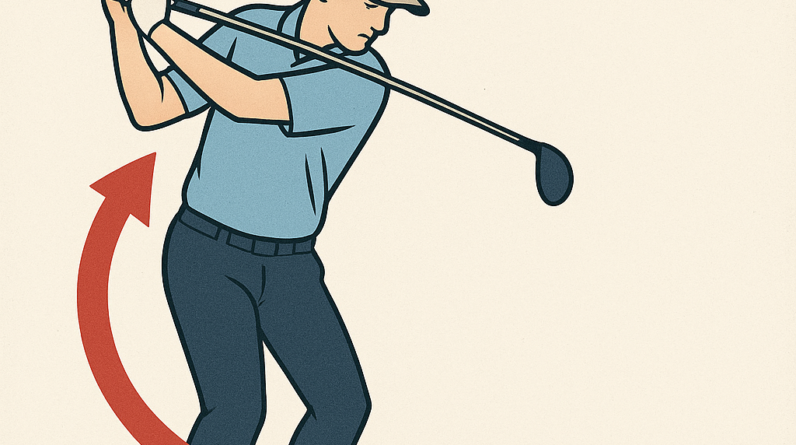
- Golf: The transition from backswing to downswing should feel like loading a spring—you load with the trail leg and release through the lead leg into impact.
- Tennis: Weight shifts diagonally across the court; a stable base allows faster racket acceleration without losing balance.
- Baseball/Softball: The weight shift accelerates the bat through the zone; cues emphasize a clear hip turn and core engagement before arm extension.
Case studies: weight transfer in action
Case 1: A recreational golfer with inconsistent ball striking implemented a four-week drill plan focused on foot-wedge and impact alignment drills. After four weeks,average carry distance improved by 8–12 yards with a higher percentage of centered strikes.
Case 2: A tennis player with a flat forehand noticed fatigue and balance loss late in matches.By incorporating clock-drill sequencing and a core-stability routine, the player reported better accuracy on cross-court shots and fewer uncomfortable post-match aches.
First-hand experience: how weight transfer changed my swing
I started focusing on weight transfer after noticing that my shots started to drift toward the hosel and lose power toward the end of the round. By practicing the Step-Through Drill and tracking weight through the midfoot at impact, I felt a more consistent rotation and a cleaner contact point. Within a couple of weeks, I observed not only better accuracy but also reduced stress in the lower back, likely from maintaining a more efficient, biomechanically sound transfer of energy rather than fighting gravity with extra arm effort.
Putting it into practice: a practical wrap-up
- Always start with a stable stance and a balanced posture. A solid base is the foundation for controlled weight transfer.
- Keep the center of gravity moving in a smooth arc from the ground upward, not in abrupt shifts that disrupt timing.
- Integrate drills into warm-ups to engrain the sequencing into your natural swing.
- Use video feedback or a mirror to confirm that contact occurs with weight centered and sequenced properly.
FAQ: Weight transfer and ball striking
- What is the most critically important part of weight transfer for ball striking?
- The initial weight shift from the trail foot into the downswing and the subsequent rotation of the hips set up the path for efficient energy transfer into the ball.
- How can I tell if my weight transfer is correct?
- Look for solid contact, centered ball flight, and a consistent low-to-high path through impact. Video can reveal whether your weight is moving sequentially from feet to hips to torso.
- How long does it take to improve weight transfer?
- Most players notice meaningful improvements within 3–6 weeks of consistent practice, especially when drills are performed with intent and proper cues.