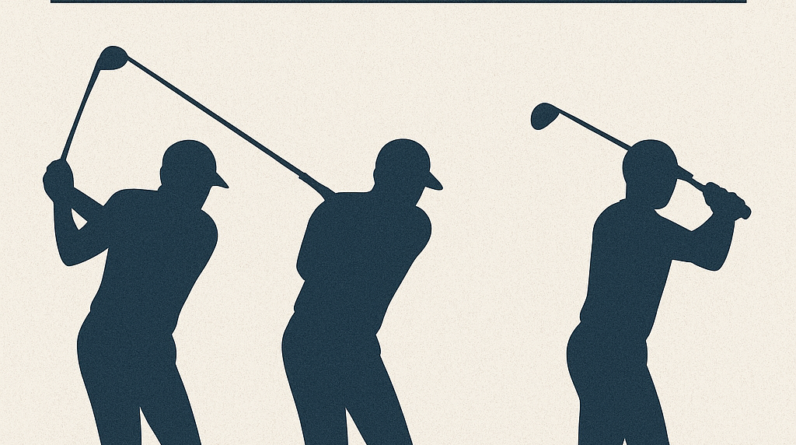

Weight Transfer: The Core to Consistent Ball Striking
In this post we’ll focus on a single, powerful concept: weight transfer. Think of it as the motor behind a solid contact and good distance. When you understand and feel it, your shots tend to be straighter, crisper, and more repeatable.
What the concept is
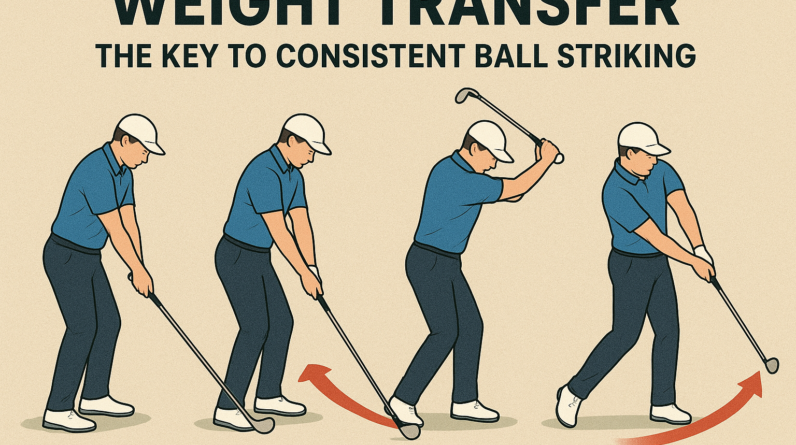
- Weight transfer means moving your center of gravity from the back foot to the front foot during the swing, especially from the downswing through impact.
- It’s not just “pushing forward.” It’s a coordinated shift that happens as your hips rotate and your chest stays over the ball long enough to compress the clubface with solid contact.
- Good weight transfer helps you maintain your spine angle and balance, which keeps the club on the correct path and the face square at impact.
Why it matters to the golf swing
- Solid contact: When your weight is properly transferred, you’re more likely to strike the ball in the center of the face, producing better distance and accuracy.
- Consistent contact: A stable base reduces fat shots (hitting the ground first) and thin shots (missing the ball low). It also helps you avoid twisting or flipping the wrists late in the swing.
- Distance control: Efficient transfer lets you maximize energy transfer from body to club, helping you hit more consistent distances with each club.
What you should feel when doing it correctly
- Back foot loading: In the backswing, you should feel most of your weight on the inside of the back foot, with the heel-ish area connected to the ground.
- Downgrade toward the front foot: As you start the downswing, you should feel a gradual shift of pressure toward the lead foot, not a violent lunge forward.
- Impact balance: At impact, most of your weight should be on the lead foot, with a slight knee flex and your chest aligned over or slightly inside the lead foot. You finish tall and balanced, not falling forward.
2–3 common mistakes and simple fixes
- Mistake 1: Reverse weight shift — staying on the back foot too long and losing forward balance.
- Fix: Feel a steady, gradual shift starting as you begin the downswing. Practice with slow, half-swings that pause at impact with most of the weight on the lead foot. Cue: “finish with my chest over the front leg.”
- Mistake 2: Early, abrupt weight transfer causing loss of lag and balance.
- Fix: Maintain your spine angle and smooth the transfer. Use a small mirror or a quiet practice drill to ensure your hips rotate first, then your weight follows. Cue: “hips first, then step into it.”
- Mistake 3: Weight ends up on the toes or slides too far forward, tipping you off balance.
- Fix: Keep weight on the midfoot of the lead foot at impact and stay connected through the ball. Practice with a simple rhythm drill: 3 slow reps, checking that your trail foot releases pressure smoothly without lifting off the ground prematurely.
One easy drill you can do at home or on the range
Step-Through Weight Transfer Drill
- Set up in a normal address stance with a short iron or wedge. Stand with feet shoulder-width apart and knees lightly bent.
- Take a half backswing, loading your weight onto the inside of your back foot.
- Start the downswing and, as you strike the ball, take a small step toward the target with your lead foot. The step should be controlled and deliberate, not a jump.
- Finish with most of your weight on the lead foot, hips rotated toward the target, chest over the lead leg, and a balanced finish.
- Repeat 8–12 reps, focusing on a smooth, coordinated transfer rather than speed.
Tips for the drill:
- Move slowly at first to feel the transfer. As you improve, you can speed up, but never at the expense of balance.
- Watch for two cues: “hips rotate first” and “weight finishes on the front foot.”
- Use a mirror or video yourself to confirm you’re not leveling out or falling forward too early.
By honing weight transfer, you give your body a reliable engine for every club in the bag. Keep the focus narrow, practice with intention, and your ball striking will become more repeatable and confident.
Weight Transfer: The Core to Consistent Ball Striking
Understanding Weight Transfer in golf
Weight transfer refers to the controlled movement of your body’s center of gravity from one side of your stance to the other during the swing. In golf and other ball-striking disciplines, this shift is the engine behind clubhead speed, ball contact quality, and consistency. Effective weight transfer optimizes ground reaction forces, preserves swing path, and reduces compensations that lead to mis-hits.
In practical terms,proficient players learn to sequence their weight so that energy generated from the ground travels efficiently into the clubhead at impact. When you shift your weight properly,you maintain balance thru the swing,preserve spine angle,and deliver the clubface square to the ball at the precise moment of contact. That combination translates into solid contact, better distance control, and more consistent ball striking across different clubs and shot shapes.
Biomechanically, weight transfer involves several interacting factors: how the hips rotate, how the knees flex and extend, the role of the trail leg as a load bearer, and the timing of the push-off into the lead leg. While some players naturally calibrate this well, most benefit from deliberate practise to reinforce the correct sequencing and reduce overthinking during the swing.
Why Weight Transfer matters for Consistency
- Center of gravity control: A deliberate transfer keeps the body’s center of gravity over a stable base, reducing wobble at impact.
- Strike quality: Proper weight placement helps compress the ball and keep the clubface square through impact.
- Power without compensations: Ground reaction forces translate into clubhead speed without requiring excessive body movement.
- Path fidelity: A consistent weight shift supports a repeatable swing plane and reduces slices or hooks caused by slipping weight.
- Injury prevention: Balanced loading reduces stress on the lower back and knees while maintaining posture.
think of weight transfer as a musical beat you ride during the swing. When you stay in tempo with the transfer—loading, transitioning, and releasing—you create a smoother, more reliable strike. Conversely, abrupt or mistimed shifts disrupt timing, leading to inconsistent contact and directional errors.
Key Phases of Weight Transfer
Address and Setup
At setup, most players maintain a balanced stance with roughly equal pressure between the big toe and heel of each foot. A subtle bias toward the middle of the stance is common, but the goal is to keep the spine erect, allow a slight knee flex, and maintain steady breathing. The clubface alignment and grip determine how the weight will respond as you begin the swing.
Takeaway and Transition
During the takeaway, the body loads slightly into the trail leg — the right leg for right-handed players — as the arms and torso coil. The lower body stores potential energy like a spring. The critical cue is to avoid early progression toward the lead side; instead,let the hips slowly turn,maintaining width and ensuring the trail knee remains flexed and alive to the ground.
As you approach the top of the backswing, the transition cues become essential: initiate the downswing with a deliberate shift toward the lead leg while the hips start rotating toward the target. A smooth transition fosters a powerful, on-plane strike rather than a descending, compensatory move.
Downswing and Impact
Impact is the moment where weight transfer is most visible. Ideally, a notable portion of your body weight sits on the lead leg (the front foot for a right-handed golfer) at impact. The trail foot should still be connected to the ground, but with reduced pressure, allowing the hips to drive the torso through the shot. Proper sequencing reduces the tendency to “flip” the wrists or throw the arms at the ball, both of which degrade contact and distance.
Follow-Through and Recovery
After impact, the weight continues toward the lead side as you finish with a balanced, athletic posture.The only time weight returns markedly to the trail foot is during practice drills that emphasize tempo; in a solid swing, the lead foot is the primary anchor through the finish. A controlled finish reinforces the learning of transfer timing and builds confidence in shot-making across clubs.
Drills to Train Weight Transfer
Use these drills to feel the correct sequencing, build consistency, and transfer this awareness from the range to on-course situations.
Step Drill
- Take your normal stance, place a chair or small box outside your trail foot line.
- Take your takeaway while keeping pressure toward the trail foot, then step forward with your lead foot into the ball line as you strike.
- Feel the push from the trail leg into the lead leg through impact.
Pump-Action Drill
- With a light ball or no ball, swing at a slow pace and pause at impact to feel weight on the lead foot.
- Repeat with increasing speed, maintaining balance and spine angle.
- Progress to hitting real shots with controlled tempo.
Seated-Torque Drill
- Sit on a chair, hold a club across your shoulders. Rotate hips while keeping your chest tall.
- Feel how weight shifts toward the lead side when hips rotate toward the target.
- Stand and replicate the feeling with an athletic setup.
split-Stance Weight Transfer
- Position feet a couple of inches apart and staggered. Begin with balanced weight.
- Slowly transfer weight to the lead side, then re-center.Repeat, focusing on stable contact.
Hint: The best drills feel natural and emphasize control over raw speed.Quality over quantity builds a reliable transfer pattern that travels with you on the course.
Common Mistakes and How to Fix Them
- Over-rotation without transfer: The hips turn, but the weight stays back, causing early forward lean and heavy shots. Fix: cue yourself to “feel the load into the trail foot” before the hips finish turning.
- Early extension: The spine straightens too soon, blocking an efficient transfer path. Fix: practice keeping spine angle by stacking the chest over the ball and feeling a slight tilt into the lead side at impact.
- Reverse weight shift: Landing on the trail foot at impact reduces clubhead speed. Fix: swing with a touch of pressure on the lead foot during impact and rehearse with slow-motion tempos.
- Head lift off the target line: Lifting the head or eyes can disrupt timing and transfer. Fix: keep eyes down and focus on a point a few inches inside the ball’s target line through impact.
Integrate cues that suit your body type. For some players, thinking “drive into the lead foot” works best; for others, “feel the trail knee bend and then release” is more effective. Consistency comes from finding the cues that solidify the transfer without overthinking the mechanics.
Benefits of Proper Weight Transfer
- Increased distance and accuracy: A clean transfer maximizes energy transfer to the ball with reduced mishits.
- Improved ball compression: Shifting weight correctly helps the clubface meet the ball on the intended path, increasing launch consistency.
- Enhanced balance under pressure: Proper sequencing stabilizes the swing during challenging lies and course conditions.
- Better spin control: weight transfer influences spin axis and curve, enabling more consistent shot shaping.
Case Studies: Real-World Impact
A small set of case studies illustrates how focused weight-transfer work translates into measurable improvements. Each case highlights the before/after tendencies and the drills that delivered results.
| Case | Key Issue | Intervention | Outcome |
|---|---|---|---|
| Case 1 | Inconsistent contact; frequent heel hits | Step Drill and Split-Stance Drill | Contact improved; closer to centerline on 8 of 10 swings |
| case 2 | Pulls to the left with long irons | Downswing sequencing cue and trail-knee feedback | better ball flight; reduced leftward bias |
| Case 3 | Low impact speed and weak release | Pump-Action Drill + tempo training | Increased carry distance; improved tempo control |
“Weight transfer is less about brute force and more about timed, efficient loading that guides the club into the ball.”
First-Hand Experience: Coach’s Notes on Feel and feedback
As a coach, I’ve watched hundreds of players improve consistency by dialing in weight transfer. The most compelling progress comes from athletes who learn to sense when their weight is too far back or when the trail knee stops actively flexing. A simple,repeatable cue—“load then lead; lead with the hips,then the hands”—helps players correlate feel with the science of ground reaction forces. Using slow-motion video during drills lets players see the exact moment weight shifts. This visual feedback reinforces neural pathways and leads to durable improvements in ball striking.
In practice sessions, I like to segment swings into four phases: setup, load, transition, and release. Focusing on the transfer at transition — the moment you shift pressure from trail to lead while the hips rotate — yields the most noticeable gains in both accuracy and distance. Real-world benefits include tighter dispersion, more solid iron contact, and a more predictable ball flight with drivers, woods, and wedges alike.
Visual Aids,Cues,and Practical Tips
- Ground feel: During practice,imagine your weight rolling across the sole from the back foot to the front foot as you swing.
- Heel-to-toe awareness: Focus on keeping pressure over the lead foot at impact to maximize contact quality.
- Hip-first sequencing: Let the hips lead the downswing, with the arms following to meet the ball at the correct angle.
- Breathing and tempo: Controlled exhalation helps maintain spine angle and balance during the transfer.
Note
If you’d like,save this article as a speedy reference: weight transfer is the core of consistent ball striking. Practice the drills, adopt the cues that fit your body, and track your progress with a simple dashboard (distance, dispersion, and contact quality). Each small enhancement compounds into higher long-term performance.
Practice Plan Snippet
use this 4-week plan to embed weight transfer into your swing with measurable goals.
- Weeks 1-2: Drills 1–2 times per week; focus on balance and trail-to-lead weight shifts.
- Weeks 3-4: Introduce speed with control; measure contact quality and dispersion on a few shots per practice block.