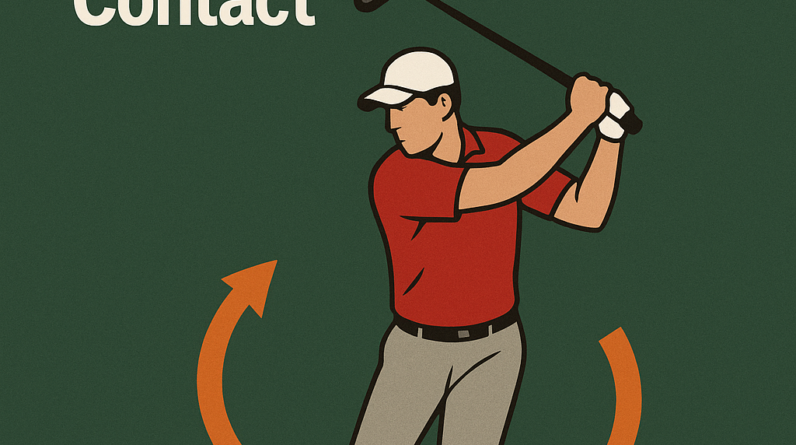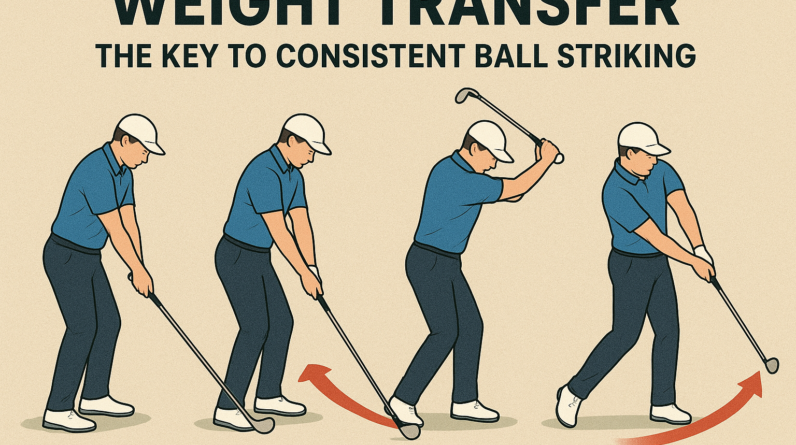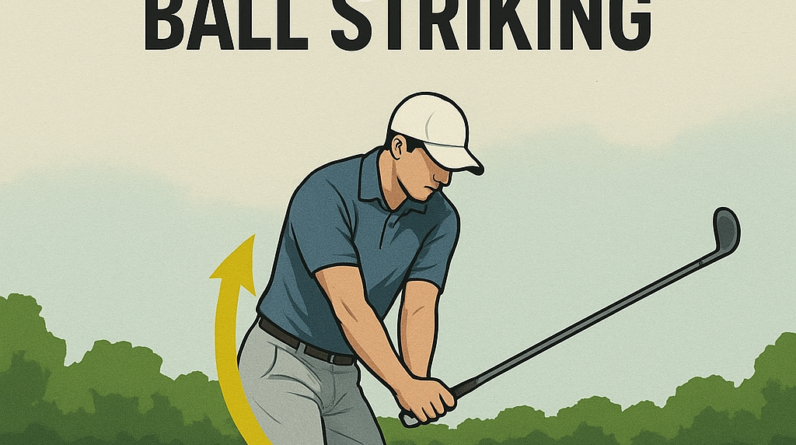

Weight Transfer: The One-Swing Focus for Consistent Ball Striking
Today we’re zooming in on a single, powerful idea that threads through every good strike: weight transfer. In simple terms, it’s how your body shifts weight from the trail foot to the lead foot during the downswing and through impact. When done well, this shift helps the clubface stay square, the swing stays on plane, and contact becomes solid more often.
What the concept is
Weight transfer is a controlled movement of your center of gravity from the back foot (the right foot for a right-handed golfer) toward the front foot (the left foot). It isn’t a head-first lunge or a big slide; it’s a balanced, rotating motion that happens as you move from the top of the swing into impact and beyond. Think of it as a gentle, coordinated shift rather than a tilt or a slide. When you finish, most of your weight should be on the lead foot with your hips rotated toward the target.
Why it matters to the golf swing
- Clubs stay on plane longer. A solid transfer helps the club remain on the correct path into the ball.
- Face control improves. Proper weight shift helps you keep the clubface square at impact, reducing major flips or hooks/slices.
- Consistent contact. Shifting weight through the strike promotes clean contact and solid compression.
- Balance and sequencing. Weight transfer reinforces the sequence: hips rotate, torso unwinds, arms drop, hands release, all while maintaining posture.
What you should feel when doing it correctly
- You feel your trail heel lightening as you start the downswing and your lead foot beginning to bear more weight.
- Your hips rotate toward the target, and your chest squarely faces the target by impact.
- You finish with most of your weight on the lead foot and a stable spine angle.
- Despite the shift, you maintain balance and a steady head position relative to the ball.
2–3 common mistakes and fixes
- Mistake 1: Early or excessive weight transfer onto the front foot before impact.
Fix: Allow the weight shift to occur naturally as you rotate hips and shoulders. Focus on keeping the upper body quiet while the lower body initiates the move. Practice with slower, controlled tempo to feel the sequence—hips first, then torso, then arms. - Mistake 2: Lateral slide rather than rotation.
Fix: Think turn, not slide. You should feel your lead hip rotate toward the target while your spine stays centered. Use a slight, deliberate turn of the belly button toward the target during the downswing. - Mistake 3: Weight staying on the back foot at impact.
Fix: Imagine brushing the inside of your trail foot along the ground as you switch weight forward. A quick check is to pause at impact with a 1–2 count and then finish with your weight on the lead foot.
One easy drill you can do at home or on the range
:
Set up with a normal golf stance. Take a half-swing, focusing on rotating your hips and chest toward the target while your weight shifts from the trail foot to the lead foot. After impact, take a small step forward with your trail foot to complete the transfer and finish balanced on the lead foot. Repeat 8–12 times, keeping the movement smooth and controlled.:
If you don’t have room to step, perform the same motion in place and use a mirror or a video phone to check that your weight appears to be shifting forward and your hips are rotating rather than sliding.
Tip: this focus works in tandem with a good tempo. Try practicing with a relaxed, even tempo (roughly a 3-to-1 swing ratio: backswing longer than downswing) so the weight shift has time to occur smoothly.
Remember, weight transfer isn’t about jumping into a new position; it’s about a coordinated derailment of the old pattern: turn the hips, let the torso unwind, and let the weight flow forward through the strike. With patience and consistent practice, you’ll feel more solid contact and greater distance control, shot after shot.
Weight Transfer: The One-Swing Focus for Consistent Ball Striking
Weight Transfer Basics: What it is and why it matters
Weight transfer in a golf swing is the deliberate movement of your centre of gravity from the
trail foot (the right foot for right-handed players) toward the lead foot (the left foot) as you
swing through impact.When executed well, this transfer creates a stable, efficient kinetic chain that
connects ground reaction forces to clubhead speed, resulting in solid contact and more consistent ball flight.
The core idea is simple: use the ground as a source of energy, not just your arms and wrists. if you
stall the weight or shift too early/late, you disrupt the sequencing, often producing thin shots, fat shots,
or pulled/sliced trajectories. A well-timed weight shift helps you deliver the club on the desired plane with
rhythm and control.
- Back foot loading: A healthy amount of pressure on the trail foot at address and into the backswing stores energy.
- Transition to lead foot: The weight moves toward the front foot as hips rotate and the body centers to the target.
- Through-impact stability: maintaining a balanced center of gravity past impact supports solid contact and exit velocity.
Pro tip: Think of weight transfer as a smooth arc rather than a click-click move. The best players feel a continuous, connected flow from backswing to follow-through.
The One-Swing Focus: Core idea for consistency
The one-swing focus reframes weight transfer as a single, coherent sequence rather than a collection of separate
micro-motions. From setup to impact, your body should shift weight in a single, fluid motion that keeps the
center of mass moving toward the target while preserving posture and spine angle.
- Consistency over complexity: Keeping the transfer within one streamlined action reduces timing errors.
- Swing plane harmony: A well-timed weight shift helps the club stay on plane relative to your body arc, improving strike quality.
- Tempo and rhythm: A smooth transfer supports a repeatable tempo, making it easier to repeat the same shot with similar results.
how weight transfer affects ball striking, contact, and distance
when weight transfer is clear and centered, you’ll notice immediate benefits in ball striking quality. The lead
arm stays soft, the clubface stays square to the intended path, and the ball launches with a more predictable
trajectory. Conversely, poor weight transfer tends to disrupt timing, alter face angle at impact, and degrade
consistency.
- Contact quality: A well-timed weight shift promotes clean, centered strikes (toe and center hits become minimized).
- Direction control: The transfer path is closely tied to your swing path; better transfer aligns to your intended target line.
- Distance consistency: You convert stored ground reaction force into clubhead speed more reliably when the sequence is smooth.
- Spin management: Proper weight transfer helps produce predictable spin rates, aiding control on approaches and drives.
The Movement Sequence: From Setup to Impact
Setup and groundwork
Start with a balanced address: feet shoulder-width apart, slight knee flex, and a posture that keeps the spine
neutral.In this stage, cultivate a subtle connection to the ground—feel the pressure on the heels or the mid-foot
of the trail leg, depending on your stance. The goal is readiness to coil and load without collapsing the posture.
Load: loading the trail side without collapsing the posture
In the backswing, you load weight onto the trail leg, creating a stored energy that will be released during the transition.
The hips rotate and the torso turns to slight coiling. Avoid excessive lateral shift or early reverse weight. A quiet, controlled
load sets the stage for the one-swing transfer.
Transition: the prime moment for one-swing transfer
as you shift from backswing to downswing, the hips rotate toward the target and the weight moves toward the lead foot.
The transition should feel like a smooth surge rather than a hard crumble. The trail knee flexes naturally as you
maintain balance and spine angle, letting the center of gravity move along a consistent path.
Impact and through-swing: finishing with a stable, forward pressure
At impact, most of your weight should be on the lead foot, with the trail foot beginning to reduce pressure as
you extend through the ball. Post-impact, the weight continues to settle toward the lead side as you rotate open and
complete the follow-through. The finish should look balanced, with chest facing the target and weight evenly distributed.
drills and Practice Protocols: mastering the one-swing weight transfer
Practical drills help you feel the transfer and ingrain the sequence. Start slow to build awareness, then increase tempo
as your body learns the pattern. Focus on a single, continuous transfer rather than creating multiple deliberate shifts.
Drill 1: Trail-to-Lead Weight Feel (Mirror or Video feedback)
Stand in front of a mirror or use a simple video setup. From setup, practice a smooth load onto the trail foot,
then transition weight toward the lead foot through impact.Keep the head relatively quiet and allow the hips to rotate
naturally.Stop the drill at impact to check whether the weight is starting to move toward the lead foot in a single, fluid arc.
Drill 2: Step-through Drill for Sequencing
With a narrow stance, take a backswing and then step toward the target on the downswing, allowing weight to move forward
as you step. The goal is to feel a continuous weight shift through impact, not a momentary shift followed by a stall.
This drill reinforces sequencing and helps prevent losing balance during the transition.
Drill 3: 3-Second Load and Unload (Tempo Drill)
Pause briefly at the top of the backswing and then execute a smooth, three-second load-and-unload toward impact. The emphasis
is on maintaining posture and a stable spine angle while transitioning weight. Repeat with incremental tempo improvements until the
transfer feels seamless.
Drill 4: Impact Bag Weight Transfer (Low-Impact Synthesis)
Place a light impact bag or foam pad just inside the lead heel line. As you swing,try to make the bag feel a slight impulse as your
weight transfers forward. The goal is contact with the bag aligned with the lead side, reinforcing the sensation of forward transfer
through impact while keeping the body in balance.
Tools, Cues, and Tech Aids to support the one-swing approach
A mix of physical cues and simple feedback tools can accelerate learning. Use a combination of:
- Video analysis or smartphone slow-motion to verify weight shift timing and path
- Mirror practice to feel the transfer in real time
- Ground-force balance checks or a bathroom-scale test to sense weight distribution during steps
- Metronome or tempo app to lock in consistent swing tempo
Quick cues you can try on the range: “Feel the trail foot loading, then ride the weight forward” or “Lead-first, then finish.” The exact words aren’t as critically important as the sensation of a steady,single transfer arc.
Common Mistakes and fixes for the Weight-Transfer Pattern
- Mistake: Early weight shift away from the trail foot before start of the downswing.
- Fix: focus on maintaining a quiet trail leg until rotation and transition begin. use drills that emphasize a single, continuous shift toward impact.
- Mistake: Lateral tilt or sway, causing inconsistent contact.
- Fix: Practice with a tall spine but soft knees; imagine keeping the upper body stacked over the center of gravity while the hips rotate smoothly.
- Mistake: Over-rotation without proper weight transfer, creating hook or push shots.
- Fix: Coordinate hip rotation with a proportional transfer to the lead side; slow down the backswing a touch if needed to regain rhythm.
- Mistake: Floating head during impact, losing connection with the ground forces.
- Fix: maintain a stable head position through impact by keeping the gaze steady and the spine angle intact.
Case Studies and First-Hand Experiences
Case Study 1: Weekend Golfer Builds Consistency with a Single Transfer Arc
A weekend golfer reported inconsistent contact, with shots often thinning or fatting. After adopting the one-swing weight-transfer focus,
they implemented the Trail-to-Lead Weight Feel drill and tempo practice. over eight weeks, their dispersion narrowed by approximately 15%, and
their average shot-to-shot contact improved thanks to a more repeatable transfer sequence.
Case Study 2: Short-Game Application Leads to Better Approach Control
A mid-iron player experimented with a controlled downswing transfer that emphasized forward weight movement. With targeted drills and
feedback, they achieved more consistent contact on mid-range shots, and their approach accuracy improved due to more predictable ball flight.
First-Hand Experience: A Coach’s Outlook
As a coach, I’ve seen players gain reliability when weight transfer is treated as a single, guided action rather than a sequence of minor moves.
The most noticeable difference is the adaptability under pressure: when shot selection demands a quick change in target, players who master the
one-swing transfer still maintain solid contact and balance, which translates into fewer double-crossed misses on crowded tee boxes.
Benefits of the One-Swing Weight Transfer and Practical Tips
- Benefits: Improved contact consistency, better distance control, more predictable dispersion, reduced swing fault sensitivity, and lower injury risk from over-rotation or abrupt weight shifts.
- Tip 1: Start with a slower tempo and deliberate weight shift; speed up only after the feel is comfortable and repeatable.
- Tip 2: Use cues that resonate with you—“load, then forward transfer” works for many, but personalize the language to reinforce the sensation.
- Tip 3: Integrate the one-swing focus into your pre-shot routine so it becomes automatic under pressure.
- Tip 4: Combine drills with on-course practice to transfer the pattern from the range to the course conditions.
Drills at a Glance: Quick Reference
Use this at the range to select a drill that matches your current focus.All drills emphasize a single, smooth weight transfer arc.
| Drill | Focus | How to Perform | Tempo/Duration |
|---|---|---|---|
| Trail-to-Lead Feel | Feel weight move from trail to lead through impact | Use mirror or video; load trail, rotate hips, transfer forward | 2–3 minutes per set, 3 sets |
| Step-through Sequencing | Downswing sequencing and balance on transfer | Swing and plant lead foot forward during transition; complete with balanced finish | 6–8 reps per set, 3 sets |
| 3-Second Load/Unload | Smooth tempo and timing | Top of backswing pause, 3-second load, 3-second unload | 6–10 cycles |
| Impact bag Feedback | Correct contact and forward weight pressure | Light bag near lead foot; feel forward impulse through impact | 4–5 sets of 8 shots |
Frequently Asked Questions
Q: Do I need to shift all my weight to the lead foot during impact?
A: Not necessarily. The goal is a controlled, forward transfer that maintains balance and supports solid contact. Over-tightening weight on the lead foot can cause stiffness and mis-hit shots. Find a comfortable balance that suits your swing tempo and body type.
Q: How long does it take to see results?
A: Most players notice improvements in 3–6 weeks with consistent drills and focused practice. Some learners observe faster gains when they couple drills with video feedback and a clear cue system.
Q: Is weight transfer different for drivers vs irons?
A: The principle remains the same, but the amount of weight held on the trail foot and the speed of transfer can vary with club length and swing path. Practicing the one-swing focus across clubs helps you adapt to these nuances without losing rhythm.
Takeaway: Master the one-swing transfer for lasting consistency
weight transfer,when executed as a single,fluid arc from setup through impact,unlocks consistent ball striking. It ties together posture, balance, and timing with the physics of the golf swing, transforming how the club meets the ball. By embracing the one-swing focus, integrating targeted drills, and using simple feedback cues, you can elevate your on-course performance and enjoy more confidence in every shot.
Ready to start? Pick one drill, practice with intention, and track your progress weekly. The path to repeatable contact is shorter when you commit to a clean, continuous weight transfer.