Weight Transfer: The Engine of Consistent Ball Striking
Today we’re dialing in on one core idea that wrecks or locks in your contact more than anything else: weight transfer. In simple terms, it’s how you move your center of gravity from the back foot (trail) toward the front foot (lead) through the swing. When done well, your body’s movement helps the hands deliver the clubface square to the ball at impact, producing solid contact and solid distance control.
What the concept is
- You start with your weight slightly toward your trail foot.
- As you swing back, the load stays consistent and your hips rotate to set up the downswing.
- At impact, most of your weight should be on the lead foot, with the trail foot releasing pressure as you finish.
- Good weight transfer is a natural, athletic sequence: hips rotate, spine stays stacked, and the arms deliver the club with the body as the engine.
Why it matters to the golf swing
- Consistent contact: proper transfer helps strike the ball first, then the turf, reducing fat and thin shots.
- More solid compression and distance: a well-timed weight shift helps release energy from the ground up, not just from the arms.
- Balance and control: staying connected to your center makes it easier to square the clubface at impact and stay on plane.
What you should feel when doing it correctly
- You sense your trail leg supporting you in the backswing and loading toward the lead leg as you descend.
- Just before impact, you feel the weight concentrated on the lead foot with the trail foot’s pressure fading.
- Your hips rotate toward the target, your spine stays tall enough to maintain posture, and your head stays reasonably still over the ball.
2–3 common mistakes and how to fix them
- Mistake 1: Weight stays on the trail foot at impact.
- Why it hurts: Off-balance contact, fat shots, and loss of speed.
- Fix: Feel a deliberate shift of pressure from the trail foot toward the lead foot just as you approach impact. Try the “inside-to-out” feeling: press into the inside of your trail foot during the downswing, then roll your weight onto the lead side through impact. Practice with a towel under your trail foot to remind you not to slide or flip away.
- Mistake 2: Weight shifts too early to the lead foot before contact.
- Why it hurts: You lose lag, you’ll bottom out early, and shots go where you didn’t intend.
- Fix: Maintain a balanced load in the backswing and “delay” the forward transfer until after you start down. A simple drill is to pause at the top for a heartbeat, feel the load staying on the trail leg, then complete the transfer through impact.
- Mistake 3: Excessive lateral sway or sliding without true hip rotation.
- Why it hurts: Loss of coil, misalignment, and inconsistent ball flight.
- Fix: Create a stable base. Keep your feet grounded and practice rotating the hips toward the target instead of sliding your weight too far sideways. A wall drill (standing close to a wall with your butt and shoulders lightly touching the wall) can help you feel the rotation without swaying.
One easy drill you can do at home or on the range
The 3-Stage Weight Transfer Drill
- Stand with your feet comfortably apart and lightly flexed knees. Place a small towel under your trail foot to help monitor weight movement.
- Take a half swing and focus on loading weight onto the trail foot during the backswing, then shifting to the lead foot through the downswing and into the finish.
- Repeat 12–15 reps, each time pausing briefly at the top to ensure the weight stays loaded on the trail foot before you shift forward.
Tip: keep the rest of your posture quiet—don’t lift your head or sway your spine. Let the hips and legs do the work of moving your weight in a controlled, athletic sequence.
By treating weight transfer as the engine of your swing, you’ll notice more consistent contact, better distance control, and smoother rhythm. Practice these checks and drills, and your ball striking will become more reliable from practice to real play.
Weight Transfer and Ball striking: The Engine of Consistent Performance
weight Transfer: The Engine of Consistent Ball striking
in the realm of precision ball striking, weight transfer is the invisible engine that powers repeatable contact. Whether you’re chasing longer drives, crisper iron shots, or more reliable fairway contact, the way you move your weight from the trail side to the lead side shapes the entire swing.When executed with clarity and control, weight transfer helps you square the face at impact, control your low point, and maintain balance through a highly dynamic arc. This article breaks down the biomechanics, practical cues, and drills you can use to make weight transfer a reliable ally on the golf course.
What is Weight Transfer?
Weight transfer is the systematic shifting of your body’s center of gravity from one part of the stance to another during the swing. In a standard right-handed golf swing, you start with a balanced setup, load weight onto the trailing (right) side during the backswing, and then transfer weight onto the lead (left) side during the downswing and through impact. The path of your center of gravity and the timing of its movement determine how effectively you release the club, maintain spine angle, and compress the ball.
Why Weight Transfer Drives Consistency
- improved sequencing: proper weight transfer creates a natural sequence of movements from hips to torso to arms, reducing compensations that lead to mishits.
- Enhanced contact: A stable, timed transfer helps keep the clubhead on plane and the sweet spot on the ball at impact.
- Distance control: Efficient loading and unloading convert stored elastic energy into clubhead speed, without sacrificing accuracy.
- Injury resilience: Balanced weight progression reduces abrupt forces that fatigue joints, especially in the lower back and knees.
Weight Transfer in the Golf Swing: Phase-by-phase
Understanding how weight moves across the swing helps you diagnose faults and apply the right drills. The swing can be viewed as a continuous, coordinated transfer of load from the ground up.
1) Setup and Load (Address to Top of Backswing)
- Initial balance: Most golfers start near a 50/50 weight distribution, with subtle pressure on the balls of the feet to stay athletic.
- Posterior load: As you set up, allow a slight pressure shift toward the trailing leg, preparing the hips for a smooth coil without collapsing the spine.
- Hip and spine angle: maintain a stable spine angle while the torso coils around it. Avoid dipping the chest or drifting excessively to the right (for right-handed players).
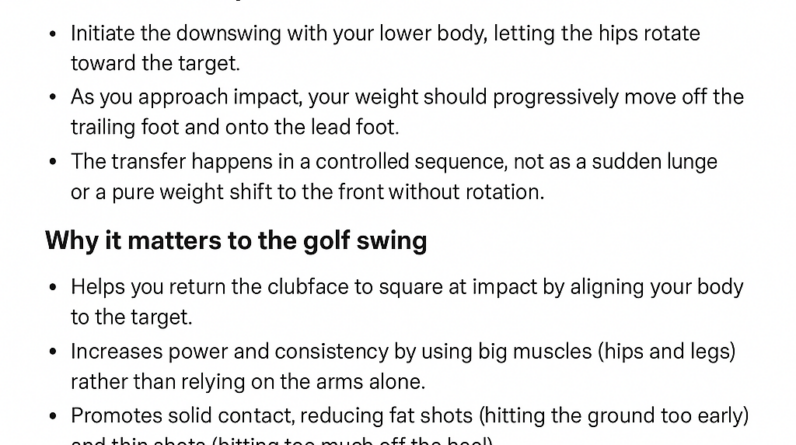
2) Transition and Downswing Initiation
- Shift onset: The downswing begins with a forward shift of weight toward the lead leg, driven by hip rotation and torso uncoiling.
- Ground reaction forces: Your back foot may gradually lift, while the lead foot feels pressure build under the ball of the foot, transferring load into the front side.
- Sequence: A clear sequence — hips leading, then torso, then arms — helps you deliver the club on plane with solid contact.
3) Impact and Through-Release
- Lead-side max load: By impact, most of your weight is toward the lead leg, with the hips rotated open and the chest square to the target.
- Hands passing the center: The hands work through the ball while the body’s momentum continues forward, allowing a consistent strike path.
- Finish balance: A controlled finish reflects the prosperous transfer; balance remains centered rather than collapsing toward the target side.
Common Faults and How to Fix Them
- Early weight shift to the lead foot: This robs you of power and can cause heel strikes or thin shots. Cue: “Feel the load and pause on the trail leg briefly before it moves.”
- Excess lateral slide without rotation: A lateral drift destabilizes contact. Cue: “Rotate the hips first, then step forward.”
- Reverse weight transfer on the downswing: You push off the front foot too early or too aggressively. Cue: “Squeeze the trail knee toward the target while you start the downswing.”
- Loss of spine angle: over-rotation or early release can raise the lead shoulder. Cue: “Keep the spine angle intact as you rotate through impact.”
- Inconsistent pressure distribution: Uneven pressure causes inconsistent contact. Cue: “Stand tall, balanced, and connected to the ground.”
Practical Drills to Improve Weight transfer
These drills focus on sequencing, balance, and feel. Practice them slowly at first, then progressively add speed while maintaining control.
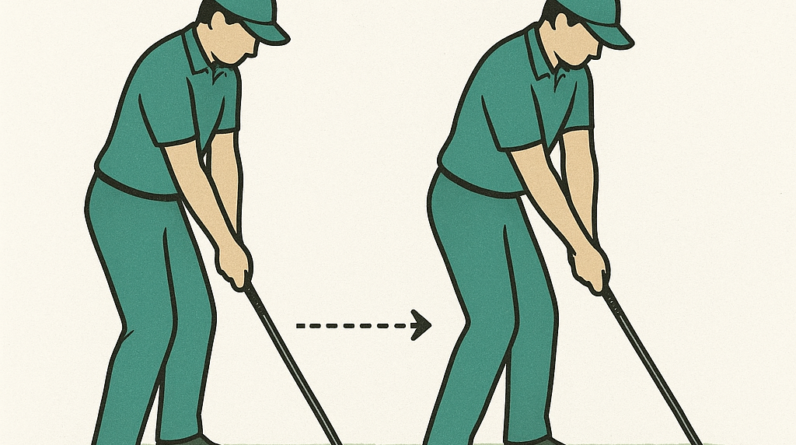
With a comfortable stance, perform a half-speed swing and tap the lead toe on the ground as you transition weight forward. Repeat to build a forward-press without losing balance. - Step-Through Drill: Take your address position, swing back to about 90% and step toward the target on the downswing, training forward weight shift and forward foot loading.
- Slow-Motion Transition Drill: move from backswing to impact in 4–6 slow steps, focusing on keeping the trail knee inward and the lead knee stable as you shift weight.
- Impact Bag Drill: Place a soft impact bag in front of you.Hit with a controlled weight transfer to the lead leg, ensuring contact is made while the spine angle remains constant.
- Drill for Rotation Priority: Use a towel or alignment stick placed across your hips to encourage hip-driven rotation before the arms engage, reinforcing proper sequencing.
- Balance board/Foam Pad: Stand on a stable balance board while swinging slowly to enhance proprioception and leg-driven weight transfer.
Benefits of Proper Weight Transfer
- Consistent contact: A well-timed transfer reduces mishits and improves center contact frequency.
- Increased power and distance: Efficient energy transfer from ground to club accelerates the clubhead without forcing the body to overwork.
- Enhanced control of trajectory: When weight moves in sequence, you can more reliably square the face and influence the club path.
- Injury prevention and longevity: Balanced loading reduces compensations and stress on the lower back, hips, and knees.
- Improved transition feel: Players report smoother transitions and less tension when weight transfer is integrated into their routine.
Case Studies and First-Hand experiences
real-world experiences frequently enough illuminate how weight transfer translates to on-course results. Here are two concise examples that illustrate the impact of focused weight transfer work.
Case Study A – The Amateur to Solid Ball Striker: An amateur with a tendency to hang back on the right foot during impact saw dramatic improvements after two weeks of weight-transfer drills. Their center contact increased from 60% to 82%, and they gained 8–12 yards on mid irons due to improved spin control and consistent contact.
Case Study B – Plateau Breakthrough: A player who struggled with inconsistent ball flights and frequent OTT (over-the-top) paths began emphasizing a hip-first transfer with intentional sequencing. Within a month, their dispersion tightened by roughly 50% and their accuracy improved across all clubs.
Weight Transfer across Sports: A Broader View
While this article centers on golf, the principle of weight transfer applies to othre ball-striking sports as well. In tennis, players rely on a forward weight shift from the back foot through the racket face to generate pace and control. In baseball or softball, the load-to-launch pattern is critical for barrel control and power. The biomechanical concept remains the same: load efficiently, transition smoothly, and accelerate the club or bat through the hitting zone with minimal wasted movement.
Fast Reference: Drills, Cues, and Cues You Can Remember
- Cue: “Hips first, then torso, then arms.”
- Cue: “Feel the load on the trail foot, then shift forward through impact.”
- Cue: “Keep spine angle, rotate through the ball.”
- Drill tip: Move in a controlled tempo; avoid rushing the transition.
- Practice plan: 10 minutes of weight-transfer drills, 20 balls at half-speed, 10 balls at full speed while maintaining form.
Table: Phase Cues,Common Faults,and Drills (WordPress-friendly)
| Swing Phase | Key Cues | Common Faults | Recommended Drills |
|---|---|---|---|
| Setup & Load | Balance,light trail-side load,steady spine | Over-lean,early weight on lead foot | Toe-Tap Drill,Slow-Motion Setup |
| Transition | Hips rotate first,weight shifts forward | Backward weight retention,late hip release | step-Through Drill,Pause-and-Load Drill |
| Downswing & Impact | Lead foot pressure,torso unwinds,spine angle preserved | Early release,loss of plane,collapse | Impact Bag Drill,rotation Priority Drill |
| Follow-through | Balanced finish,confident weight on lead leg | Imbalance after impact,excessive lean | Finish Alignment Drill,Quiet finish Drill |
Putting It All Together: A Practical Practice Plan
- Warm up with 5 minutes of light cardio and dynamic hip rotations.
- Do the Toe-tap Drill for 3 sets of 12 reps per side, focusing on quiet trail leg and clean lead-side contact.
- Move to the Step-Through Drill for 3 sets of 8 swings, at half-speed, then at full speed.
- Incorporate the Impact Bag Drill for 2 sets of 10 impact repetitions,maintaining spine angle.
- Finish with 5 minutes of reflect-and-adjust: use a mirror or video to ensure weight transfers precede the hands and clubhead through impact.
Common Misconceptions About Weight Transfer
- More weight on the trailing foot always equals more power: Not necessarily. Power comes from efficient transfer and timing, not simply loading the back foot.
- weight transfer is the same for every golfer: Individual body structure and swing style require personalization of the load, timing, and sequencing.
- A perfect transfer guarantees a perfect shot: It improves your odds, but path, face angle, and timing also play critical roles.
Expert Tips for Teachers and Players
- Start with slow tempo and precise cues; gradually increase to full speed only after the sequence feels natural.
- Use video analysis to verify weight shift: look for a clear, timely transfer and a stable finish.
- Integrate breathing: exhale slightly as you transition weight forward to reduce tension and improve rhythm.
- Don’t overcorrect all at once; small, daily improvements compound over time.
Frequently Asked Questions (FAQ)
- Is weight transfer the same in all clubs?
- Core principles are the same, but your timing and amount of weight shift vary with club length, shaft flex, and swing style. Shorter clubs generally require less aggressive weight transfer than longer clubs.
- Can weight transfer help with slice or hooks?
- Yes. Proper sequencing and weight transfer can definitely help you control your swing path and face impact, which reduces unwanted curvature. It’s often part of a broader path and face-control plan.
- How long does it take to improve weight transfer?
- Consistency typically improves with deliberate practice over 2–6 weeks, depending on existing swing habits, fitness, and coaching quality.
In sum, weight transfer isn’t simply a move—it’s an integrated pattern that connects the ground to the golf club through the kinetic chain. By training the load,transition,and forward momentum with intentional drills,you can unlock more consistent ball striking,better distance control,and a more confident on-course feel. Treat weight transfer as the engine of your swing, not an isolated cue, and you’ll see measurable improvements in both accuracy and power.