
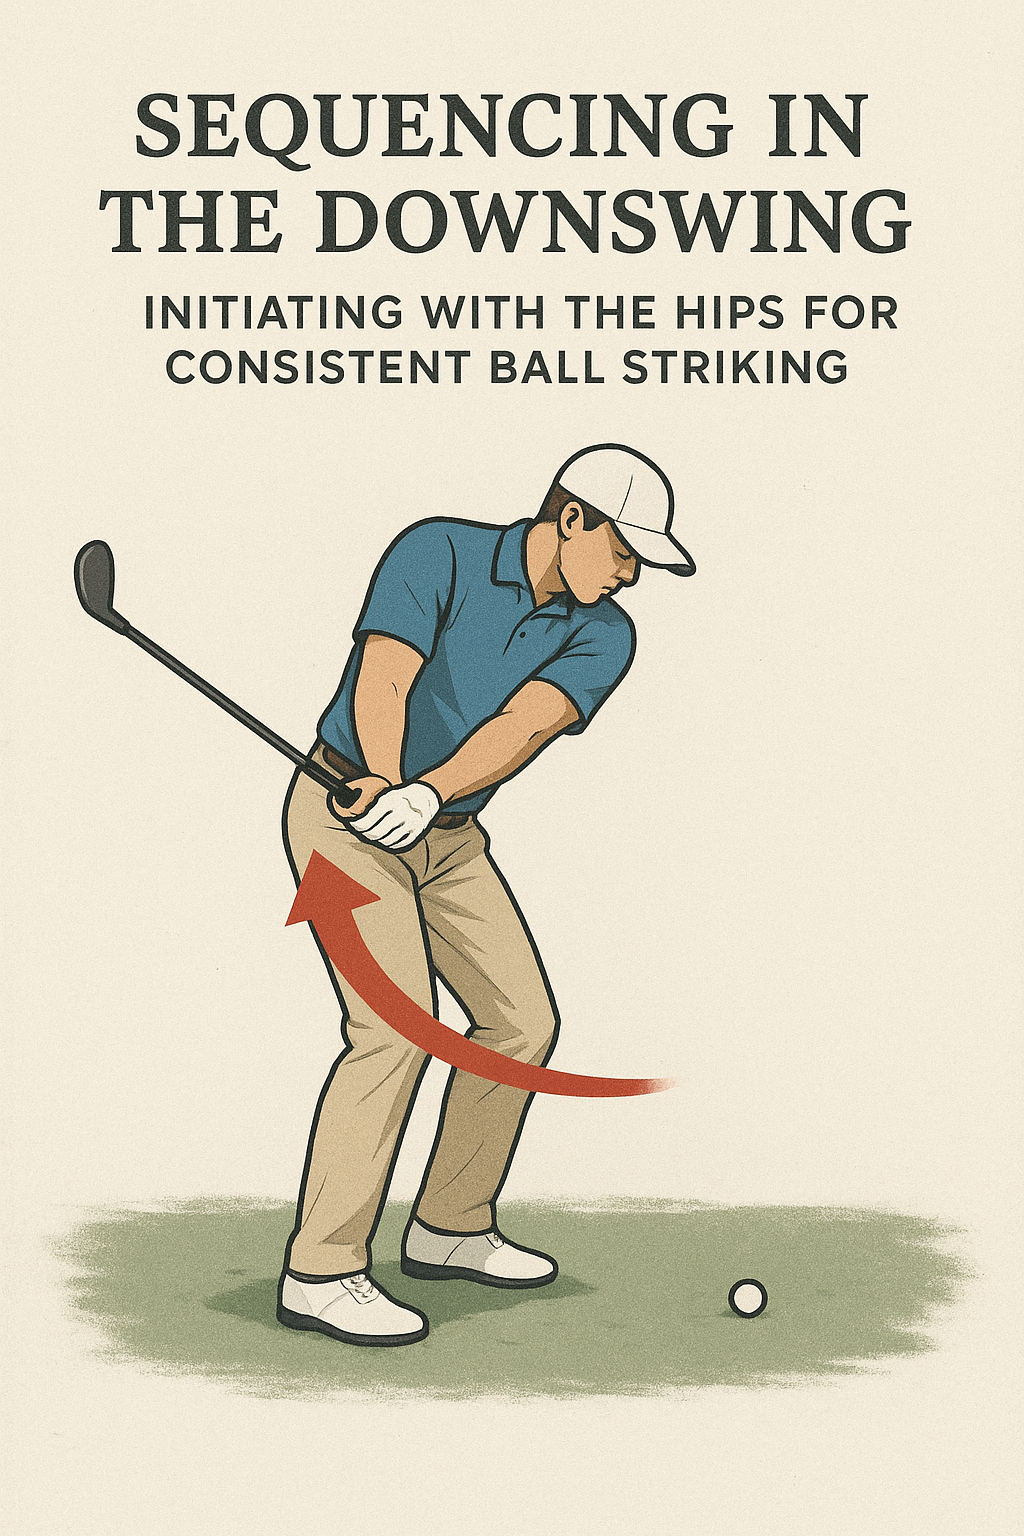
Sequencing in the Downswing: Initiating with the Hips for Consistent Ball Striking
When we talk about consistent ball striking, the order in which your body parts unleash energy matters as much as how hard you swing. The single focused concept here is sequencing: starting the downswing with the hips and letting the torso, arms, and hands follow in a smooth chain. This simple shift keeps your body connected, preserves spine angle, and helps you deliver the club with solid contact more often.
What the concept is
Sequencing is the order of movement from the top of the backswing to impact. For most players, the ideal pattern is
- hips rotate toward the target first,
- torso and arms follow,
- hands release the club through impact.
Think of energy moving from the ground up: the legs and hips initiate, the torso supports, and the hands guide the club through the hitting zone. Keeping the spine angle steady during this process is a key part of good sequencing.
Why it matters to the golf swing
- Better compression and center contact. When the hips lead, the hands stay connected to the body, promoting clean contact and a more consistent ball flight.
- More efficiency and power. Proper sequencing releases stored energy in the right order, helping you maximize clubhead speed without throwing the face closed or opening it too early.
- Improved balance and control. Initiating with the hips helps you stay over the ball longer and prevents early swaying or getting trapped behind the ball.
What you should feel when it’s working
- Belts buckle and hips rotate toward the target before the chest starts to turn.
- Spine angle is maintained; you don’t “stand up” or flip the upper body too early.
- Weight gradually shifts to the lead foot during transition, then into a solid finish.
- You hear and feel a smooth, connected sequence rather than a jarring, arm-dominant swing.
2–3 common mistakes (and how to fix them)
- Mistake 1: Upper body leads the downswing; the hips stay quiet.
- Fix: Create a clear “hips-First” cue. At the start of the downswing, think “belly button to target” and feel your hips rotate before your chest. Slow the movement to feel the sequence in your core first, then add speed as you get comfortable.
- Mistake 2: Weight stays on the trail foot or shifts incorrectly during transition.
- Fix: Maintain a steady spine angle and allow the weight to move toward the lead foot as you begin the downswing. A simple rhythm check: at impact, you should feel more pressure under the lead foot than the trail foot, without heavy lateral dipping.
- Mistake 3: Over-rotation of the hips or too-early release, causing loss of lag.
- Fix: Rotate the hips just enough to start the downswing, then let the arms follow without forcing a snap release. Focus on keeping the club lagging slightly behind the hands during the early impact window.
One easy drill you can do at home or on the range
- Hips-First Slow-Mo Drill – Stand to address as you normally would. Take a half or three-quarter backswing, then pause for 1–2 seconds at the top. Begin the downswing by rotating the hips toward the target while keeping the chest quiet. Allow the torso and arms to follow in sequence, and finish normally. Repeat 8–12 reps, concentrating on the order, not speed.
Tip: practice this at a comfortable pace first, then gradually increase speed while preserving the same sequence. The goal is feel over force: a calm, connected chain from hips to hands that produces solid contact and repeatable results.
Sequencing in the Downswing: Initiating with the Hips for Consistent Ball Striking
Why hip-first sequencing matters for consistent ball striking
In golf, the downswing is a carefully choreographed sequence where the lower body leads the way and the arms and hands follow with timing. When you initiate the downswing with the hips, you unlock a chain reaction that helps maintain posture, preserves swing plane, and delivers a stable platform for the hands to deliver accurate contact. this hip-centric approach can reduce common faults such as “over the top” path, loss of lag, and inconsistent contact.
The central idea is simple: start the downswing by rotating the hips toward the target with controlled speed, than allow the torso, arms, and hands to synchronize. This sequencing builds power efficiently and encourages a more inside-to-outside swing path, which some players find easier to repeat. Below, you’ll find the biomechanics, drills, and practical tips to adopt hip initiation without sacrificing balance or spine angle.
Biomechanics of hip-first sequencing
Hip-first sequencing is a coordinated action that involves pelvic rotation, weight transfer, and ground-force connections. When done well, it creates a fluid transfer of energy from the ground up, maximizing leverage and minimizing early release of the clubhead. Key biomechanical concepts include:
- Pelvic rotation: The trail hip clears out of the way and then rotates toward the target, initiating the downswing.
- Weight shift and ground reaction forces: The pressure shifts from the lead foot to the trail foot as the hips rotate,producing stored energy that helps speed up the club through impact.
- Spine angle maintenance: The lower body leads without collapsing the spine, helping maintain a consistent swing plane and face alignment at impact.
- Sequenced muscle activation: Hips trigger a timed sequence with the core and torso, reducing compensations that derail ball contact.
When the hips initiate the downswing correctly, the torso remains in a relatively stable position while the arms and hands can deliver a square, consistent strike. For players who tend to “flip” or cast during the downswing, hip initiation offers a reliable cue to re-align forces and improve both distance control and accuracy.
Drills to train hip initiation for the downswing
Below are practical drills designed to teach hip-first sequencing. Each drill emphasizes weight transfer, pelvic rotation, and a smooth transfer of momentum from the ground to the club. Practice these with a focus on feel, not force, and progressively add speed as you become more consistent.
1) Hip-Start Drill
Objective: Train initiating power from the hips while keeping the upper body quiet.
- Set up in a normal address position with a mid-iron.
- Shift weight toward the trail foot, then rotate the hips toward the target to start the downswing—hands stay passive for a moment.
- slowly progress to a full swing while maintaining hip-first timing. Focus on leading with the pelvis and feeling pressure move from the back foot into the front foot.
2) Chair-Guard Drill
Objective: Keep the torso from swaying while the hips initiate rotation.
- Place a sturdy chair behind you, just outside your trail foot line.
- during the downswing, allow the hips to rotate without letting the chair block your hip movement. Your torso should stay relatively stable while the hips drive the motion.
- Exhale through impact and feel the hips square the path before the arms release.
3) Wall-Standing Hip Bump
Objective: Develop a hip-driven path without excessive upper-body rotation.
- Stand with your back about 6 inches from a wall, feet shoulder-width apart.
- Initiate the downswing by a small hip bump toward the target, keeping your chest pressed lightly against the wall to discourage upper-body sway.
- Repeat with increasing speed while maintaining wall contact and hip-driven rotation.
4) Slow-Motion Inside-Out Drill
Objective: Feel a controlled inside-out path as the hips start the swing rather than the hands.
- perform a slow-motion swing focusing on hip-first initiation while keeping your hands passive in the early downswing.
- Gradually increase tempo as you feel the hips leading the sequence and the clubface remaining square at impact.
5) Track-Assist Drill (Metered Wall Clock)
Objective: Build consistency by aligning hip initiation with a timed delivery.
- Visualize a clock face around your lead shoulder. Start the downswing with a “5 o’clock” hip rotation and complete the delivery by around “7 o’clock.”
- Use a mirror or video to ensure the hips are the primary initiator and that the torso remains stable during the early downswing.
Common faults and fixes when using hip-first sequencing
- Fault: Hips rotate too early and disrupt balance.
Fix: Pause the hip movement briefly at the top of the backswing and rehearse a smooth, purposeful initiator using a slower tempo.
- Fault: Loss of spine angle or back bending.
Fix: Emphasize lateral bend control and keep the upper body quiet until the hips have initiated the move.
- Fault: Over-rotation causing an outside-in path.
Fix: Focus on rotating hips toward the target with a neutral spine,then let the torso rotate gradually to maintain the inside-out path.
- Fault: Early extension or sway.
Fix: Use wall drills or chair drills to constrain lateral movement while teaching hips to lead the swing.
Benefits and practical tips for implementing hip initiation
- Benefits: increased consistency, improved strike quality, better angle of attack control, enhanced power transfer, and a more repeatable swing plane.
- Practical tips:
- Warm up the hips and ankles before practice to ensure fluid rotation.
- Use slow tempo in early reps to reinforce timing; speed up gradually as feel becomes automatic.
- In video practice, look for a visible hip-first cue before the hands begin to engage.
- Integrate breath control to prevent tension; exhale through impact for easier hip sequencing.
- Track movement with simple metrics such as tempo, swing plane consistency, and impact location to ensure progress.
Case studies: hip-first sequencing in real play
These case summaries illustrate how a hip-first downswing can translate into improved ball striking for players at different skill levels.
Case study A: Intermediate player seeking consistency
A 12-handicap golfer reported inconsistent contact and a tendency to drift toward an outside path. After four weeks of hip-initiation drills and tempo work, their ball striking improved notably:
- Contact quality improved from 60% solid to 82% solid on average.
- Ball flight became more predictable with fewer slices; path shifted to a more inside-out pattern.
- Clubhead speed improved modestly due to cleaner energy transfer from the ground up.
Case Study B: Beginner who learned reliable sequencing
A new golfer struggled with early extension and an inconsistent driver swing.Through hip-first drills and wall-based practice, the player developed a repeatable sequence:
- Better balance and posture through the swing.
- Improved contact on center of the face and a more stable clubface at contact.
- Greater confidence in making a complete swing with fewer compensations.
First-hand experiences: coaches and players weigh in
Coaches consistently note that hip-first sequencing provides a robust framework for repeating a quality strike. players frequently enough report an easier time managing tempo and maintaining control of the swing plane when the hips lead the downswing. A practical takeaway is to treat the hips as the “start switch” for the swing, with the torso and arms following in a controlled, synchronized order.
- Experience reports highlight improved contact consistency after 2–6 weeks of targeted hip drills.
- Video analysis often shows more consistent spine angle preservation and a more stable delivery line at impact.
- metrics such as attack angle and swing path tend to stabilize as hip initiation becomes more automatic.
Pro tip: Combine hip-first practice with your existing swing routine to minimize disruption. gradual integration helps you preserve your personal feel while adding a more repeatable sequencing pattern.
Data and metrics to track progress
Monitoring objective measures helps validate whether hip-first sequencing is translating into better ball striking. The table below uses commonly available swing analytics concepts that players can track with launch monitors or video analysis apps.
| Metric | What it indicates | Target / Range | How to improve |
|---|---|---|---|
| Hip initiation timing | Order of body segments initiating the downswing | hip first, then torso/arms | Practice hip-start drills with slow tempo; use video to confirm sequence. |
| Path (swing path) | Inside-to-outside vs outside-in tendencies | Inside-out tendency preferred for draw-pleasant ball flight | Use hip-first cueing; limit upper-body rotation initially. |
| Attack angle | Launch angle relative to the ground; impact consistency | Downward or slightly positive for irons; variable for woods | Maintain spine angle; ensure shoulders stay square as hips rotate. |
| Face-to-path relationship | Face angle at impact relative to swing path | Close to square at impact for consistency | Drill to keep hands passive early in the downswing; verify with alignment aids. |
| Dynamic loft at impact | Club loft after impact; consistency matters for distance control | Stable dynamic loft with hip-led sequencing | Control release and maintain shaft lean through impact. |
Quick tip: start with one metric at a time. For example, first lock in “hip initiation timing” during practice, then gradually integrate path and face control as timing becomes automatic.
Putting it all together: a practical practice plan
To implement hip-first sequencing into your game, follow a progressive plan that alternates between drills, on-course practice, and video review. A suggested 4-week plan:
- Weeks 1–2: Focus on hip initiation with slow-motion drills and wall-based cues.Use a mirror or video to reinforce hip-first timing and minimal upper-body sway.
- weeks 3–4: Integrate hip-first sequencing into full swings with moderate tempo. add drills that encourage a stable spine angle and consistent swing path.
- Weeks 4+: transition to regular practice on the range and course, tracking metrics such as contact quality, path, and impact consistency.
Remember: The objective is repeatable timing, not maximal force. Build speed once you are consistently initiating the downswing with the hips and maintaining good balance and posture.