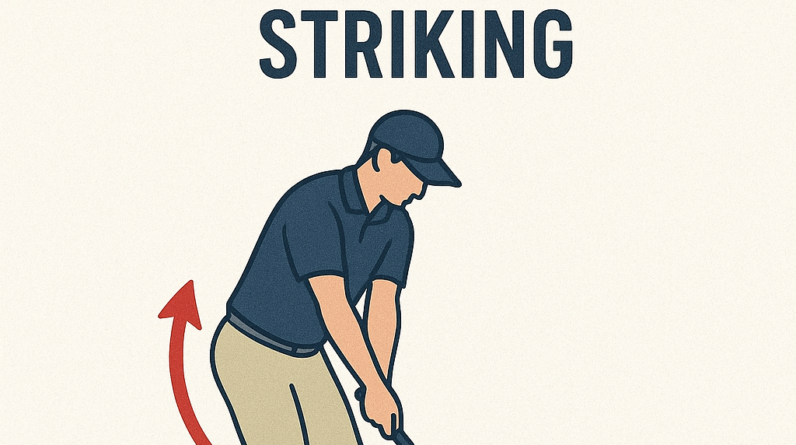
Weight Transfer: The Key to Consistent Ball Striking
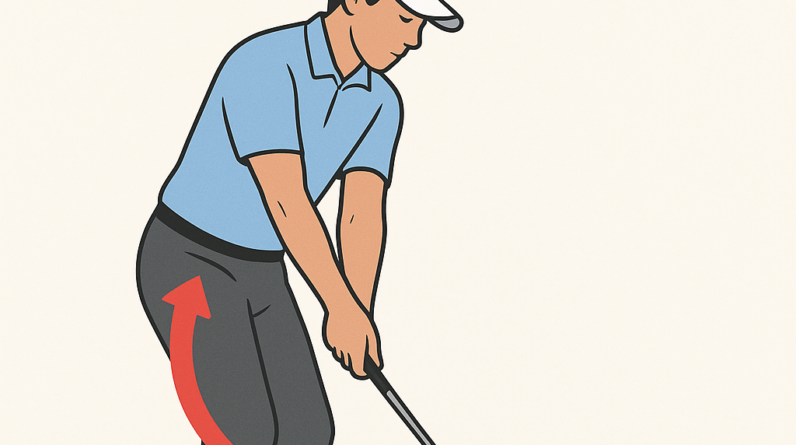
Weight transfer is the process of moving your weight from the back foot to the front foot as you swing, with a clear progression from setup to impact. For most golfers, the big win comes when the hips rotate and the body’s center of mass shifts toward the target, finishing with most of the weight on the lead foot.
What the concept is
In a simple sense, you start with your weight distributed on the back foot. As you swing, your hips rotate, your torso unwinds, and your pressure shifts toward the lead foot. At impact, the transfer should be complete enough that the lead leg supports your body, you feel solid-ground contact, and the clubface can meet the ball with control. Think of weight transfer as the engine that powers contact quality, distance, and accuracy.
Why it matters to the golf swing
- Better contact: moving weight forward helps you strike the ball from the center of the clubface instead of hitting behind or thin.
- Consistent compression: proper transfer promotes clean impact and solid ball compression, not fat shots or thin shots.
- Plus power with control: a forward-weighted impact allows for more speed without losing balance, especially on mid and short irons.
- Path and face control: when weight shifts smoothly, you’re less likely to flip the hands late or slide out of balance, which can push shots to the right or left.
What you should feel when doing it correctly
- During the downswing, you feel pressure moving from the back foot into the front foot.
- Your hips clear and rotate toward the target, guiding the torso and arms into the ball.
- At impact, most of your weight is on the lead foot, with a stable ankle and a quiet, centered chest over the front knee.
- Finish with a balanced, chest-facing-the-target posture and a steady front-side leg.
2–3 common mistakes and simple fixes
Mistake 1: Weight stays on the back foot into impact
Fix: Allow and feel the pressure shift toward the lead foot as you move into impact. Think “drive the lead heel into the ground” slightly after you start the downswing, while your hips rotate to the target. Practice drills that emphasize forward weight without collapsing the spine.
Mistake 2: Weight shifts too early or too abruptly
Fix: Initiate the downswing with a hip/torso rotation first, then feel the weight glide forward smoothly. Don’t rush the transfer; a smooth, deliberate shift leads to better timing and contact.
Mistake 3: Balance loss or over-rotation after impact
Fix: Keep your spine angle and finish with your chest facing the target. Think of finishing with weight on the lead foot and a quiet trail foot, rather than sprawling or wiggling off-balance.
One easy drill to practice
Step-Through Weight-Shift Drill
- Take your normal address position, then set up a light, comfortable stance with your feet close together.
- Make a slow backswing, then during the transition, step your trail foot slightly toward the target with a small, controlled step (like you’re stepping into a better position to hit a ball).
- As you step through, feel the weight transfer from the back foot to the lead foot. Your lead knee should flex and your lead thigh should feel firm as you approach impact.
- Finish with a balanced, upright posture and chest facing the target. Repeat slowly, focusing on the feeling of the weight moving forward without losing balance.
Do 2–3 sets of 8–12 repetitions, half-speed first, then gradually increase to a comfortable swing pace. This drill trains the exact transfer you want without requiring a full swing every rep.
With consistent practice, the feeling of forward weight transfer becomes natural, supporting cleaner contact, better distance control, and more reliable ball flights. Remember: the goal is a smooth, complete shift toward the target that starts the path to solid impact and a balanced finish.
Weight Transfer in Ball Striking: A Practical Guide to Consistency
Weight Transfer: The Key to Consistent Ball Striking
In golf and other ball-striking disciplines, how you move your weight from one part of your body to another is the difference between average contact and consistent, powerful strikes. Weight transfer is not just a feeling; it’s a biomechanical sequence that engages your legs, hips, core, and upper body in the correct order. When done well, it helps you strike the ball more solidly, with better dispersion, and with improved distance control. In this section, we’ll unpack what weight transfer is, why it matters, and how to start integrating it into your practice.
Why weight transfer matters
- Improved center of gravity control leads to more solid contact on the clubface.
- Sequential loading and unloading of the legs creates power without excess swing speed, reducing stress on joints.
- Better balance during the downswing promotes consistent ball flight and direction.
- Appropriate weight transfer reduces lateral sway, encouraging a more vertical, centered swing arc.
- Efficient weight transfer helps golfers of all levels generate more distance with control.
The biomechanics behind weight transfer
Weight transfer is part of a larger kinetic chain that links the ground to the clubhead. Think of the golf swing as a relay race: the ground reaction forces push up through the feet, travel through the legs and hips, then move into the torso and arms to deliver energy to the ball. The timing and sequencing of this transfer are crucial.
- Slightly more weight on the inside of the back foot at address helps you coil correctly without losing balance.
- Backswing: Weight shifts to the back foot as the hips internally rotate, storing energy in the hips, core, and torso.
- Transition: The hips open and the weight begins to move toward the front foot. This is the moment of potential energy release.
- downswing and impact: The lower body unwinds toward the target with progressive weight transfer to the front foot, allowing the hands and arms to release on a stable, centered base.
- Follow-through: The majority of your weight remains on the front side into the finish, aiding balance and accuracy.
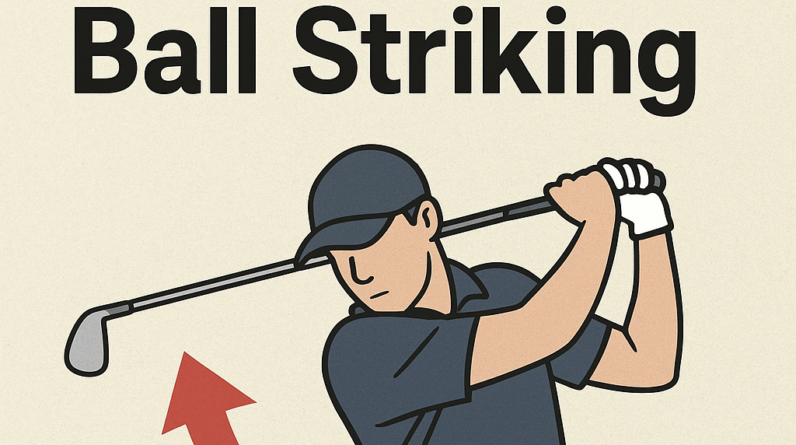
How weight transfer looks in a correct swing
While explanations are helpful,visuals are essential. A well-timed weight transfer typically features a smooth, continuous transition from back-foot heavy to front-foot dominant through impact. Key cues include:
- Early in the backswing, you feel pressure building on the back foot.
- During transition, your weight starts to move toward the front foot while the hips begin to rotate toward the target.
- At impact, your weight is actively shifting to the front side, creating a stable platform for the hands to release the clubhead.
- Post-impact, your trail leg accepts excess energy and your torso continues to rotate toward the target.
Setting up for successful weight transfer
: A agreeable,athletic stance with feet shoulder-width apart typically supports a clean transfer of weight. : For most iron shots, position the ball in the middle of your stance; for drivers, a slightly forward ball position can definitely help with a smoother forward transfer. : At setup, a small bias toward the mid-to-back of the trail foot helps preserve potential energy for the transition. : Maintain a stable core to prevent early extension and to support an efficient transfer from hips to torso.
Common faults and how to fix them
Understanding typical missteps helps you diagnose your own swing and apply practical fixes. Below are frequent faults related to weight transfer and targeted solutions.
- Early weight transfer to the front foot (over-acceleration). Fix: Pause briefly at the top of the backswing, then initiate the downswing with a controlled hip rotation and a deliberate weight shift toward the front foot.
- Reverse weight shift (pushing off the front foot too soon).Fix: Focus on keeping some pressure on the trail foot during the early downswing and feel the trail knee tracking toward the ball, not away from it.
- Swaying instead of rotating (lateral movement). Fix: Practice with a small pivot cue—imagine keeping a tennis ball between your belt buckle and your lead thigh to enforce rotation over lateral motion.
- Loss of posture (standing up through impact). Fix: Maintain spine angle by keeping your head steady and your chest rotating toward the target, rather then lifting up.
- Inconsistent pressure shift (too much pressure on the back foot at impact). Fix: Use a tempo drill to ensure a smooth transfer that culminates in balanced loading on the front foot.
Drills and practice progression
Drills that emphasize weight transfer help embed the correct sequencing into your swing. Start slow, then progressively add speed and complexity as your body memorizes the pattern.
— Purpose: Train the move from back foot to front foot during transition. — Purpose: Emphasize forward weight shift and front-foot posting on contact. — Purpose: Integrate hip rotation with weight transfer to maintain posture and balance. — Purpose: Build timing by pausing briefly at the top of the backswing before initiating the downswing.
for each drill, perform 6–12 repetitions, gradually increasing tempo while preserving control and accuracy. If you notice compensations (over-rotation, wobble, loss of posture), slow down and re-establish the correct setup before advancing.
Drill libary: quick reference table
Below is a compact reference table with three practical drills and their focus. Use this table as a quick checklist during warmups or practice sessions.
| Drill | Focus | Setup | Progression |
|---|---|---|---|
| Toe-Tap Transition | Weight transfer timing | Stand with feet shoulder-width apart, light grip | Slow to full speed while keeping balance |
| Step-Through Drill | Front-foot posting on contact | Address with normal stance, practice with no ball | Gradually add a club and a lightball |
| Hip-Stack Drill | Hip rotation and sequencing | Feet shoulder-width, hands on hips to feel rotation | Introduce club, maintain stack through impact |
First-hand experiences and practical tips
Many players report noticeable gains once weight transfer becomes a conscious part of their practice. Here are a few concise, real-world takeaways:
- A well-timed weight transfer often translates to more solid ball contact and reduced dispersion across the clubface.
- Consistency improves before distance does; as you stabilize weight transfer, the strike pattern becomes repeatable, wich lays a foundation for longer-term gains in distance and accuracy.
- Feel-based cues work well for beginners, while advanced players benefit from biomechanical cues (hips leading the shift, chest staying on plane) to maintain the correct sequence.
case studies and expert insight
Here are brief, illustrative scenarios from coaching experiences and professional insights that highlight weight transfer in action:
A weekend golfer reduced slices by aligning weight transfer with a quiet downswing tempo, resulting in more centered contact and a clearer path to the target. - Professional insight: Tour players emphasize the sensation of “driving the belt buckle toward the target” during transition to maximize forward shaft lean and reduce excessive upper body tension.
- coach tip: Use video feedback to observe how the trail knee tracks toward the ball and where the weight resides at impact; these indicators are often more telling than feeling alone.
Practical tips for daily practice
- Warm up with gentle movements that simulate weight shift—side-to-side steps, hip rotations, and light swings without a ball.
- Focus on timing rather than swing speed. A crisp, well-timed transfer beats a fast but imprecise swing any day.
- Embed a consistent pre-shot routine that sets mental cues for weight transfer, such as a deliberate pause at the top and a targeted feel of front-foot pressure at impact.
- Track progress with simple metrics: strike quality (solid vs. off-center), distance consistency, and time-to-target confidence.
Frequently asked questions
- Q: Can weight transfer fix a slice? A: It can be a major contributor. Ensuring a proper sequence—from hip rotation to forward weight transfer—helps promote a more inside-out path and reduces over-the-top moves that commonly cause slices.
- Q: Is weight transfer the same for irons and woods? A: The principle is the same, but ball position and swing dynamics differ. Woods often benefit from a slightly more forward ball position and a longer,smoother transfer; irons require precise contact across a smaller sweet spot,making balance and transfer crucial.
- Q: How long before I see results? A: With consistent drills 3–4 times per week,many players notice improved balance and contact within 2–4 weeks,with progressive gains in distance and accuracy over 6–12 weeks.
Incorporating weight transfer into your plan
To make weight transfer a stable pillar of your swing, schedule structured practice weeks with a clear progression. Here’s a sample micro-plan you can adapt:
- Week 1–2: Drills only (Toe-Tap Transition, Step-Through Drill) at low speed, focusing on balance and sequencing.
- Week 3–4: Introduce light ball work, maintain transfer cues, monitor contact quality.
- Week 5–6: Increase tempo gradually, add targets and distance control drills to reinforce consistent weight transfer under pressure.